
Starting a garden can feel intimidating. Many beginners worry about cutting wood incorrectly, overspending on materials, or struggling with complicated assembly. But it doesn’t have to be that way. This guide provides planter box plans that are simple, affordable, and require minimal carpentry skills. By the end, you’ll know exactly how to build your own raised garden beds, maximizing productivity while keeping costs low. You’ll also get practical tips for choosing materials, setting up soil layers, and avoiding common mistakes that trip up first-time gardeners.
Why You Should Build a DIY Raised Garden Bed This Year
Raised garden beds are more than just a pretty addition to your backyard, they’re a practical solution to common gardening problems. First, they minimize weeds, saving hours of tedious maintenance. Second, they give you full control over your garden soil, which is crucial for growing healthy vegetables, herbs, and even flowers. Third, building your own bed is often cheaper than buying pre-assembled kits, allowing you to invest the savings into soil, seeds, or additional planters. These benefits make DIY raised garden beds an ideal choice for anyone looking to get the most from a small or urban space.
The Ultimate Tool & Material Checklist (What You Actually Need)
Before starting your DIY raised garden bed, it’s essential to gather the right tools and materials. Having everything ready will make the assembly process smooth and prevent costly mistakes. Here’s a complete checklist:
Tools
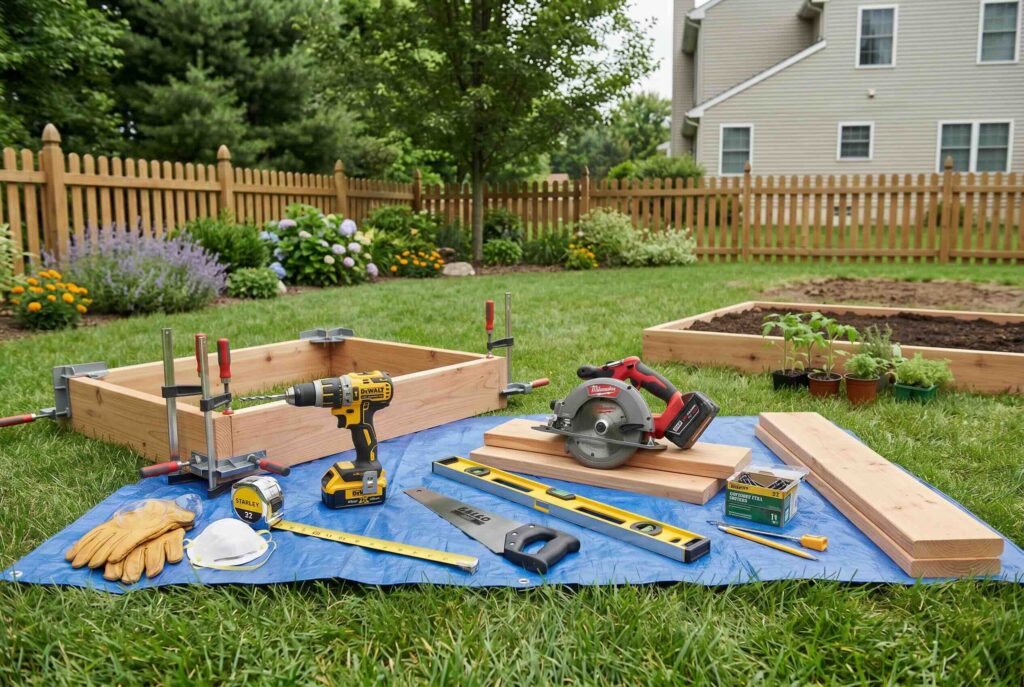
- Cordless Drill or Electric Drill – For drilling pilot holes and driving screws efficiently.
- Measuring Tape – Accurate measurements ensure your bed is square and fits your desired space.
- Hand Saw or Circular Saw – Needed to cut wood planks to the correct lengths if you’re building a wooden bed.
- Level – Ensures your raised bed sits evenly, which is important for proper drainage and structural stability.
- Clamps (Optional) – Useful for holding planks in place while you secure corners with screws.
- Safety Gear – Gloves, eye protection, and a dust mask for safe handling of wood, screws, and sawdust.
Materials
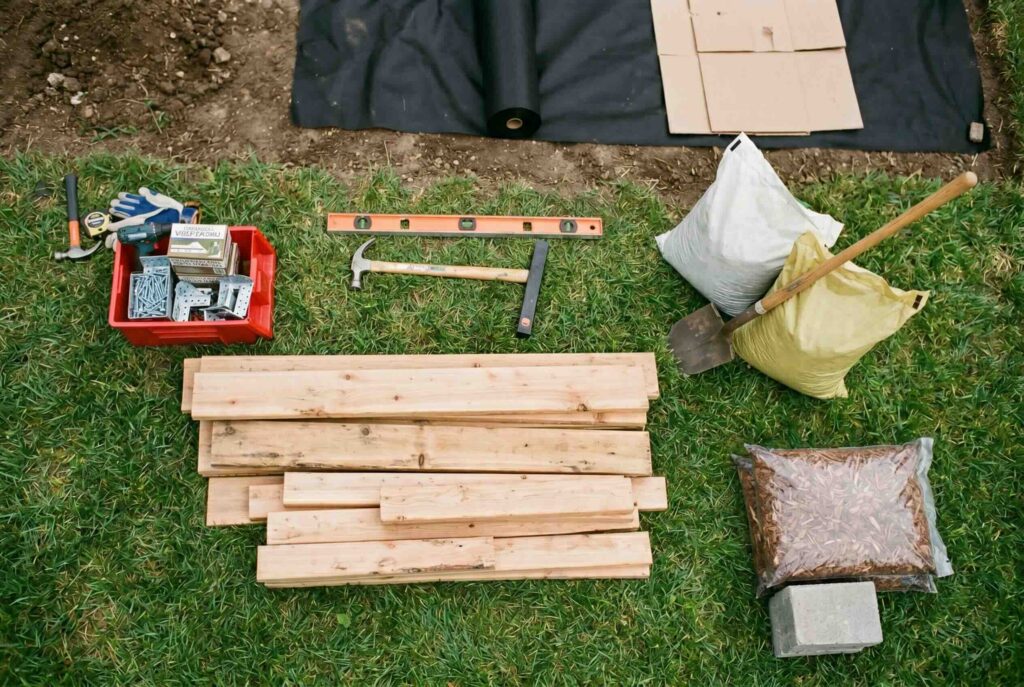
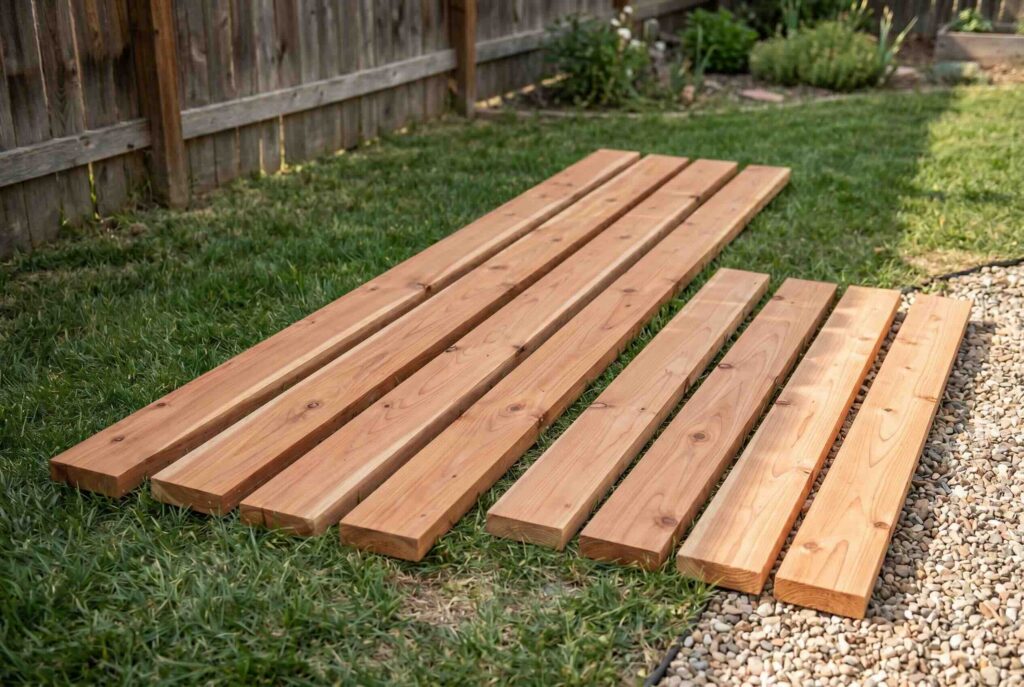
- Cedar Wood Planks – Naturally rot-resistant, safe for growing vegetables. Avoid pressure-treated wood with chemicals.
- Screws or Corner Brackets – To assemble the planks securely; stainless steel is ideal to prevent rust.
- Landscaping Fabric or Cardboard – For lining the bottom of the bed to suppress weeds.
- Garden Soil and Compost – A nutrient-rich mixture to fill your bed, providing a healthy growing environment.
- Optional Mulch – To retain moisture and reduce weed growth once planting is complete.
- Concrete Planter Blocks (Optional) – If building a hybrid or block-style bed for extra height or stability.
Pro Tips
- Always double-check the wood for straightness and avoid any old or chemically-treated wood, which could compromise the safety of your vegetables.
- Use pre-drilled pilot holes for screws to prevent wood from splitting.
- Consider using metal corner brackets if you want additional reinforcement for larger beds.
5 Inexpensive Raised Garden Bed Ideas & Plans
Here are five beginner-friendly raised garden bed plans that are easy to build, cost-effective, and practical. Each plan includes a conceptual design, a cut list integrated into the text, and step-by-step instructions so you can start building immediately.
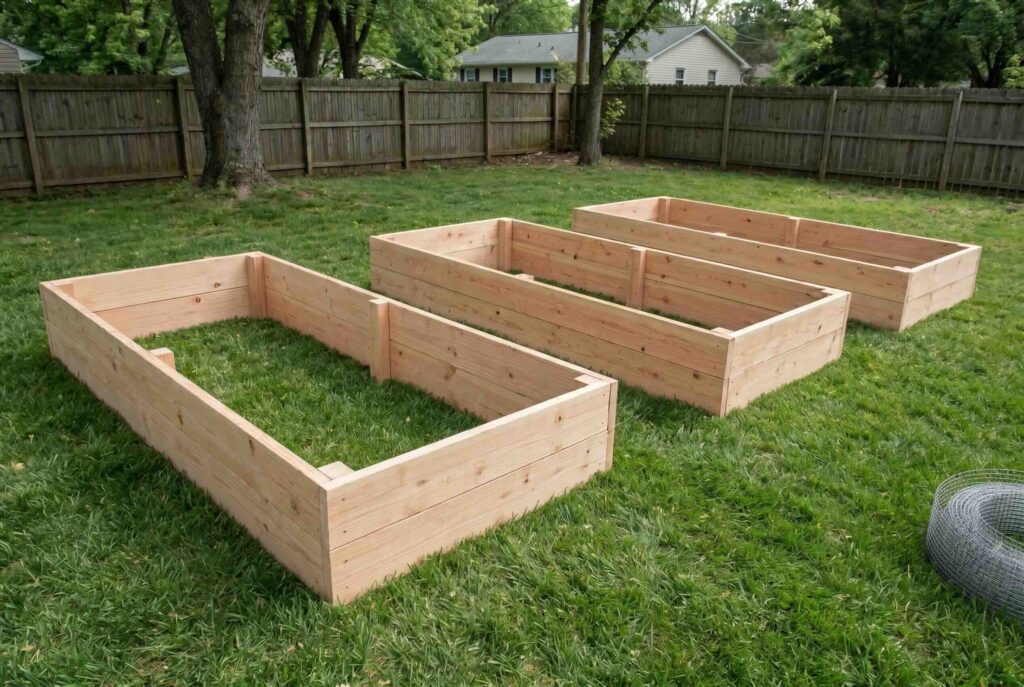
Plan #1: The Classic 4×4 Cedar Box (Under $50)

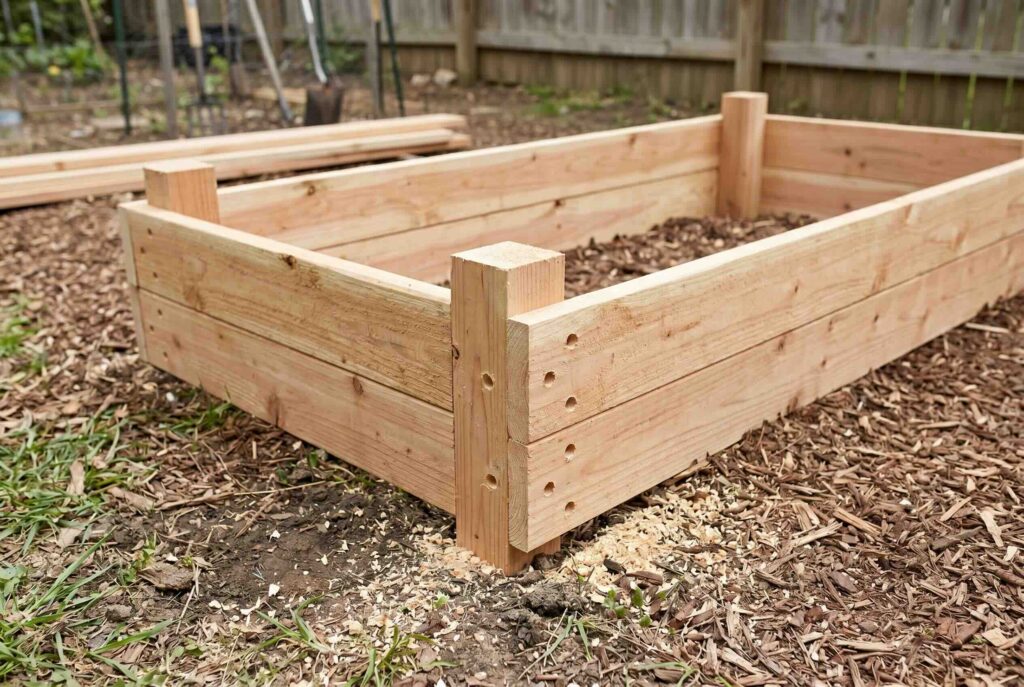
For the classic 4×4 cedar box, you’ll need four 4-foot cedar planks for the long sides and four 4-foot planks for the short sides. Begin by arranging the planks into a square and securing each corner with brackets and screws. Drilling pilot holes first will prevent the wood from splitting. Once the frame is square and stable, line the bottom with landscaping fabric to prevent weeds, then fill the box with garden soil and compost. This design is compact, easy to assemble, and perfect for a backyard, patio, or small garden space.
Plan #2: The “No-Tools” Concrete Block Planter
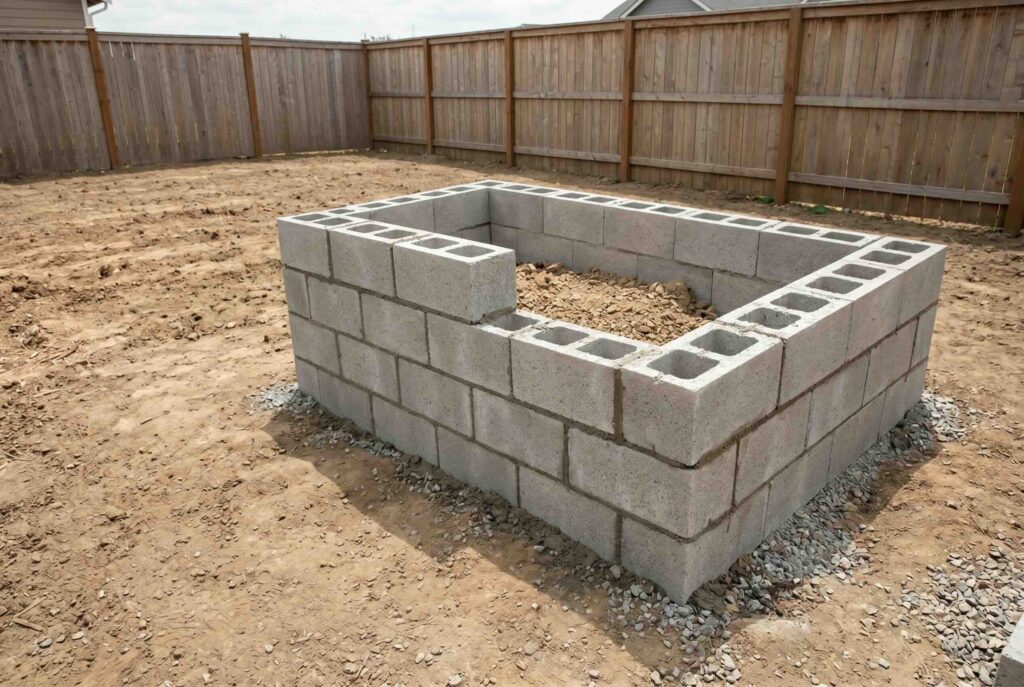
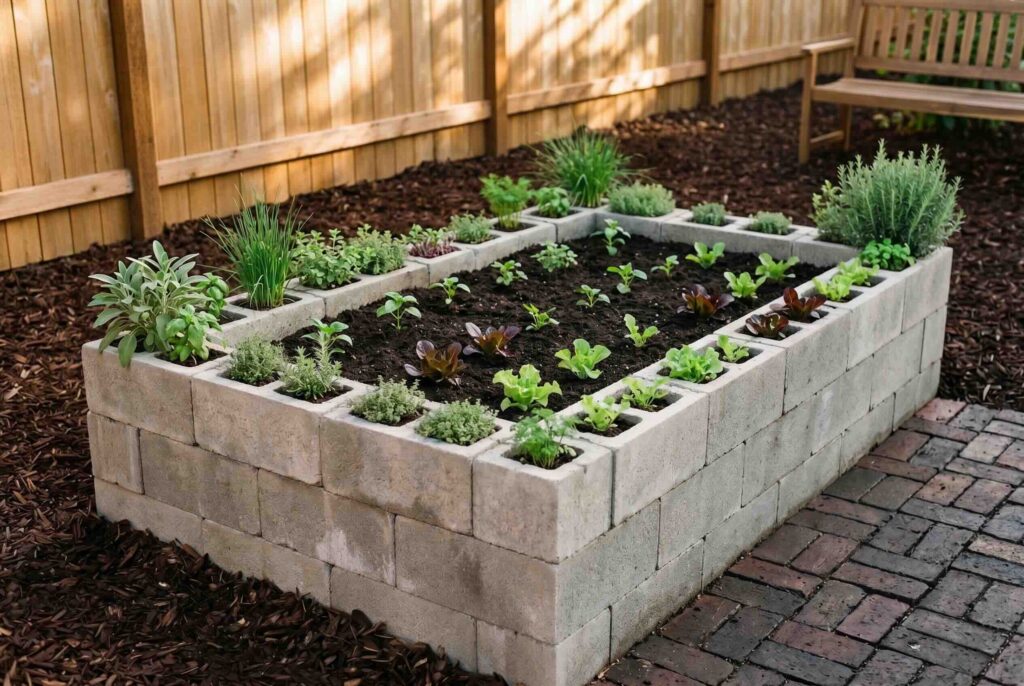
If you want a simple setup without power tools, this concrete block planter is ideal. Stack 12 to 16 standard hollow concrete blocks into a rectangle or square, creating two or three tiers depending on the height you want. Fill the block cavities with a mix of soil and compost, and you can even plant small herbs directly into the holes to maximize space. This approach is perfect for urban gardeners or anyone looking for a low-effort, modular raised bed solution that can be easily expanded or rearranged.
Plan #3: The Corrugated Metal & Wood Hybrid
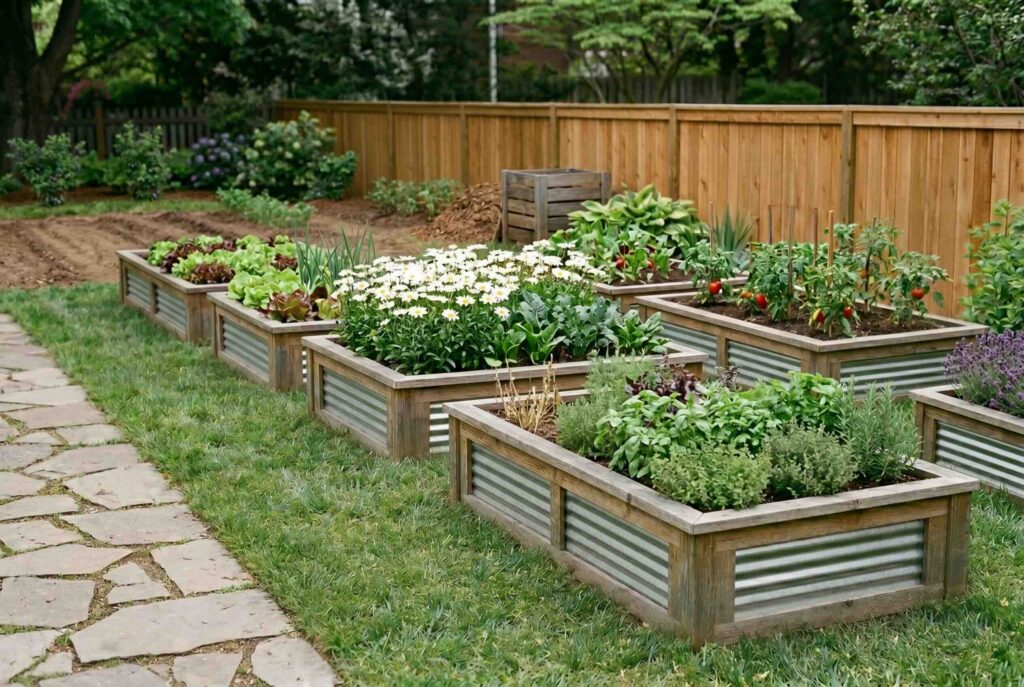
For a modern, durable raised bed, combine cedar wood with corrugated metal sheets. Use four long cedar planks and four shorter planks to assemble the frame, securing corners with screws and brackets. Once the wooden frame is stable, attach the corrugated metal sheets to the exterior using screws. Check the metal edges to ensure they aren’t sharp, and sand or cover as needed. Line the bottom with landscaping fabric and fill the bed with a soil-compost mix. This hybrid design is highly resistant to rot, visually striking, and perfect for contemporary outdoor spaces.
Plan #4: The Elevated Planter Box (For Patios & Bad Backs)
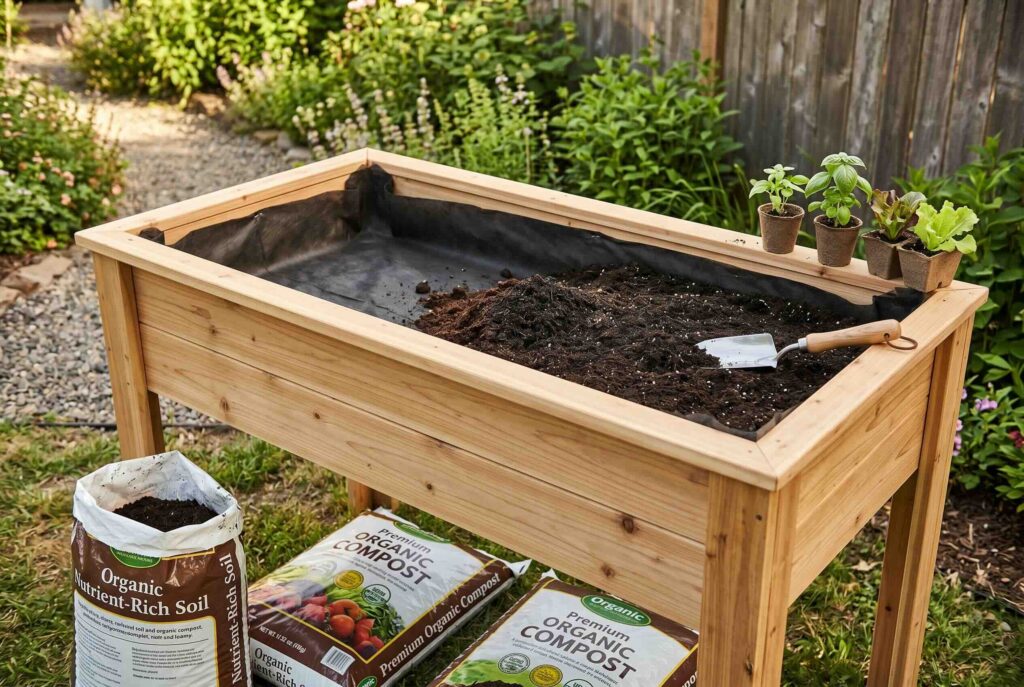
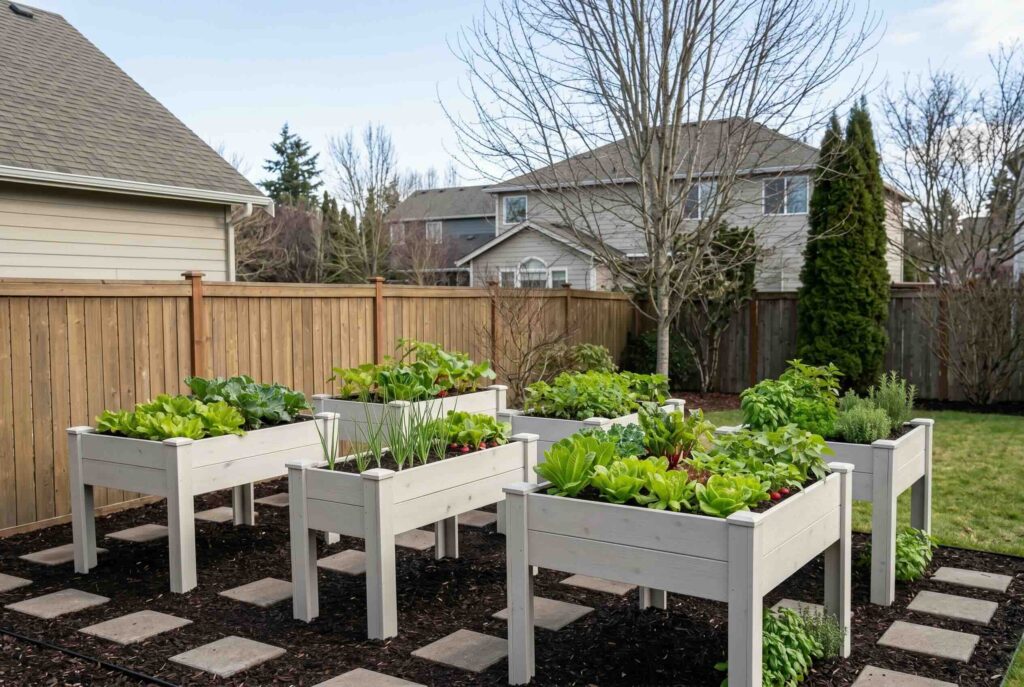
Elevated planter boxes solve ergonomic issues and are great for patios or small spaces. Construct the cedar frame as usual and attach four sturdy legs at each corner, adding brackets for extra support if needed. The elevated design keeps you from bending or kneeling, making gardening easier on the back. After assembling the frame and legs, line the bottom with landscaping fabric, fill with nutrient-rich soil and compost, and your elevated bed is ready for planting vegetables, herbs, or flowers.
Plan #5: The U-Shaped Kitchen Garden Bed
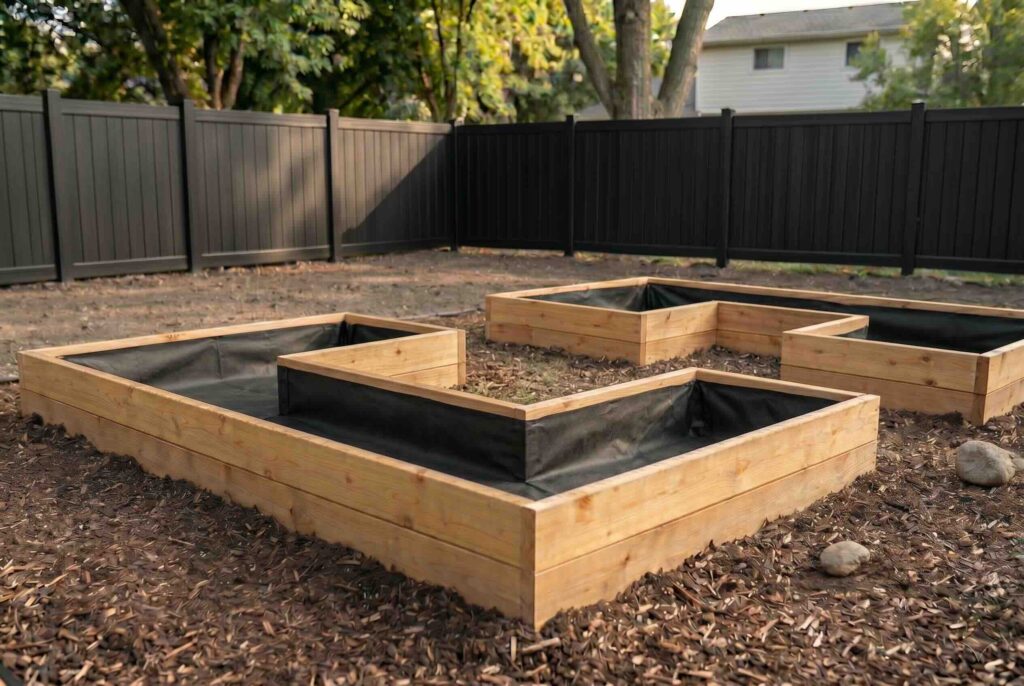
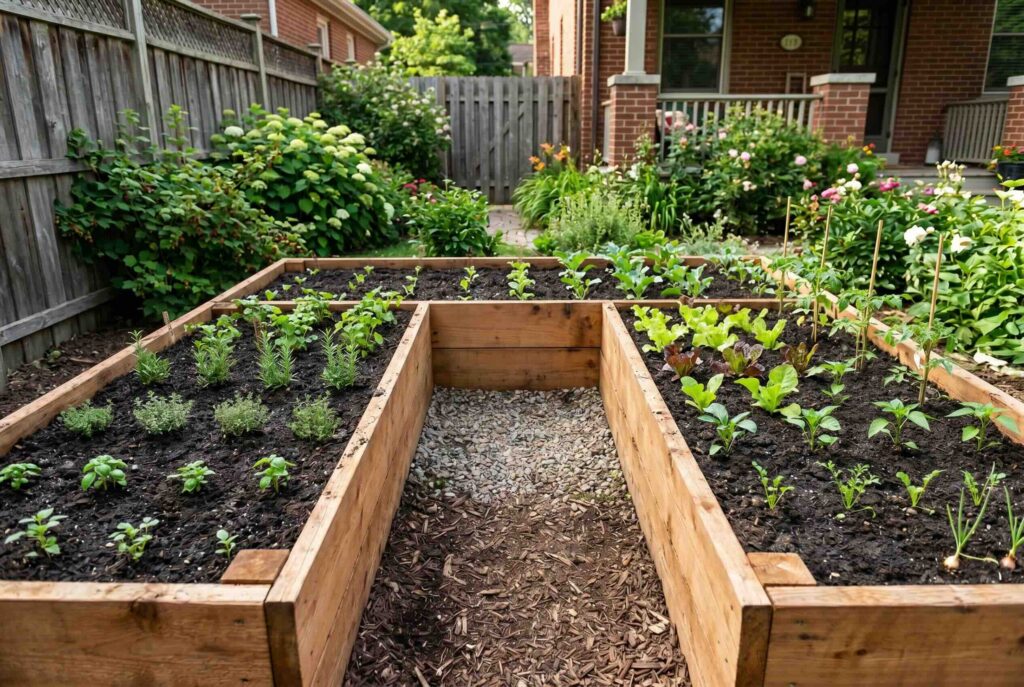
The U-shaped bed maximizes accessibility by allowing you to reach all plants without stepping into the soil. Start by cutting cedar planks to form three connected sides in a U-shape and secure the corners with screws and brackets. Line the bottom with landscaping fabric to prevent weeds, then fill with a mixture of garden soil and compost. This layout is ideal for kitchen gardens, letting you grow a combination of vegetables and companion flowers efficiently while optimizing space and accessibility.
How to Fill Your New Raised Garden Bed (The Smart Way)
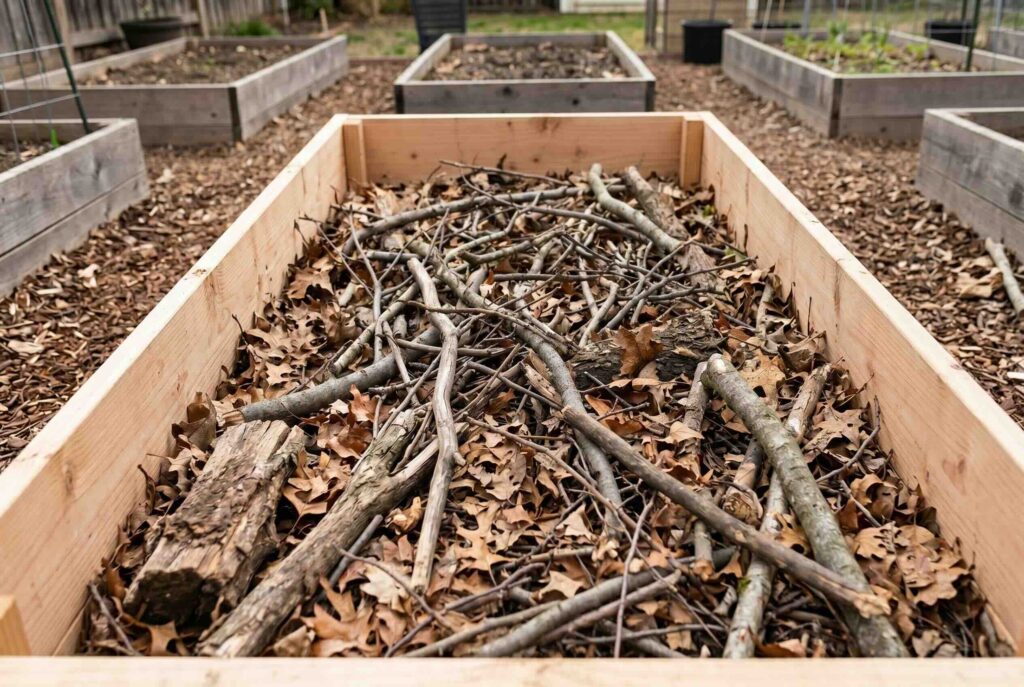
Once your raised garden bed is fully assembled, the next step is preparing it for planting. Start by lining the bottom of the bed with landscaping fabric or even layers of cardboard. This creates a barrier that prevents weeds from growing up into your bed while still allowing water to drain freely. For gardeners looking to maximize soil fertility while saving money, consider using the Hugelkultur method: place a layer of dry wood, branches, and fallen leaves at the bottom of the bed before adding your soil. This natural layering technique gradually decomposes, enriching the soil and improving moisture retention.
On top of the Hugelkultur base, add a mix of garden soil and compost, ensuring an even layer throughout. By filling your bed this way, you create a nutrient-rich, well-draining environment that promotes strong root growth, helps retain moisture, and reduces the need for frequent fertilization. This method works equally well for vegetables, herbs, and companion flowers, making it an ideal setup for beginners who want maximum productivity with inexpensive raised garden bed ideas.
Final Thoughts on Your Garden Bed Construction

Knowing how to build a raised garden bed may sound intimidating at first, but with the right plan, tools, and materials, it’s surprisingly straightforward. From the initial cut list to the assembly of your frame and filling with soil, each step is manageable for beginners, and the results are immediately rewarding.
Once your bed is planted, you’ll enjoy better control over soil quality, reduced weed growth, and a more organized garden layout. Don’t forget to take a photo of your finished project or share your progress in gardening communities, showcasing your work inspires others and keeps you motivated. Remember, whether you’re growing vegetables, herbs, or flowers, your DIY raised garden bed is a long-lasting, productive addition to your outdoor space, designed to serve your gardening needs for years to come.