

A DIY smokeless fire pit works because it fixes the real cause of smoke: incomplete combustion. When wood doesn’t get enough heat and oxygen, it releases unburned particles into the air. That gray cloud drifting into everyone’s face isn’t just annoying. It means the fire isn’t burning cleanly.
A smokeless design uses dual airflow. Cool air enters near the bottom, heats as it travels through a narrow wall cavity, then exits near the top as superheated oxygen. That second oxygen stream burns off smoke before it escapes.
If you’re researching how to build a fire pit that feels more advanced than a basic ring of stones, airflow is the secret. Below are three DIY fire pit ideas: a contractor-grade masonry wrap, a from-scratch dual-wall ring, and a budget stock tank build with one serious safety warning.
Build #1: The Contractor-Grade Masonry Wrap
This is the most polished version. It uses a smokeless steel insert inside a permanent masonry surround. You get cleaner combustion, a professional look, and a fire pit that feels built into the backyard rather than dropped onto the lawn.
Step 1: Site Prep and Safety Marking
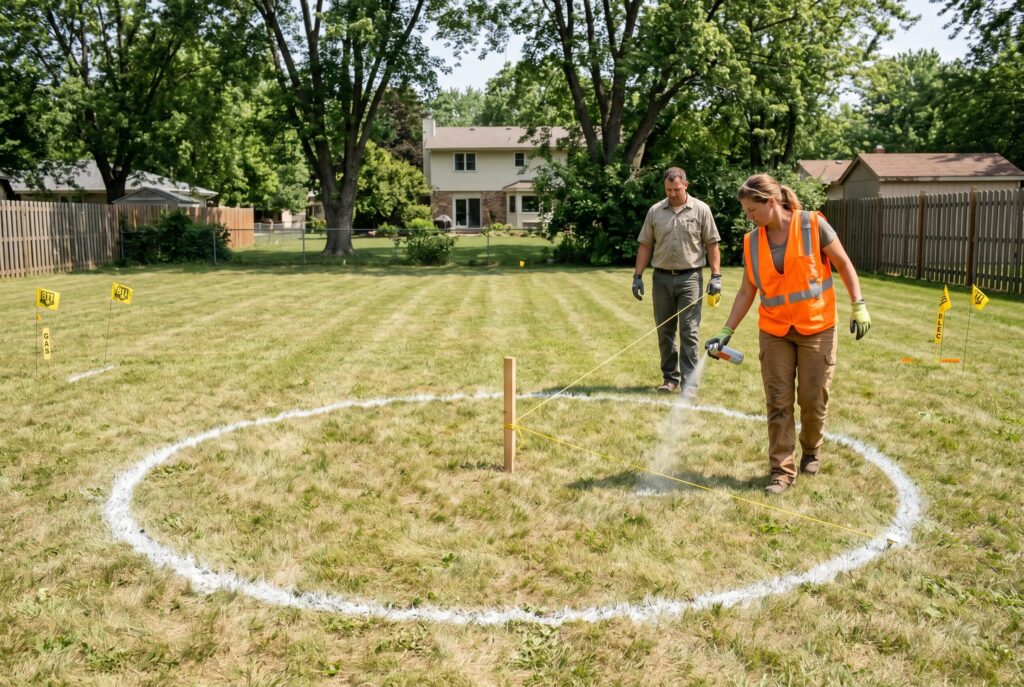
Choose a flat location away from the house, fences, sheds, low branches, dry leaves, and traffic paths. Check local fire rules before digging. Then call 811 so underground utility lines can be marked. Use a stake and string to draw the circle. Drive the stake into the center, tie a string to it, measure the radius, and walk the string around with marking paint. This gives you a clean layout before you cut into the ground.
Step 2: Excavating the Base
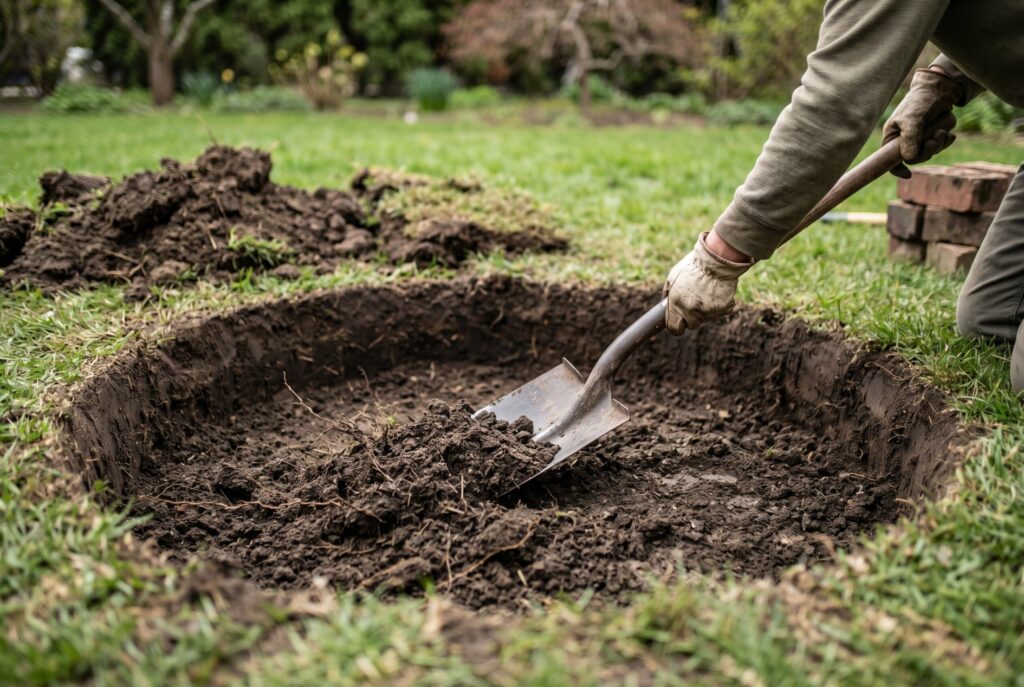
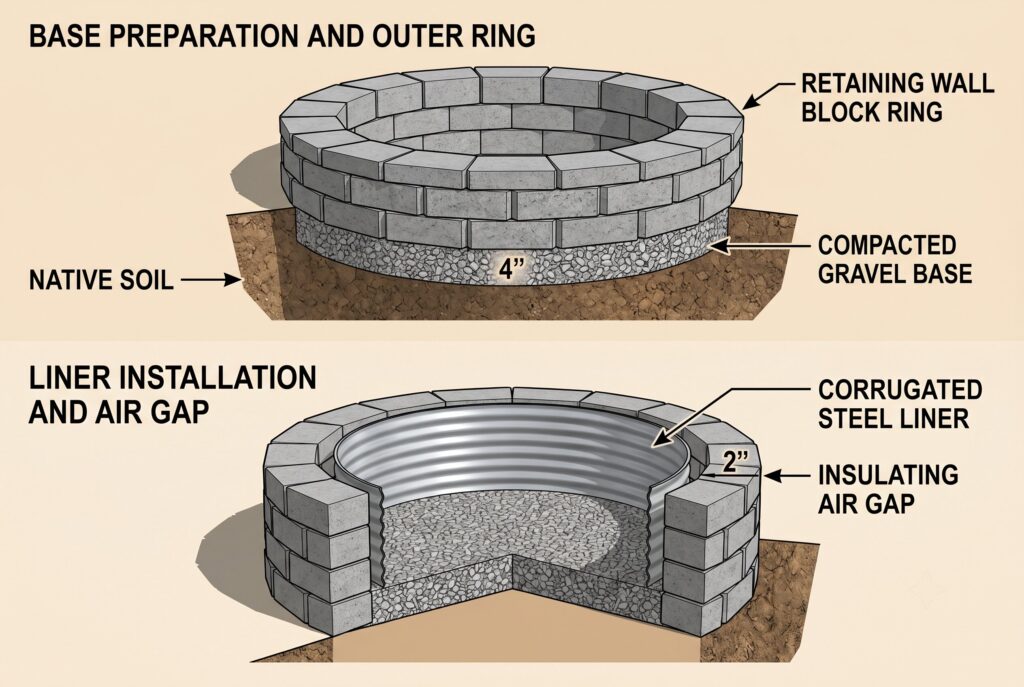
Dig 6 to 8 inches deep inside the marked circle. Remove grass, roots, loose soil, and soft spots. A shallow surface build may look fine at first, but it can settle unevenly after rain. This step creates room for a compacted base. That base supports the weight of the blocks and prevents the fire pit from shifting over time.
Step 3: Laying the Gravel Foundation
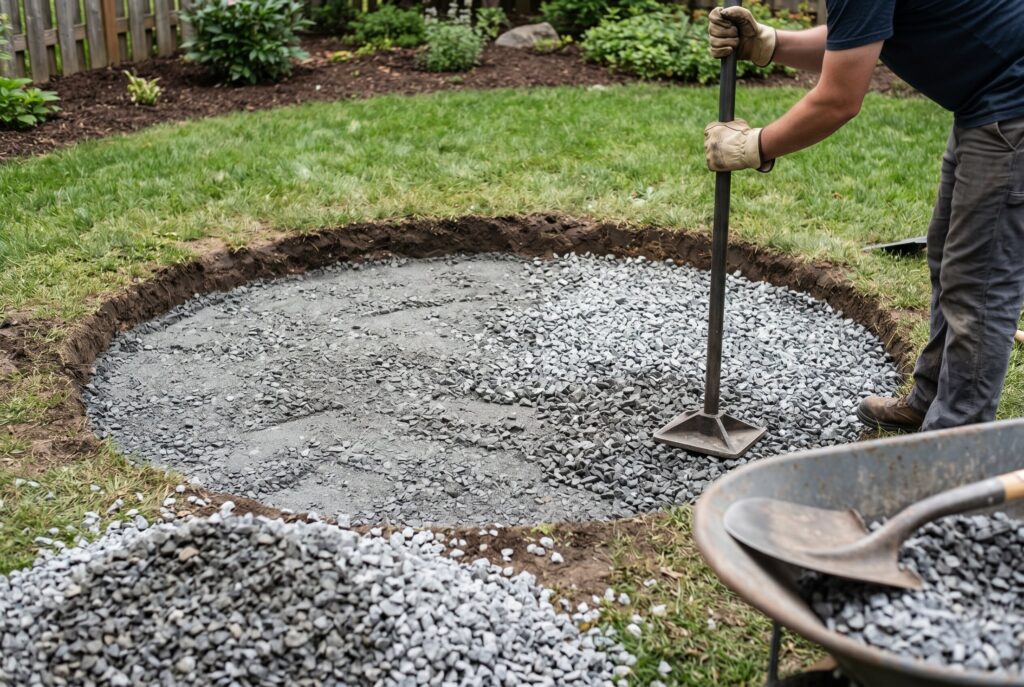
Add 2 to 3 inches of crushed stone or compactable gravel. Tamp it firmly until the surface feels stable underfoot. Drainage matters. If water sits under the fire pit, freeze-thaw cycles can crack blocks and weaken the structure. A gravel foundation lets water move through instead of pooling beneath the wall.
Step 4: Setting the First Course
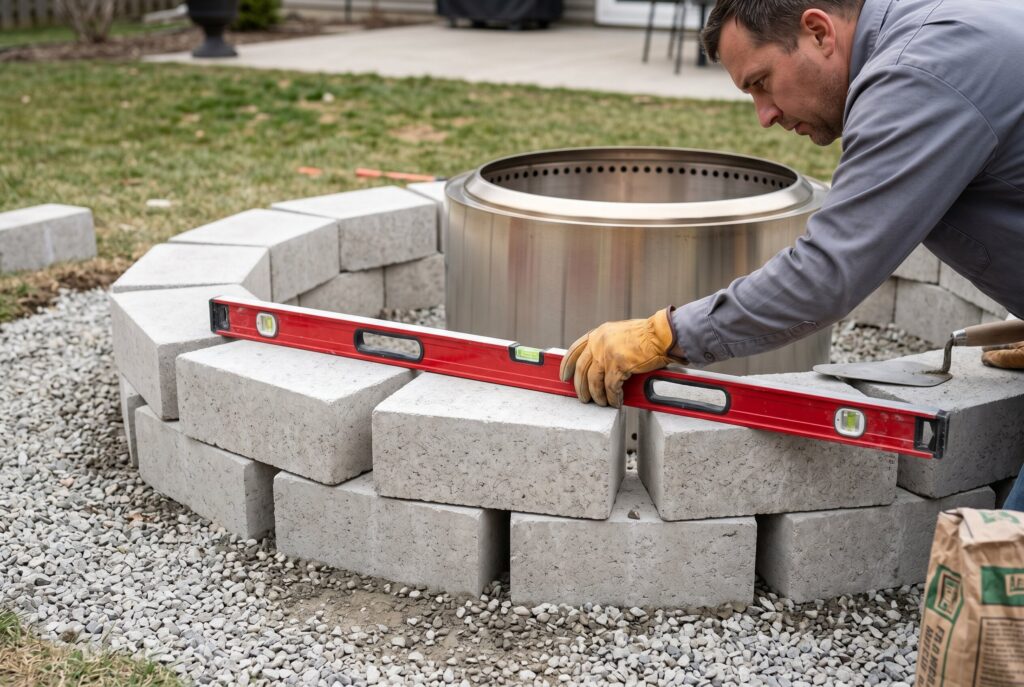
Place the first ring of blocks carefully. Use a level on every block. If this row isn’t level, every row above it will look worse. For smokeless performance, leave several intake gaps in the bottom course. These gaps let cool air enter and feed the fire from below. The airflow should move through the cavity between the masonry and the steel insert, then rise toward the secondary burn holes.
Step 5: Inserting the Steel Ring
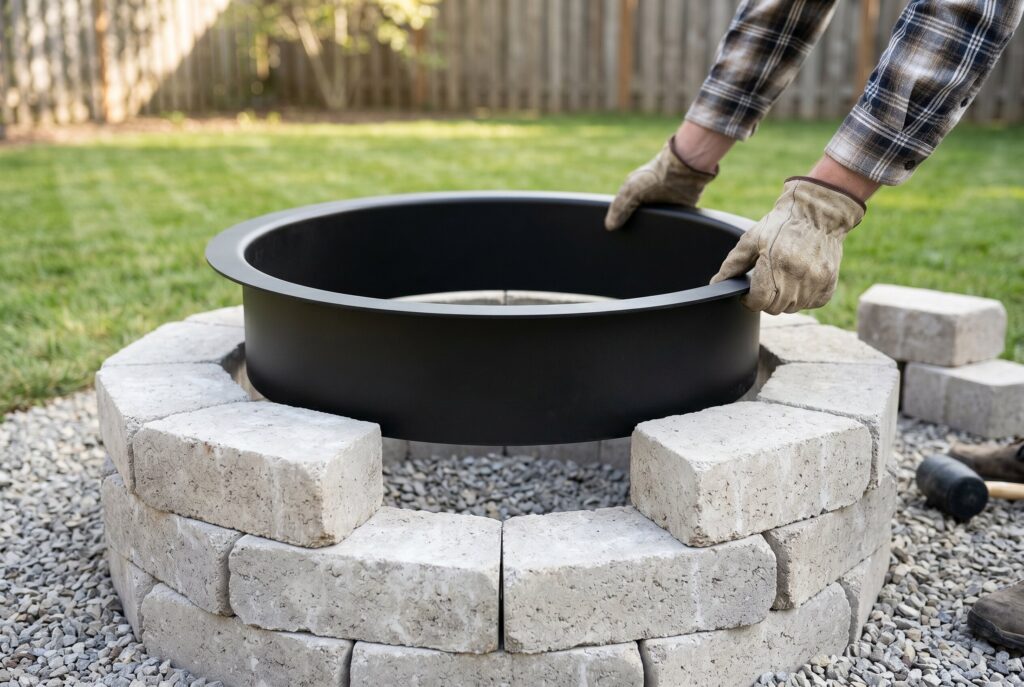
Set the smokeless insert or steel fire ring into the center. This insert protects the outer blocks from direct heat and helps create the dual-wall airflow system. The ring also acts like a guide, keeping the circle clean as you stack the masonry. Leave a small air channel between the insert and outer wall so air can heat and rise properly.
Step 6: Stacking and Gluing
Stack the remaining rows with staggered joints. Use outdoor landscape adhesive rated for heat-adjacent hardscape use. Don’t rely on regular glue or indoor construction adhesive. If a block needs trimming, use an angle grinder with the right blade and proper eye protection. Clean cuts make the build feel finished instead of improvised.
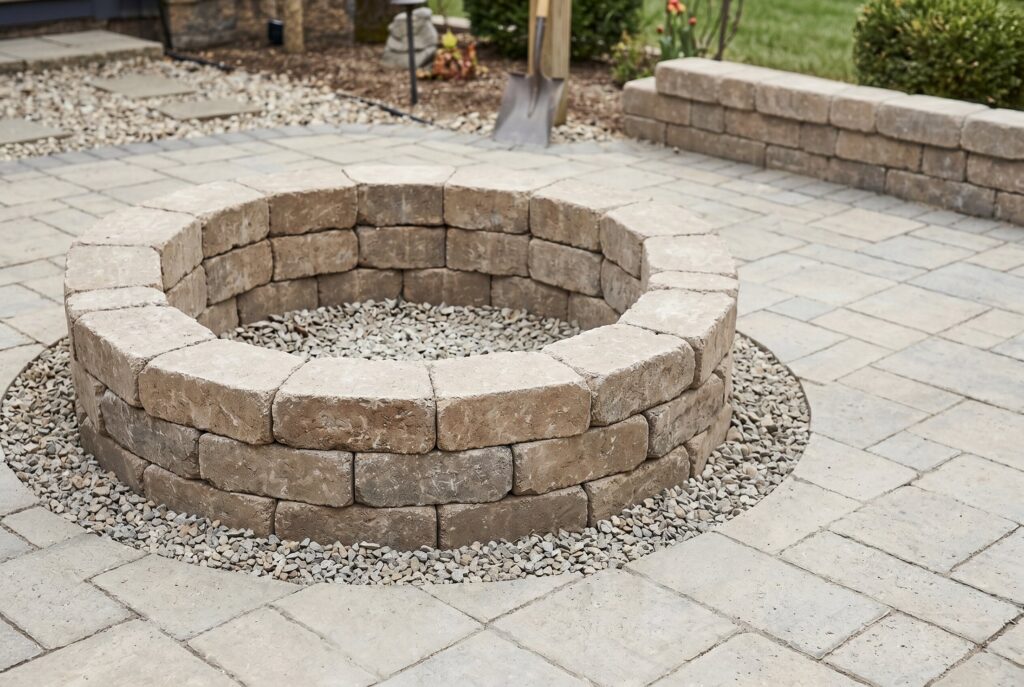
Step 7: Capping and Lava Rock
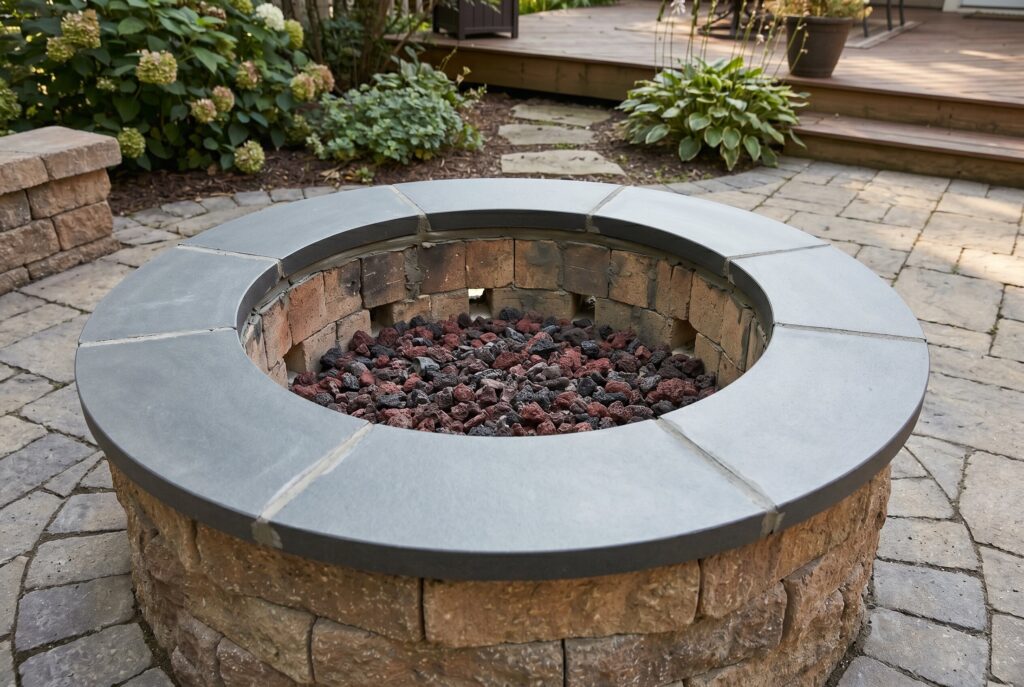
Finish the top with capstones for a smooth edge. Then add lava rock at the bottom of the burn chamber. Lava rock helps with heat distribution and drainage, but it shouldn’t block the airflow holes. Let adhesive cure fully before lighting the first fire. A rushed first burn can weaken the bond before the structure has settled.
Build #2: The From-Scratch Dual-Wall Ring
This build is for homeowners who want fire pit ideas that don’t require an expensive commercial insert. The goal is to create your own air gap using an inner metal wall and an outer masonry ring.
Start with the same compacted base. Then build the outer ring from retaining wall blocks or fire-safe masonry. Inside that ring, install a corrugated steel or fire-rated metal liner, leaving a narrow air gap between the liner and the masonry.
Drill intake openings near the lower part of the outer wall or leave gaps in the bottom masonry course. Then drill secondary burn holes around the upper edge of the inner metal wall. When the fire heats the cavity, air rises and exits through those upper holes. That heated oxygen helps burn the smoke.
This version requires more careful measuring. The air gap must be continuous, and the upper holes must face the flame zone. If the gap is blocked by stone, ash, or poorly placed filler, the fire won’t breathe well. A from-scratch dual-wall build can save money, but it should still use heat-safe materials. Avoid random scrap metal with coatings, paint, or unknown finishes. Heat changes materials, and fumes matter.
Build #3: The Galvanized Stock Tank Method
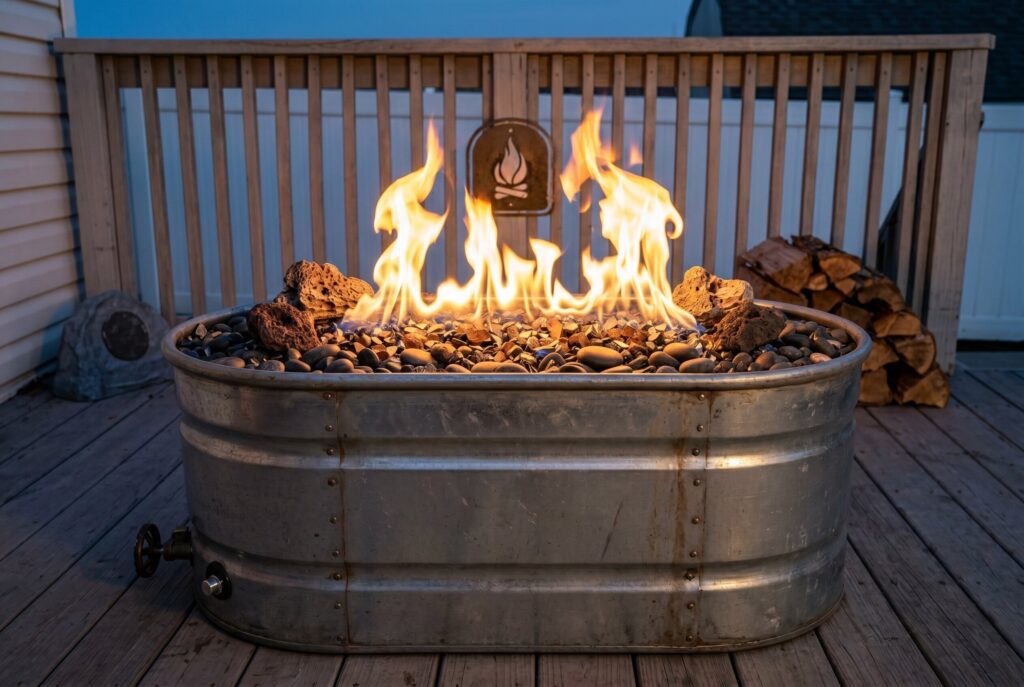
A stock tank can look like a clever budget hack. It’s round, affordable, and easy to drill. With bottom intake holes and upper secondary burn holes, it can mimic the airflow pattern of a smokeless fire pit.
But this method comes with a serious warning. Galvanized steel is coated with zinc. When overheated, zinc can release fumes that may cause metal fume fever. That risk shouldn’t be ignored.
If you choose this method, don’t gather people around it during early burns. Burn off coatings outdoors, stand far away and upwind, then clean and refinish the surface with high-heat enamel designed for fire applications. Even then, this build is better for cautious DIYers who understand the material risk. The stock tank method is fast, but fast isn’t always better. A safe fire feature should never trade convenience for questionable fumes.
Anchoring the Space: Fire Pit Area Ideas & Landscaping
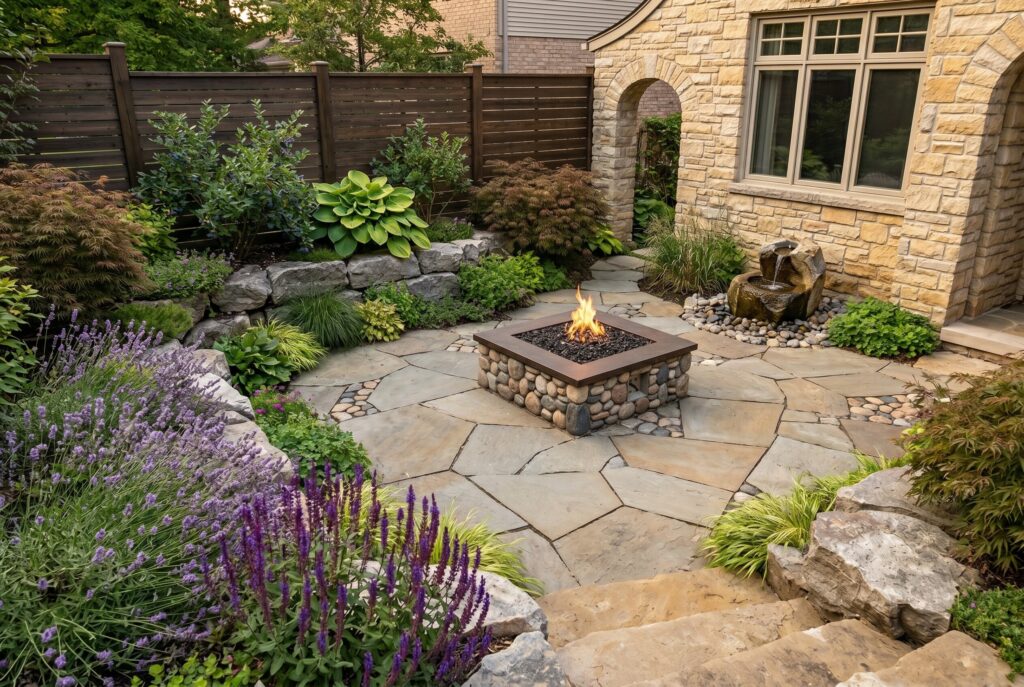
A smokeless fire pit still needs the right setting. Strong fire pit area ideas make the pit feel intentional and keep the surrounding space safer. Don’t place the fire pit directly on grass. Create a defined pad with compacted crushed slate, decomposed granite, concrete pavers, or fire-safe stone. For low cost fire pit landscape design, decomposed granite is often better than loose pea gravel because it compacts more firmly. Chair legs won’t sink as easily, and the surface feels smoother underfoot.
Add seating in a wide arc or U-shape so people face each other, not just the fire. Avoid placing fabric furniture too close to sparks. Built-in benches, Adirondack chairs, or a large outdoor sectional can all work if spacing is safe.
Lighting also matters. Freestanding string-light planters can define the area without drilling into the patio. Fill large planters or barrels with concrete, set posts inside, and hang warm outdoor string lights overhead. The fire gives glow from below, while string lights create a soft ceiling above the gathering area.
Conclusion
A DIY smokeless fire pit succeeds when airflow is treated as part of the design, not an afterthought. The fire needs oxygen at the bottom, a heated air channel in the wall, and secondary burn holes near the top. The contractor-grade masonry wrap gives the cleanest result. The from-scratch dual-wall ring gives budget-minded DIYers more control. The stock tank method can work, but only with serious attention to galvanized metal safety.
Whatever build you choose, start with a stable base, use heat-safe materials, protect the surrounding landscape, and keep seating at a safe distance. A good fire pit burns wood. A great one burns cleaner, smokes less, and turns the backyard into the place everyone wants to stay.

