

A steep, grassy hill in a backyard often feels like a wasted opportunity. Sloped terrain can lead to significant soil erosion and might even threaten the stability of home foundations over time. A well-designed garden wall doesn’t just stop the yard from washing away; it creates functional, flat space for patios, gardens, and outdoor living.
Learning how to build a retaining wall on a slope is a common goal for homeowners looking to reclaim their land. It’s a project that combines physical effort with structural physics. This guide explores retaining wall ideas for sloped backyard projects and provides the technical steps needed for a lasting build.
The Golden Rules: Why Drainage & Safety Come First
The most common reason a concrete wall or stone structure fails is hydrostatic pressure. This occurs when water becomes trapped behind the wall, creating immense weight that pushes against the structure. Without a way for this water to escape, even the strongest materials will eventually crack or tip.
Managing Hydrostatic Pressure with Perforated Pipes
A reliable drainage system is non-negotiable for any retaining wall construction. Standard practice involves placing a perforated drainage pipe at the base of the wall behind the first layer of stone.
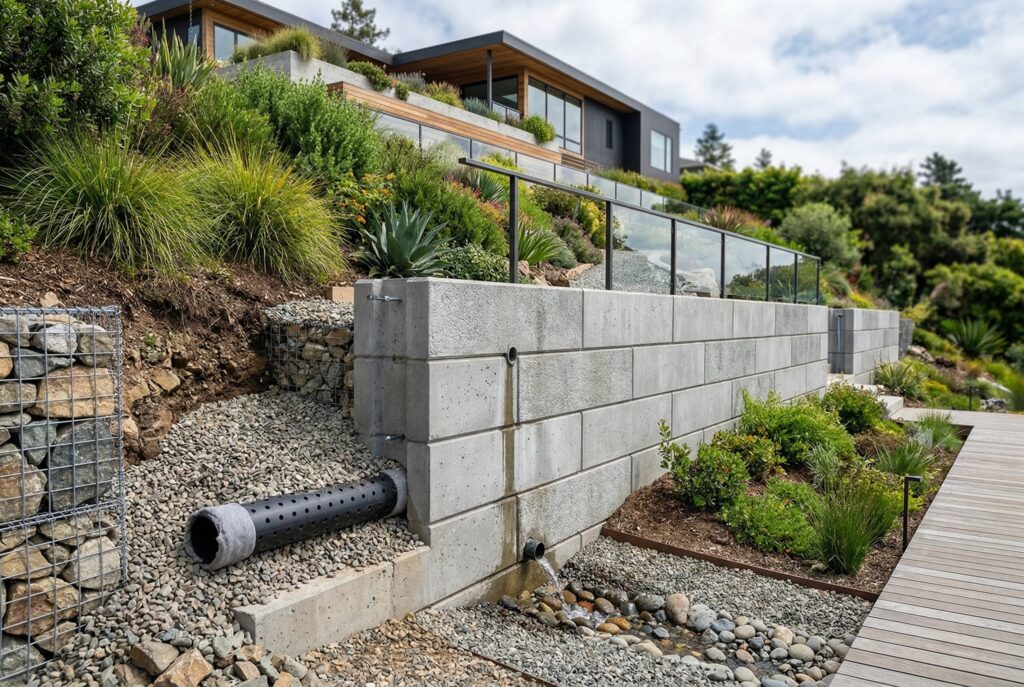
This pipe should be surrounded by several inches of clean gravel. The gravel acts as a filter, allowing water to reach the pipe while keeping soil out. Modern builds in 2026 often include moisture sensors behind the wall to alert property owners of drainage clogs before structural damage occurs.
The “Rule of 3 Feet” and Local Permits
Safety and legality are top priorities when planning a diy retaining wall. Most municipalities have a strict rule that any wall exceeding 3 feet in height requires a building permit or a signature from a structural engineer. It’s also vital to call 811 before any digging begins. This free service identifies underground utility lines, preventing dangerous and expensive accidents. Skipping these steps can lead to fines or the forced removal of the wall.
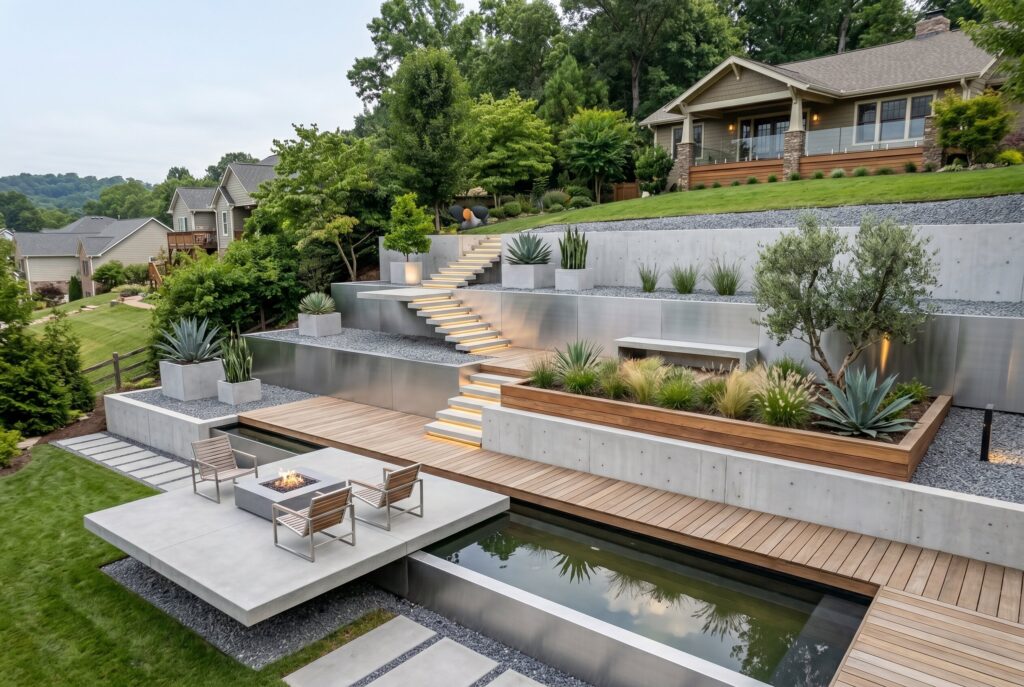
5 Inexpensive Retaining Wall Ideas for Sloped Backyards
Budget often dictates the choice of materials, but aesthetics don’t have to suffer. There are several inexpensive retaining wall ideas that provide both durability and visual appeal.
Idea 1: Natural Stone & Rock Retaining Walls
Using a natural stone retaining wall provides a timeless, rustic appearance that blends into the landscape.
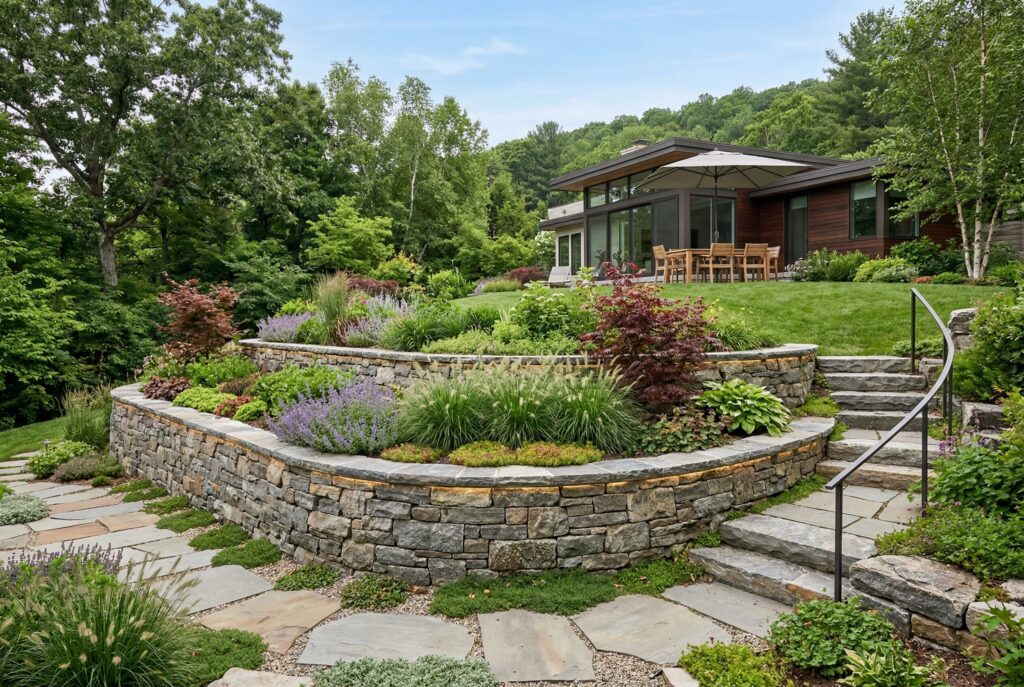
A rock retaining wall is particularly effective for gardens with an organic feel. While the individual stones can be heavy and require careful fitting, the result is a permanent structure that rarely goes out of style.
Idea 2: Interlocking Retaining Wall Blocks
For those seeking the easiest installation, interlocking retaining wall blocks are a top choice.
These manufactured retaining wall blocks feature a built-in lip or pinning system that holds each row in place without the need for mortar. Systems like the “Cascade” interlocking design offer a modern look and are specifically engineered for slope stability.
Idea 3: Timber & Railroad Ties for a Rustic Look
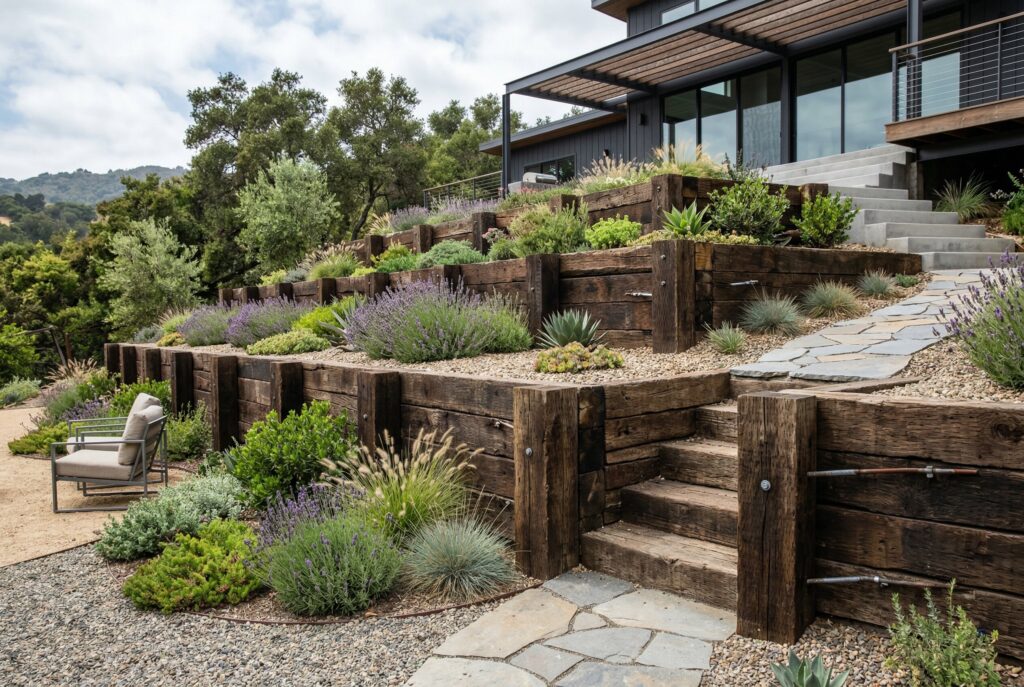
Timber is frequently cited as the cheapest retaining wall option for initial material costs. Using railroad ties or pressure-treated 6×6 timbers is a popular choice for shorter projects or lower budgets. However, it’s important to remember that wood will eventually rot, typically lasting 15 to 20 years, whereas masonry options are much more permanent.
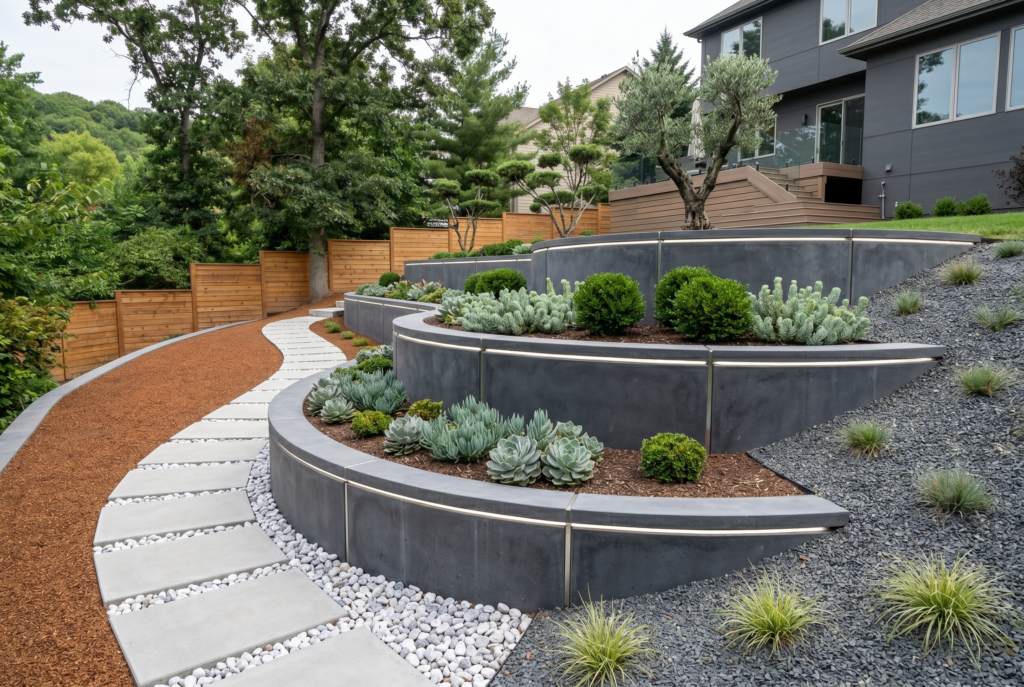
Idea 4: Modern Gabion Baskets & Permeable Hardscaping
Gabion baskets are wire cages filled with rock or recycled materials. They’re becoming more popular in 2026 because they are naturally permeable, meaning water flows right through them without building up pressure.
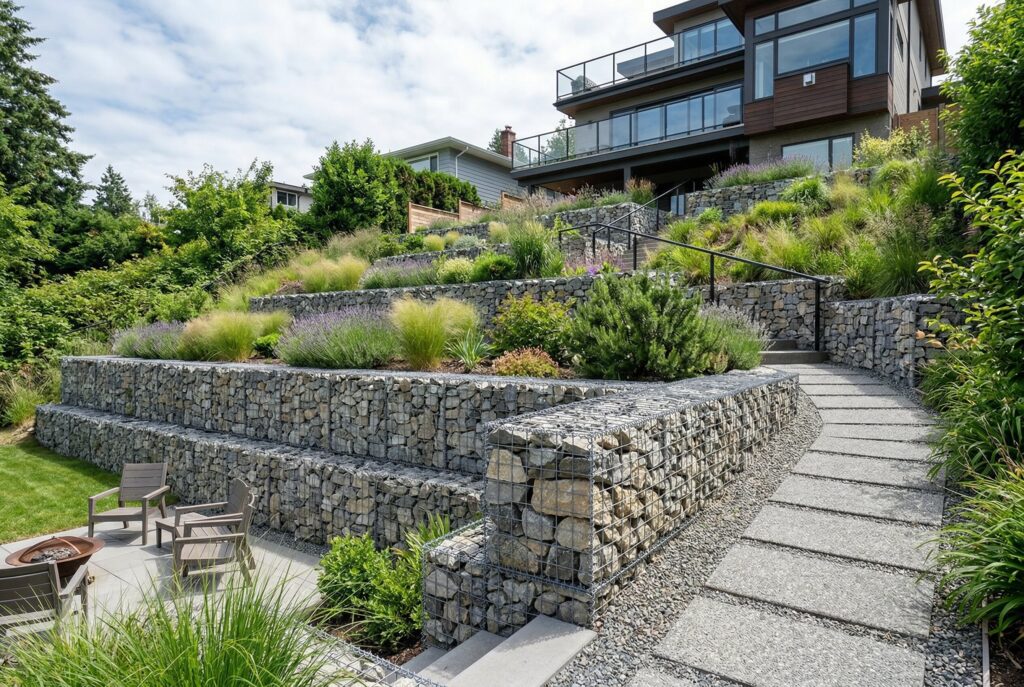
This design meets many modern environmental regulations that favor natural groundwater infiltration over street runoff.
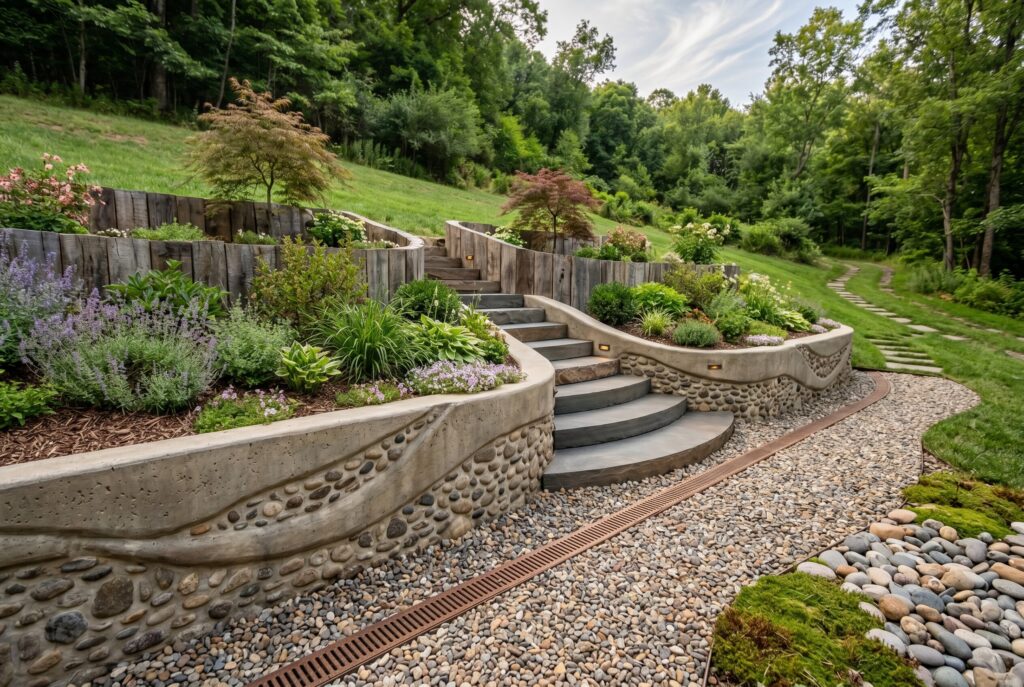
Idea 5: Terracing for Steep Inclines
When a hill is too steep for a single tall wall, terracing is the preferred solution. This involves building a series of smaller walls that step up the slope.
Terracing reduces the pressure on each individual wall and creates multiple flat levels for planting or seating areas. It’s a great way to incorporate retaining wall ideas into a larger landscape design.
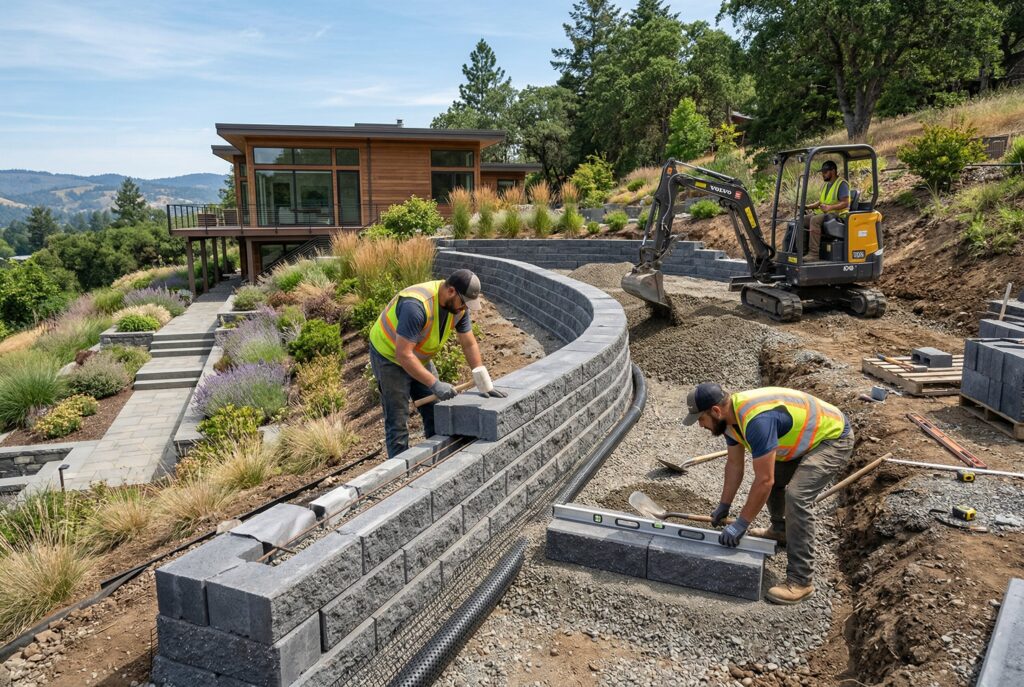
Step-by-Step: How to Build a Retaining Wall on a Slope
Building a stable wall requires a systematic approach, starting from the ground up.
Preparation: The “Call 811” Safety Check
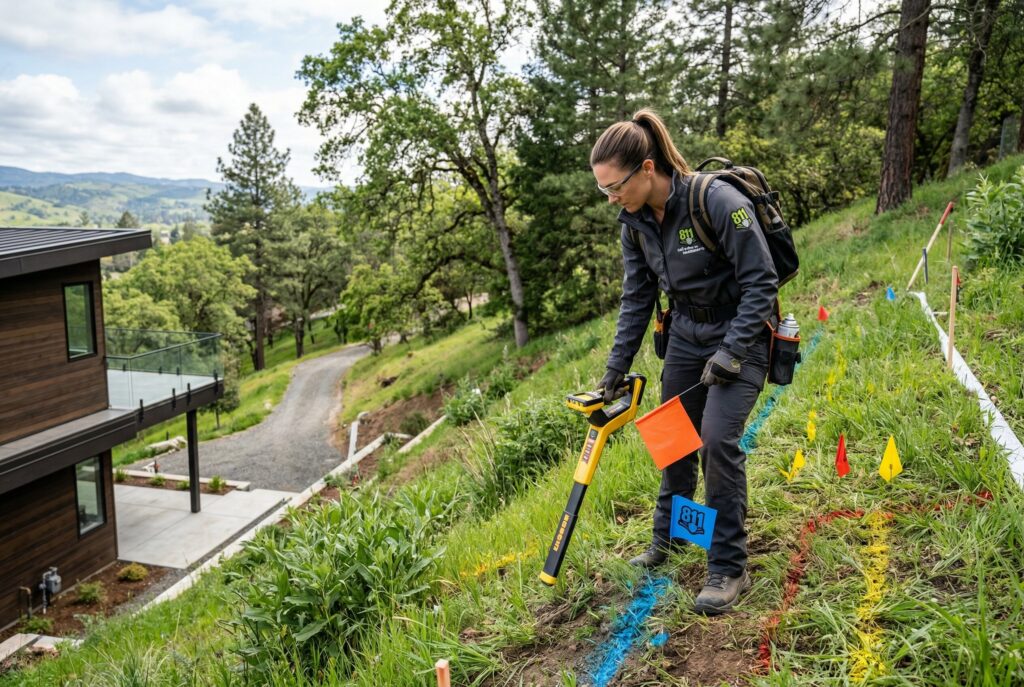
The first step in any excavation project is ensuring the site is clear of gas, water, and electrical lines. Contacting 811 is a mandatory safety precaution that protects the property and the workers.
Base Preparation: The Critical First Row
The longevity of a wall depends almost entirely on the base row. A trench must be dug deep enough to hold a few inches of compacted gravel and at least half of the first block’s height.
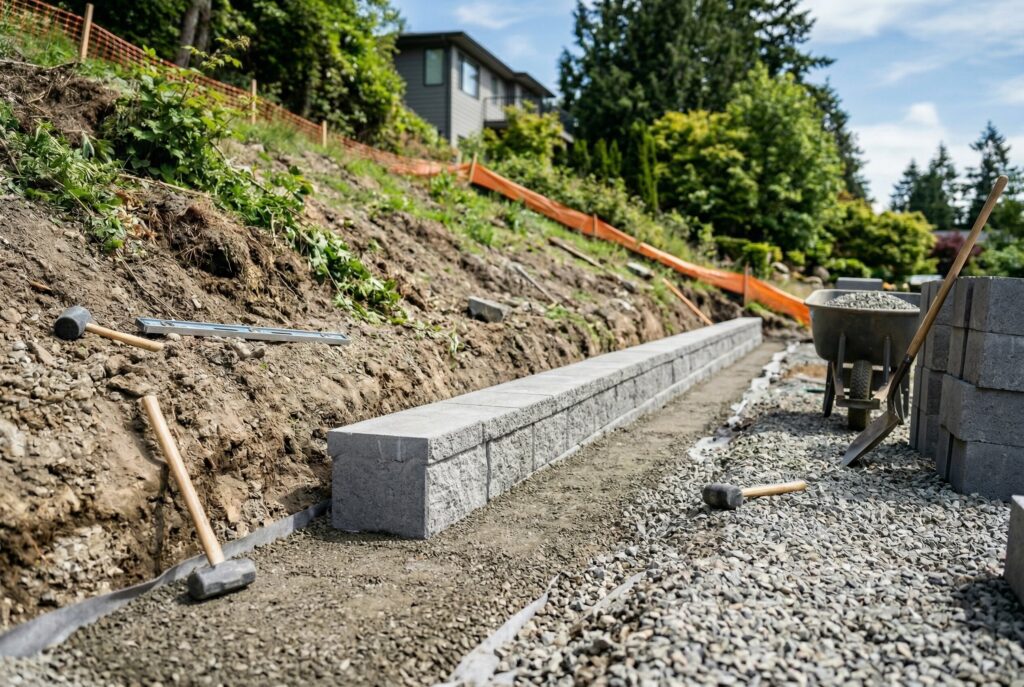
This row must be perfectly level in all directions. If the foundation is uneven, the rest of the wall will eventually lean or collapse.
Staggering Joints and Backfilling
When placing retaining wall stones, the vertical joints must be staggered so that they don’t align from one row to the next. This “running bond” pattern increases the structural strength of the wall.
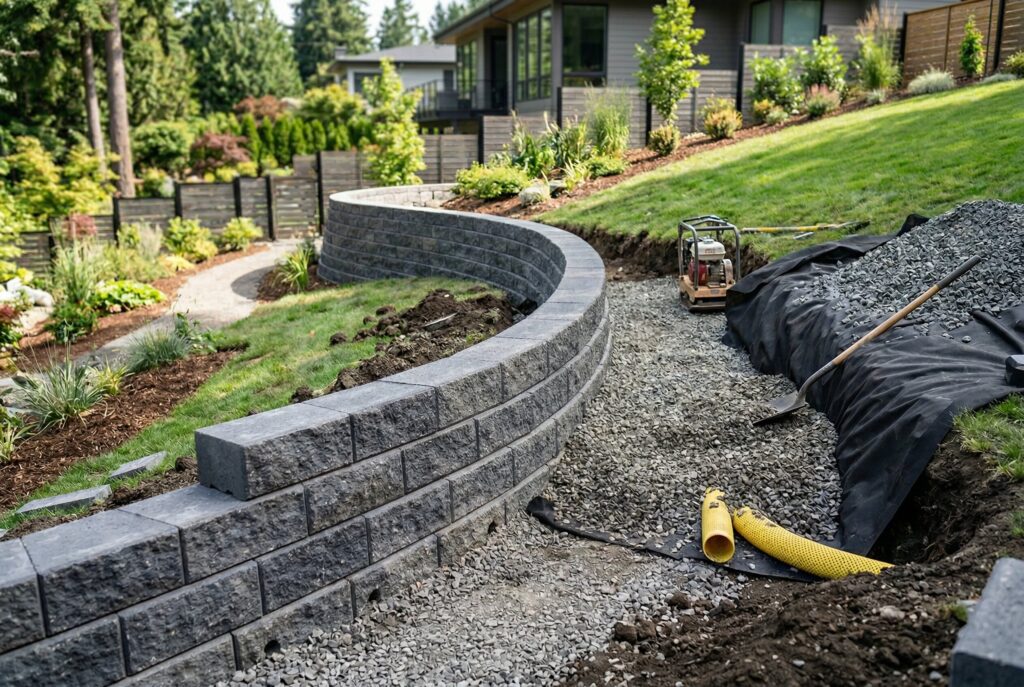
After each row is set, clean gravel should be poured into the space behind the blocks and compacted. This gravel backfill ensures that water can reach the drainage pipe efficiently.
Budgeting: Estimated Cost Breakdown (DIY vs. Pro)
Costs for a retaining wall can vary wildly based on material choice and terrain difficulty. A general estimate for materials and basic professional installation is around $20 to $40 per square foot.
Save: Keeping Existing Drainage & DIY Labor
Tackling the project as a DIY retaining wall is the most effective way to lower the total price.
If the current yard has a functional drainage path that don’t need relocation, costs stay even lower. Using cheap retaining wall ideas like timber or standard concrete blocks also keeps the budget in check.
Splurge: Smart Sensors & Integrated LED Lighting
For those looking to add a touch of luxury and extra security, modern upgrades are available.
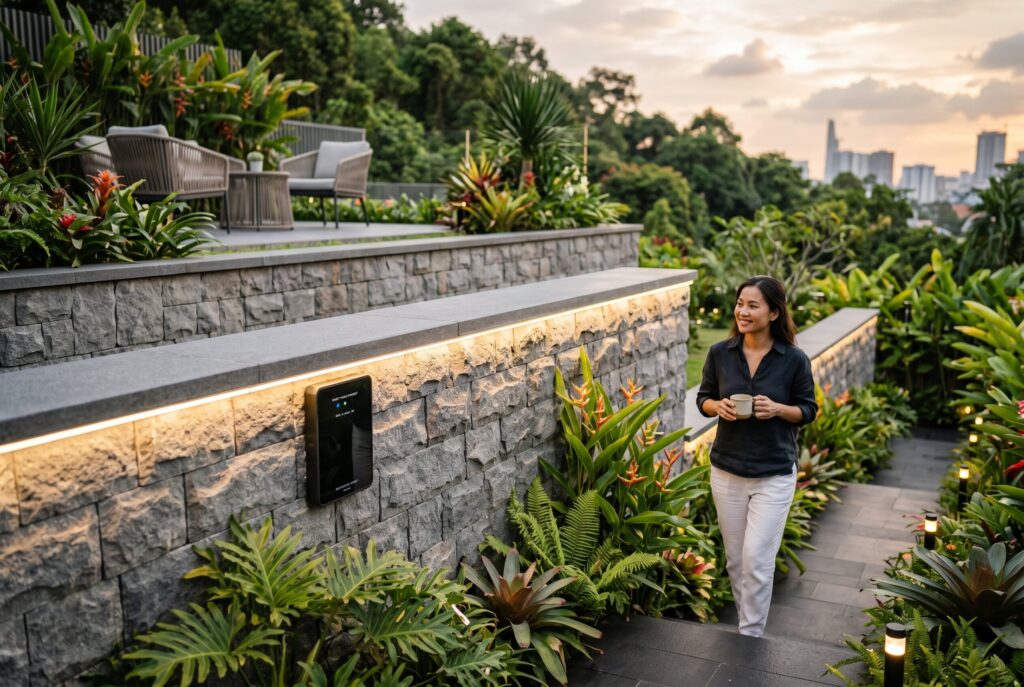
Integrated LED lighting can be installed under the capstones to illuminate the wall at night, improving both safety and nighttime aesthetics. As mentioned, smart moisture sensors are an excellent high-end addition to monitor the health of the wall’s internal drainage system.
Common Questions (FAQ)
How many blocks are needed for a 10 foot wall?
To find the number of blocks, first calculate the total square footage of the wall face (length multiplied by height). Divide that total by the square footage of a single block. It’s always smart to purchase 10% more than the calculated amount to account for cuts, corner pieces, or accidental breaks.
Can a wall be built on heavy clay soil?
It’s possible, but clay requires much more attention to drainage than sandy soil. Clay holds onto water and expands, which puts significantly more pressure on the wall. In these cases, a much larger pocket of gravel backfill and a heavy-duty perforated drainage pipe are required to prevent structural failure.
What is the best material for a beginner DIY project?
Interlocking retaining wall blocks are widely considered the best option for beginners. They’re specifically designed for ease of use, with a self-leveling or self-aligning feature that takes much of the guesswork out of the construction process. These blocks are durable, widely available, and don’t require the advanced masonry skills needed for natural stone or poured concrete.

