

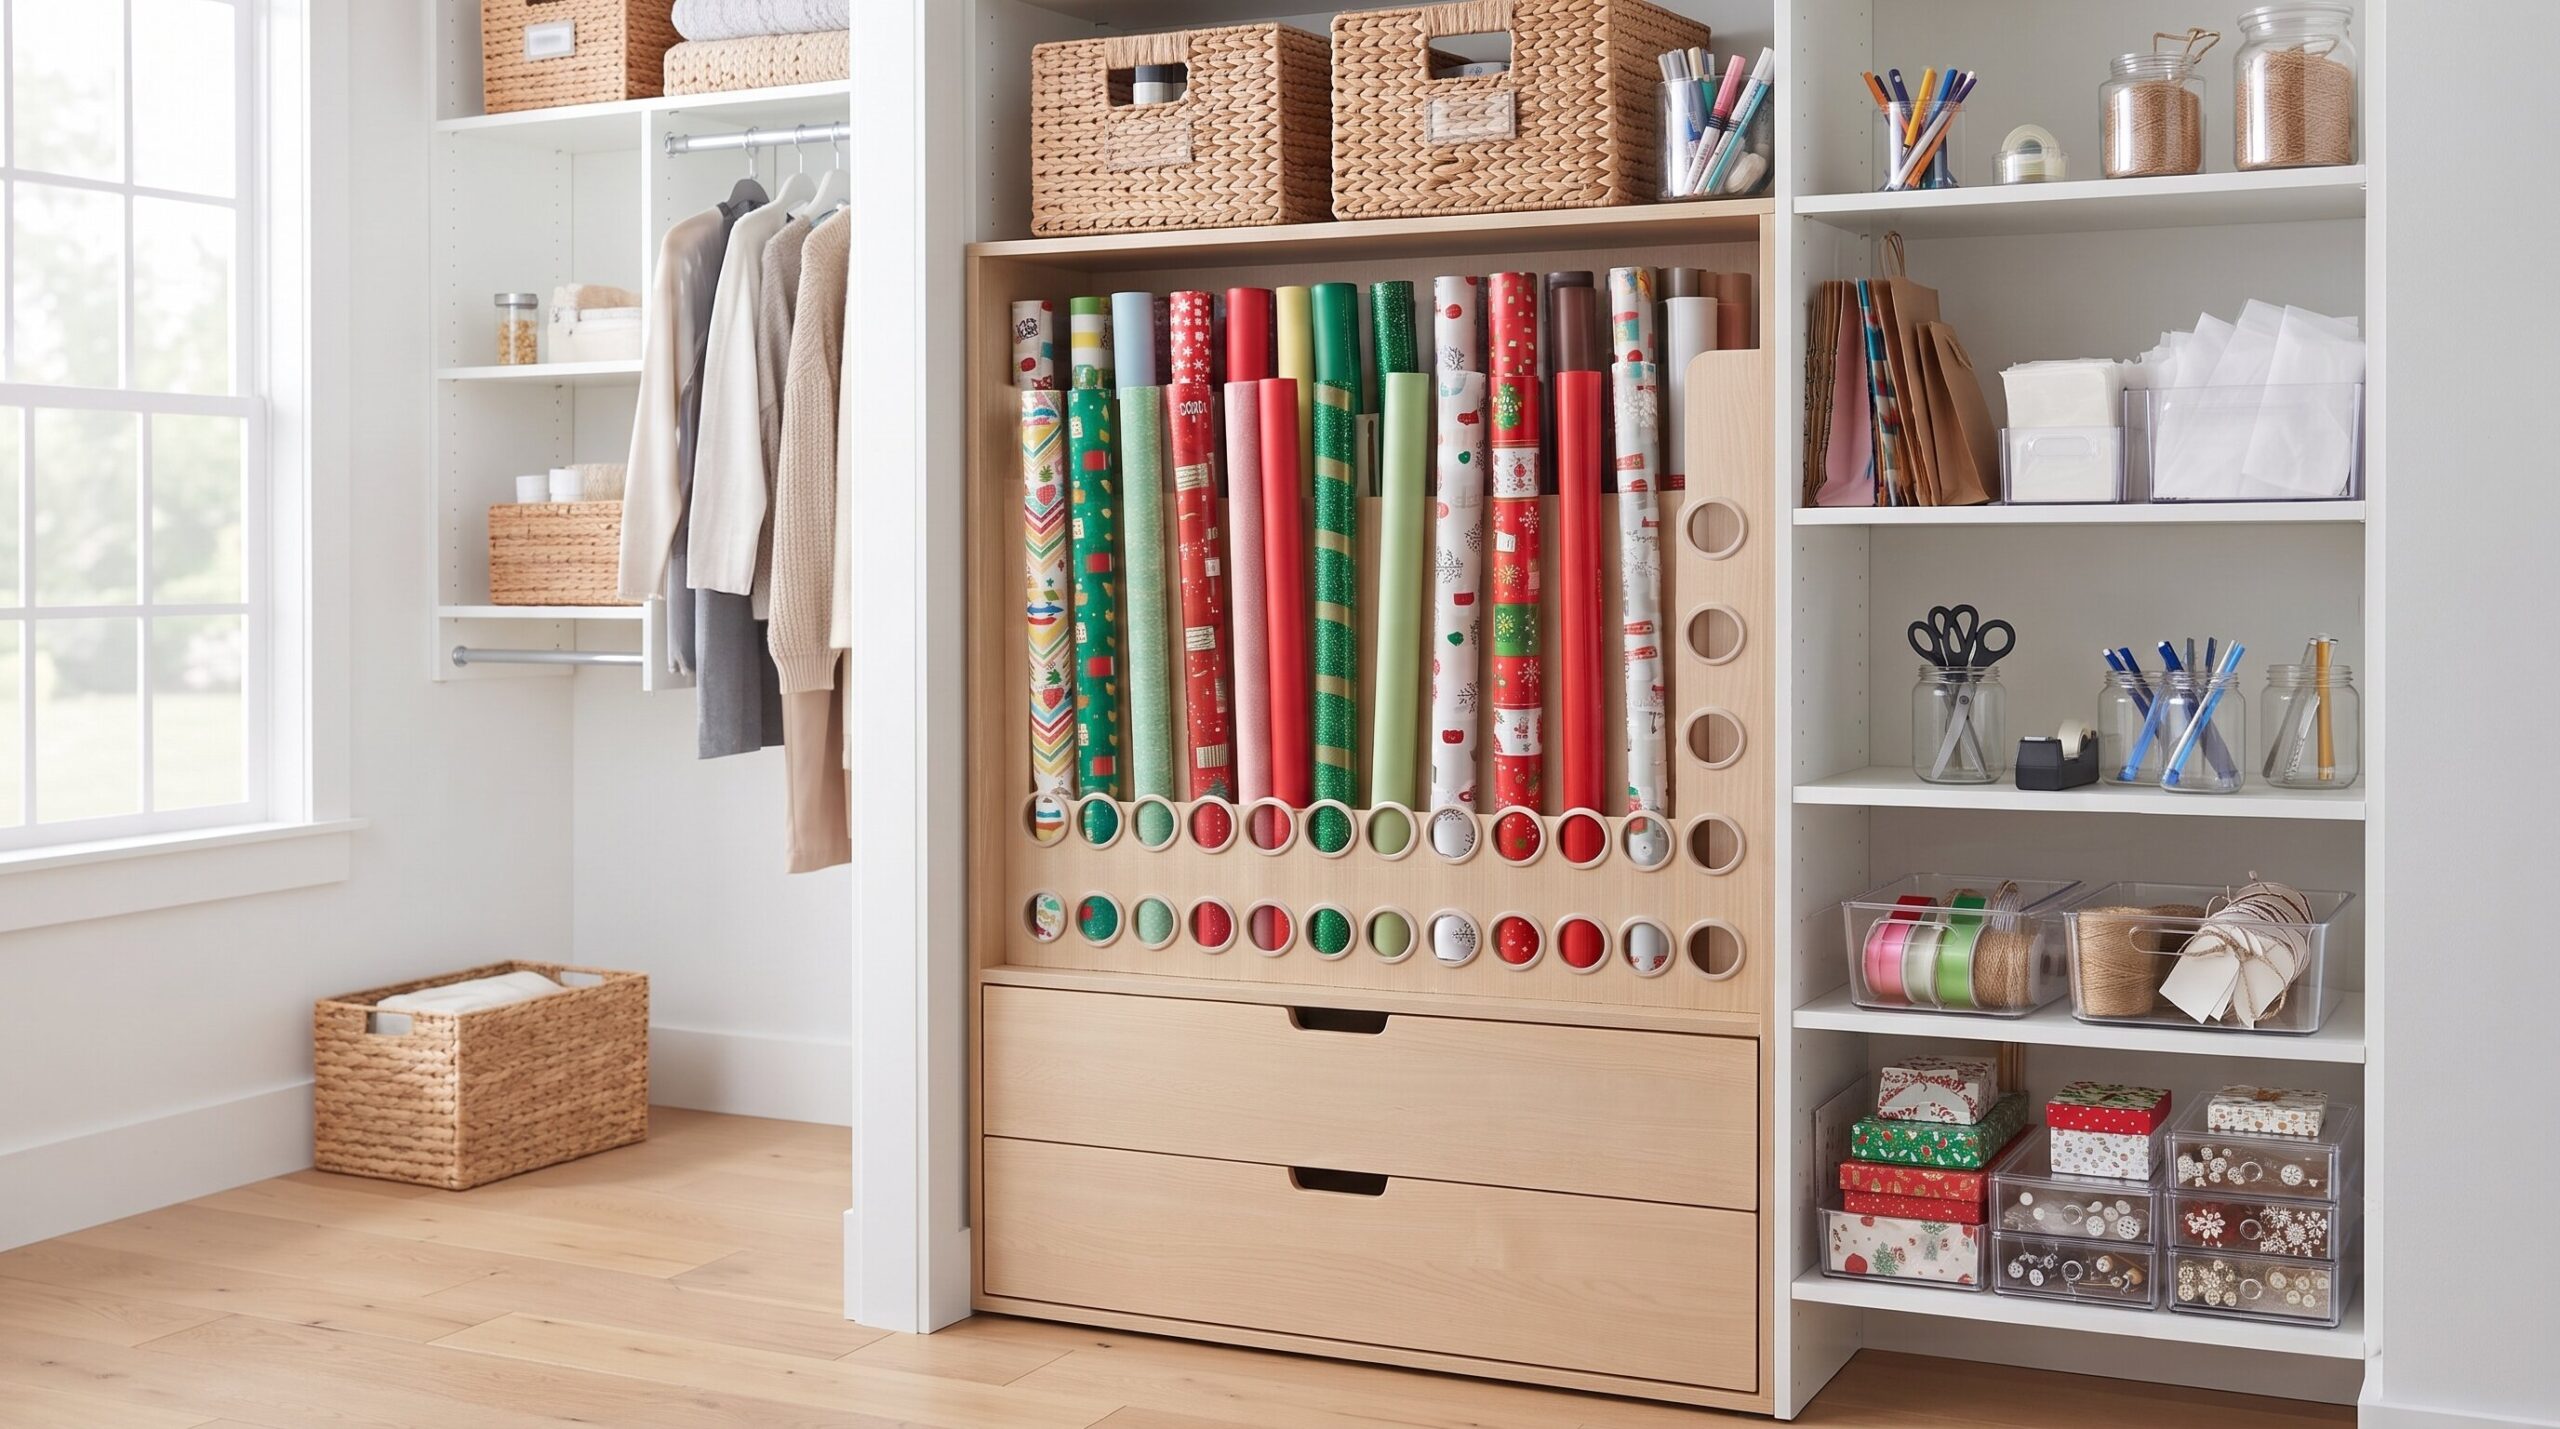
The days right after the holidays always bring the same scene: torn rolls leaning against a wall, ribbon tangled inside a grocery bag, gift tags scattered across three different drawers. Figuring out how to store wrapping paper for good doesn’t require a spare room or a fresh trip to the store. It takes grouping supplies vertically, protecting the roll ends specifically, and picking a spot that actually gets used instead of forgotten.
Whether the space on hand is a walk-in closet or a single shelf in a studio apartment, these 11 wrapping paper storage ideas turn that yearly mess into a system that survives contact with next December, without a single roll getting crushed along the way.
Start With a Ten-Minute Sort, Not a Shopping Trip
Buying a storage tote before sorting through what’s worth keeping usually backfires, since half of what gets packed away ends up thrown out a year later anyway. Two quick moves make everything after this point easier.
Sort and purge first, setting a hard rule: any roll with more than two inches of torn or crumpled paper at either end gets recycled rather than saved, and any ribbon spool shorter than a foot goes in the same pile. Assess the actual space available next, measuring the specific gap in question, whether that’s the six- to twelve-inch clearance under a bed frame or the narrow six-inch strip behind a closet door, since that one measurement decides which of the following options will physically fit.
Wrapping Paper Storage Ideas Worth the Investment
1. The Slim Under-Bed Canvas Tote
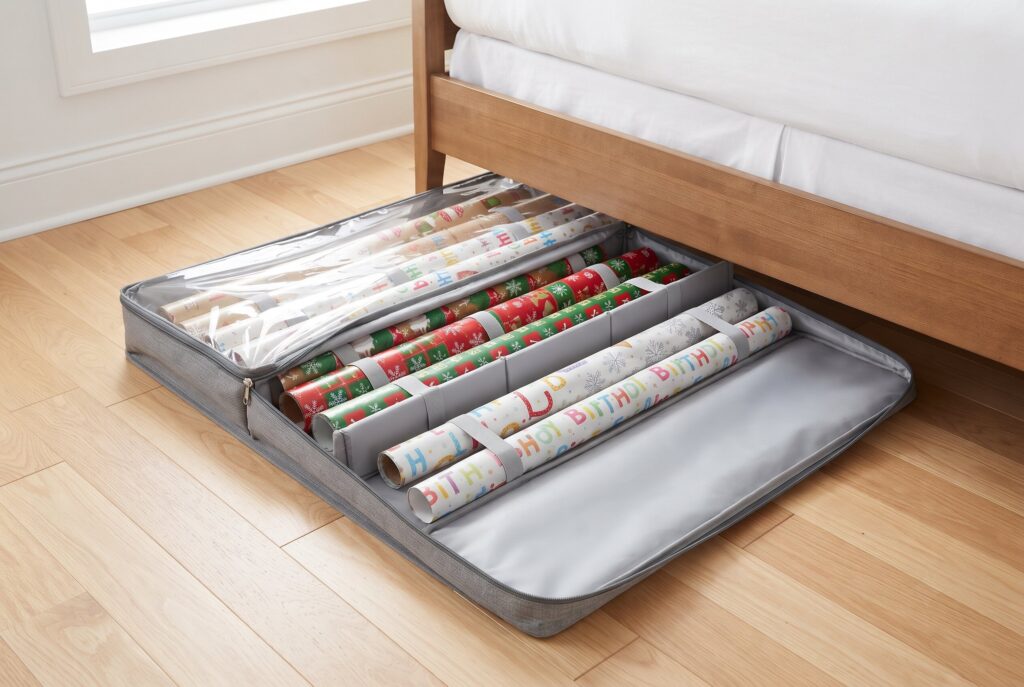
A wrapping paper storage tote built for under the bed usually runs somewhere close to 40 inches long and only 6 to 8 inches tall, sized specifically to slide beneath a standard bed frame without scraping the floor. Look for one with rigid internal dividers spaced every 10 to 12 inches and elastic straps that pin each roll in place, since loose rolls sliding side to side inside a soft bag is exactly what bends corners over a full year of storage. A double zipper closure running the full length also keeps dust bunnies and seasonal humidity from working their way in during the eleven months this collection sits untouched.
>>> How to Remove Stickers from Glass: 15 Methods That Work
2. Over-the-Door Vertical Racks
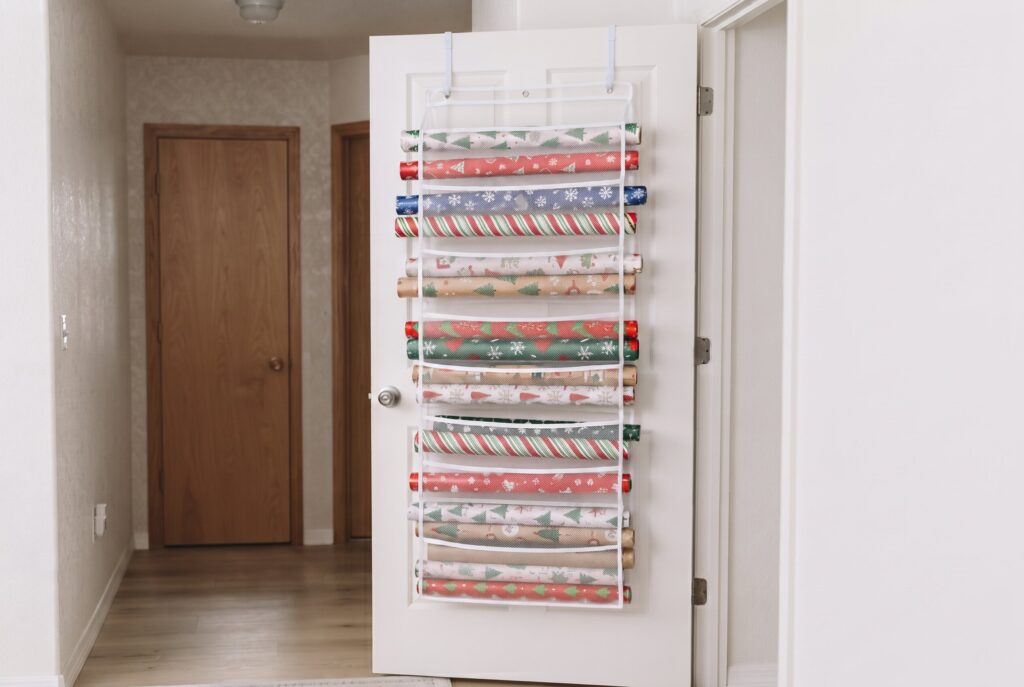
A mesh or clear vinyl rack that hangs over a standard door, usually with six to eight individual sleeves, turns dead space behind a closet door into fully visible storage. Sorting rolls by pattern into individual sleeves means every option is visible at a glance, which matters most on December 23rd when a gift needs wrapping in the next five minutes. For more ways to use wall and door height, see our vertical storage ideas.
3. The Rolling Wrap Station Cart
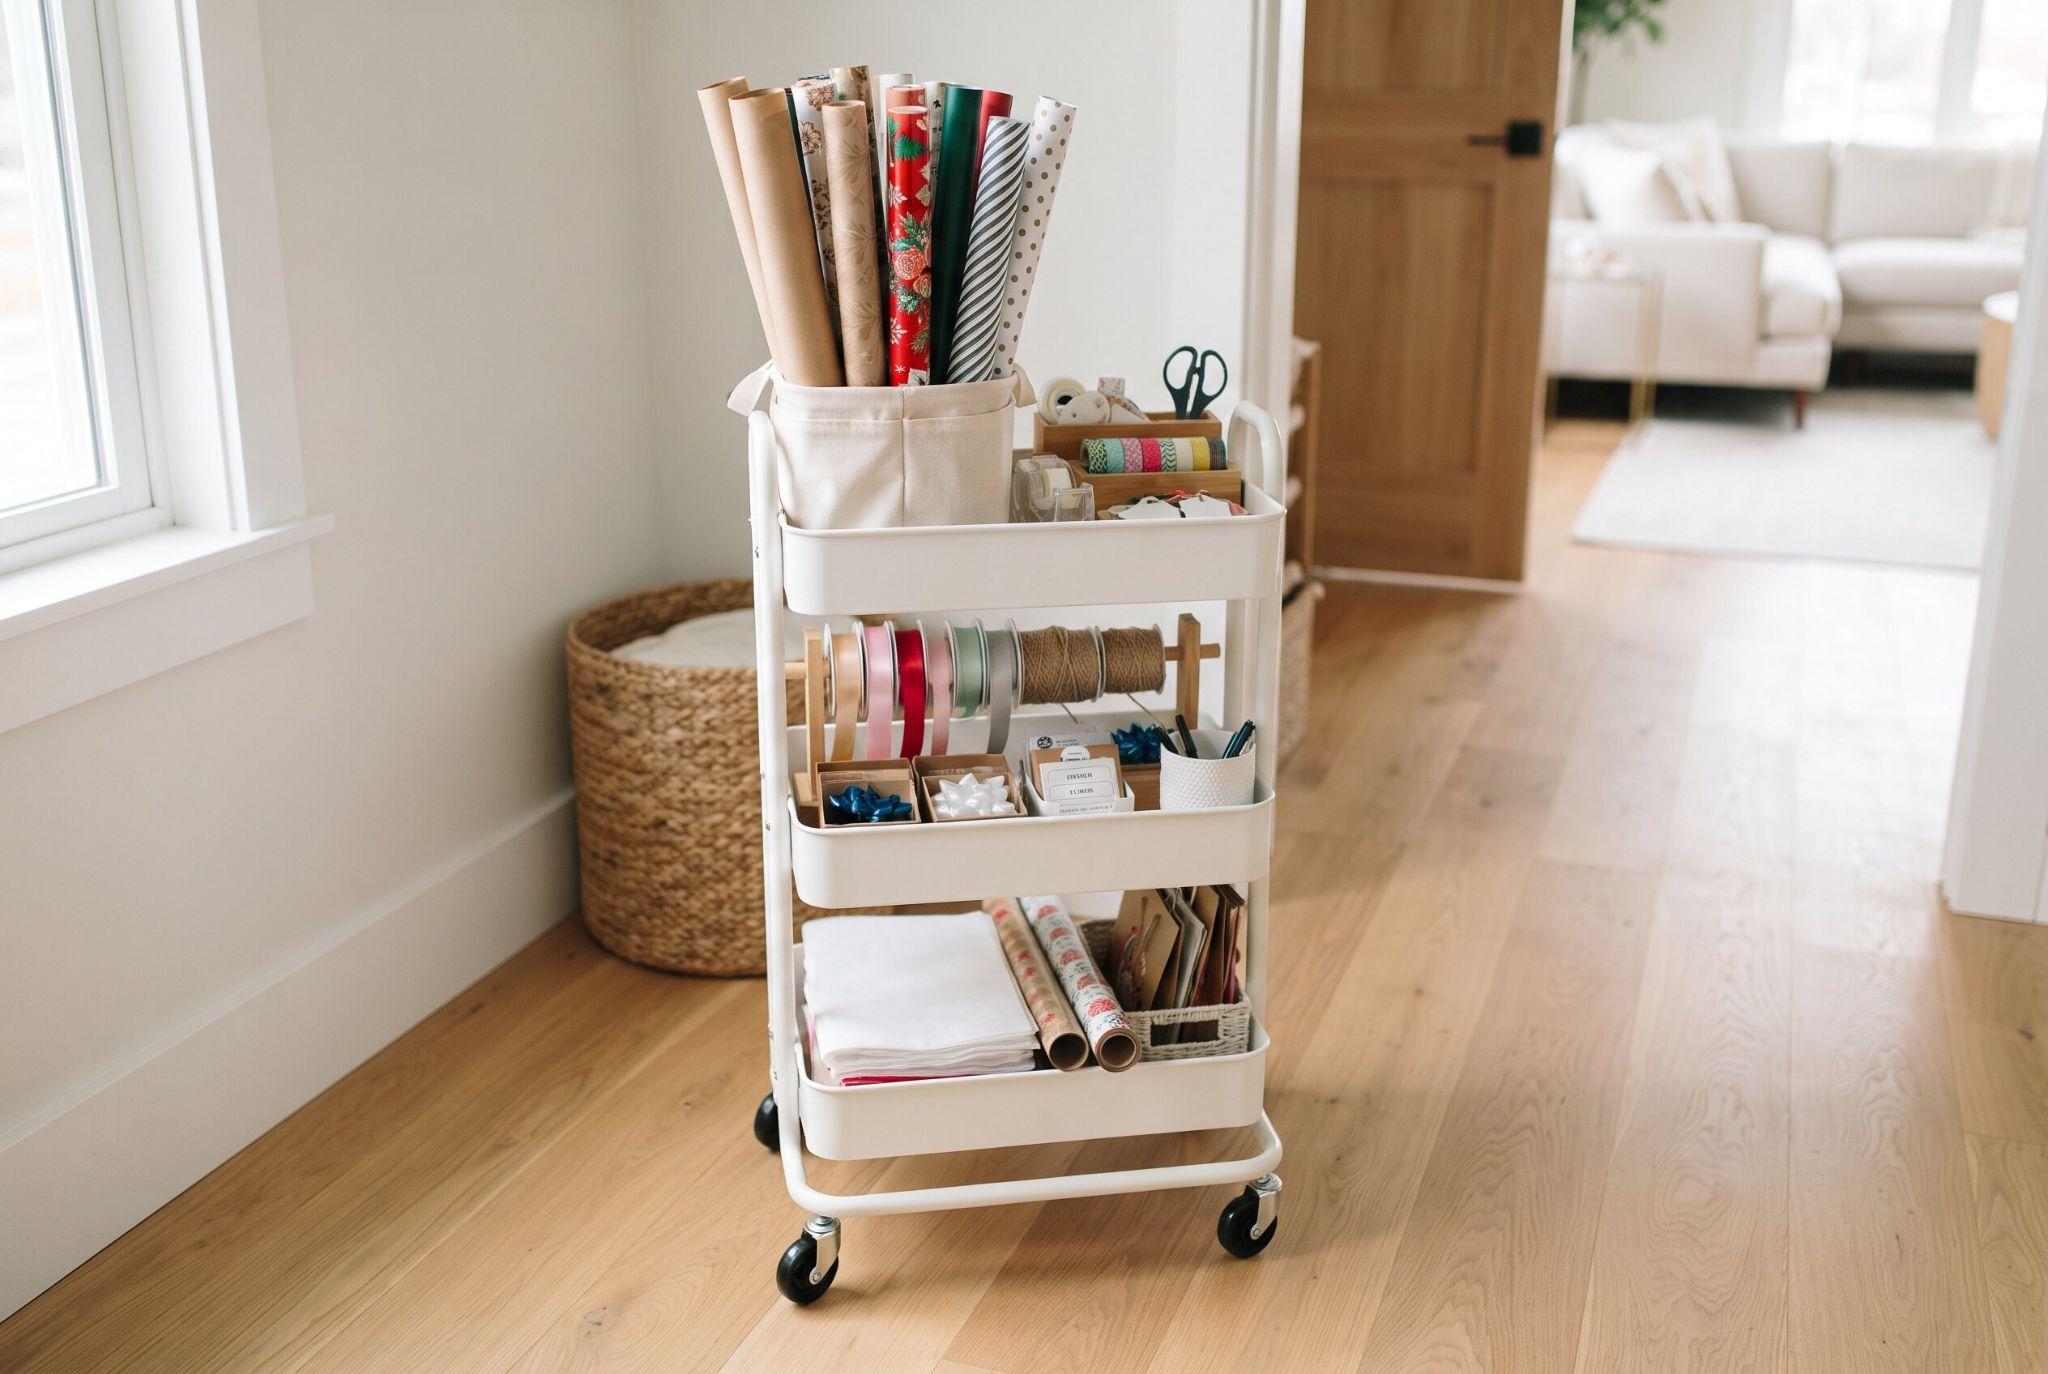
A three-tier rolling cart, roughly 12 by 16 inches per shelf, consolidates paper, scissors, tape, and ribbon spools into one mobile station rather than four separate drawers. Wheel it from a bedroom into the living room while wrapping gifts on the floor, then push it back into a closet corner the moment the job wraps up, literally and figuratively.
4. Clear Tall Trash Cans in a Closet Corner
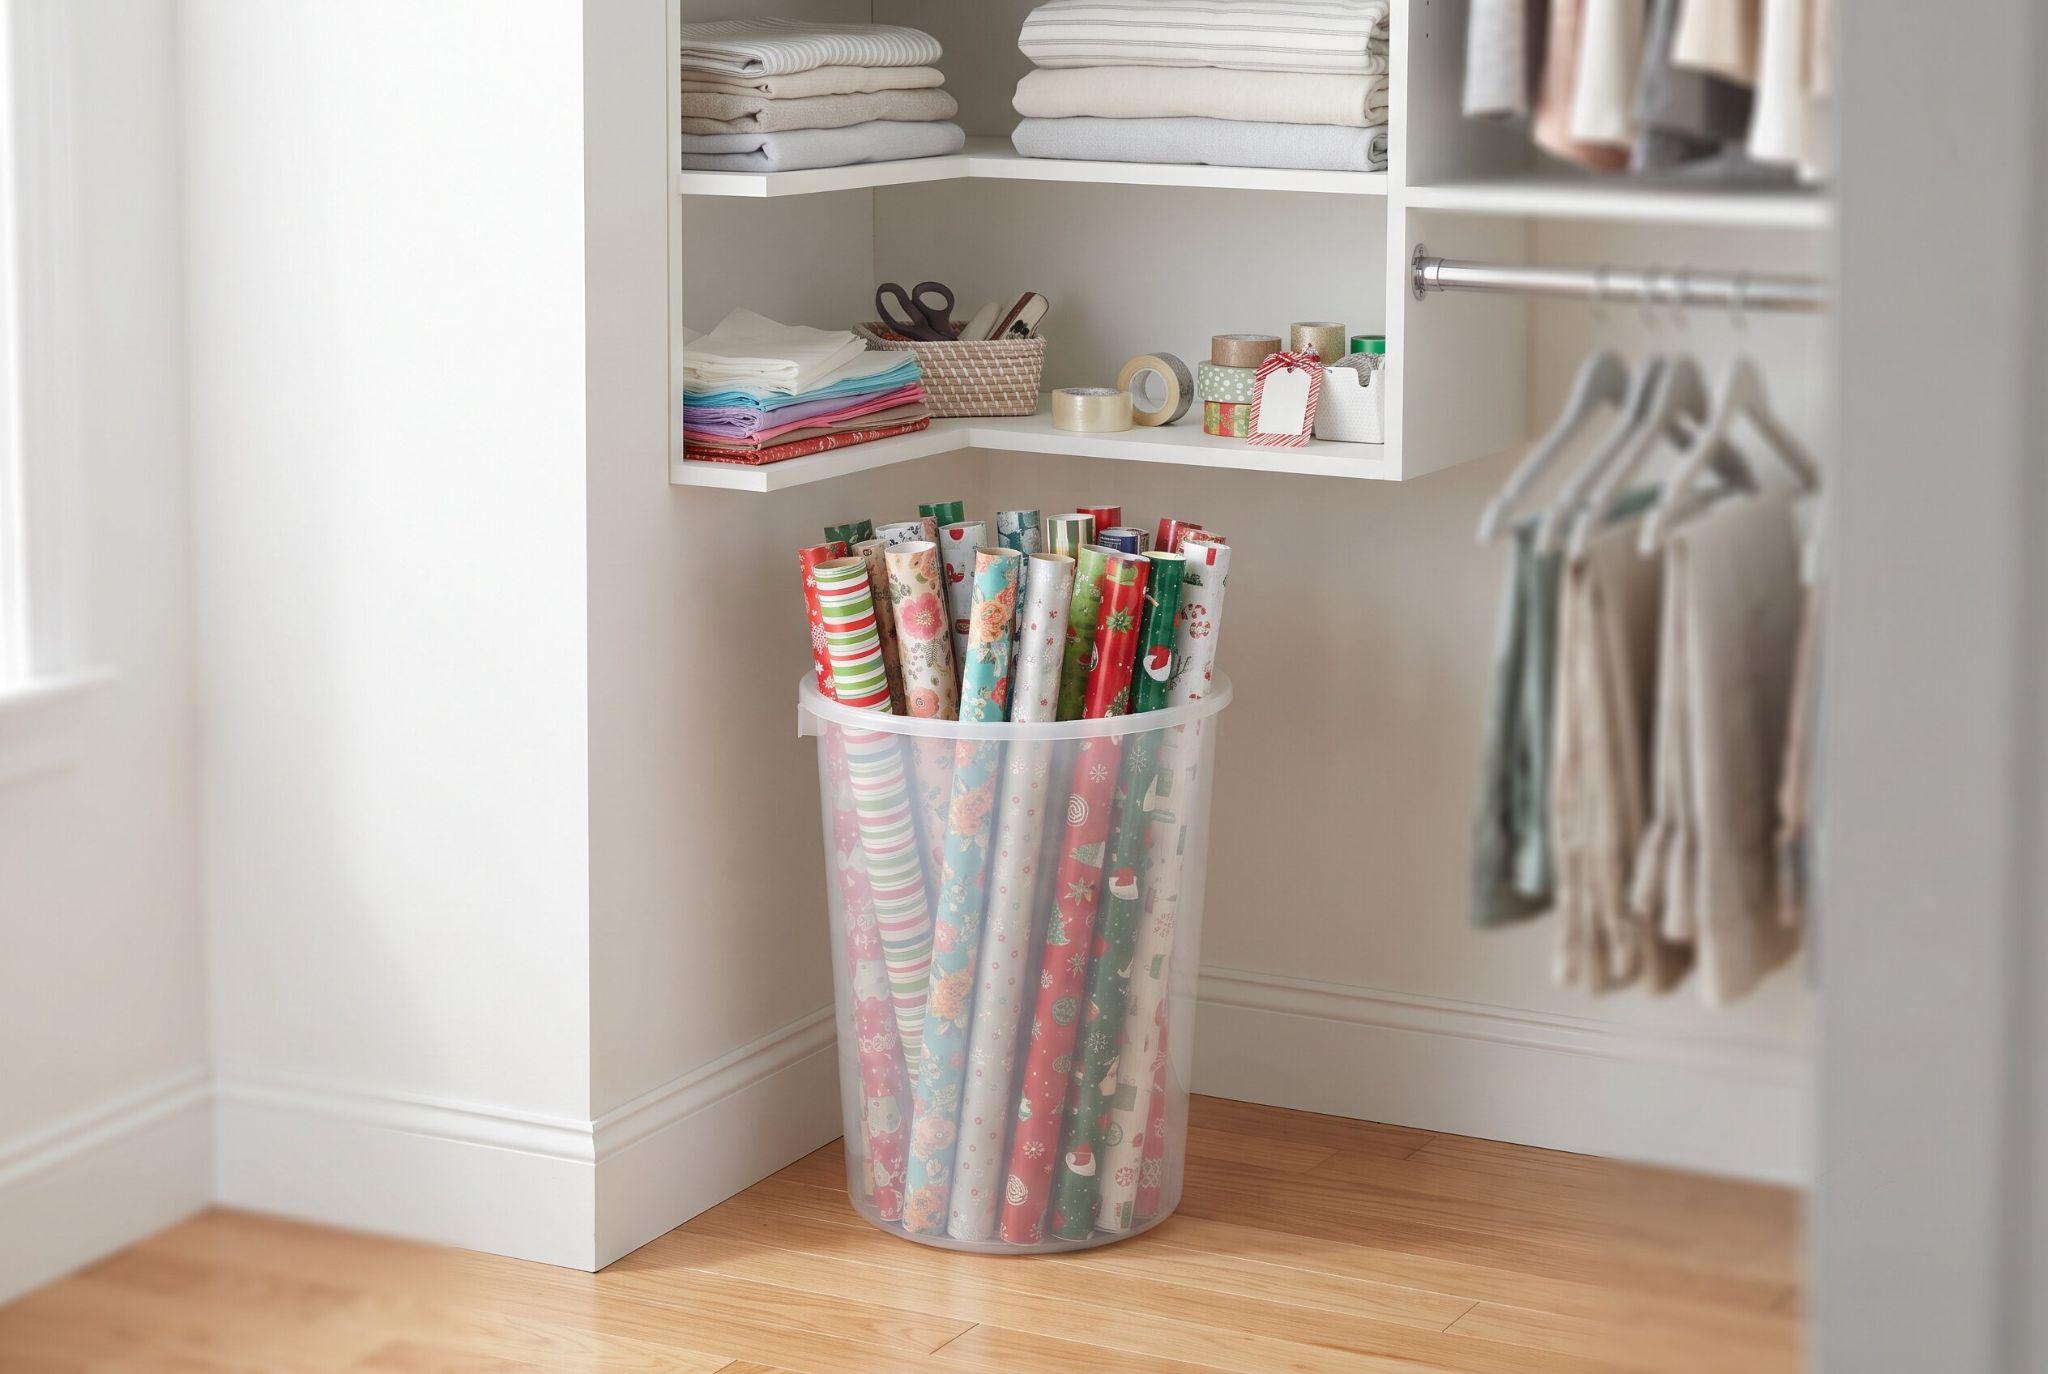
A clean 13-gallon trash can, stood upright in an unused closet corner, holds up to a dozen rolls standing on end without a single dollar spent on a specialty product. Clear plastic versions in particular make it easy to spot which pattern sits where without pulling every single roll out first, and a can this size costs a fraction of a purpose-built organizer.
Zero-Dollar DIY Storage Hacks
5. Toilet Paper Roll Cuffs
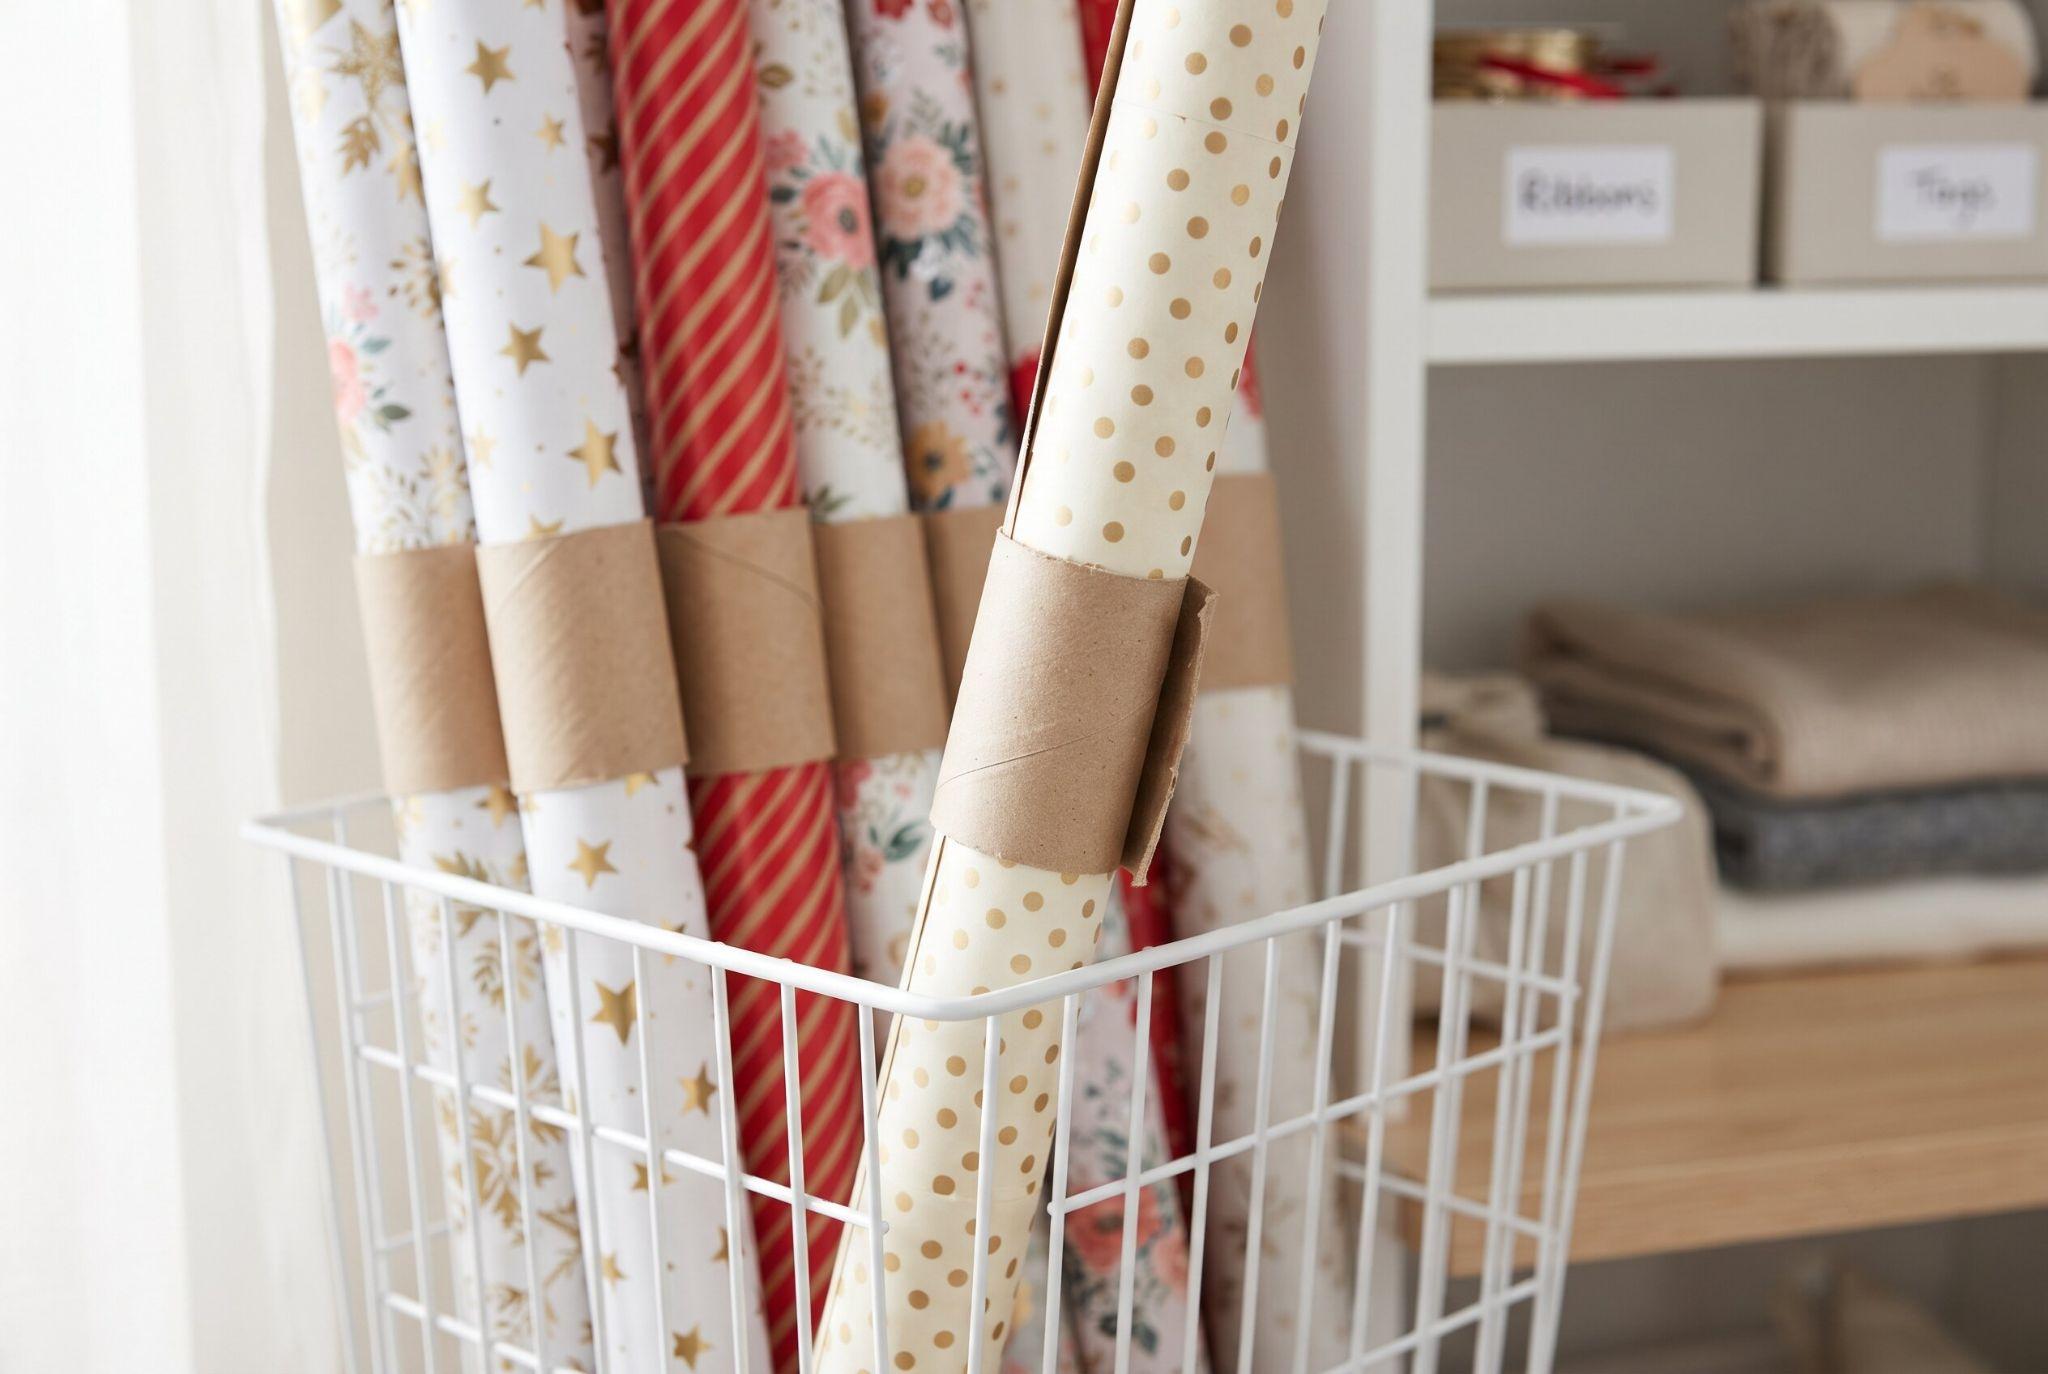
Cut an empty cardboard toilet paper tube lengthwise down one side, then slide it open and clip it around the open end of a paper roll like a cuff. That single cardboard ring keeps the roll from unraveling in storage and prevents the torn, sticky edges that come from taping paper directly to itself, all without spending a cent or leaving residue behind.
6. Upcycled Garment Bags
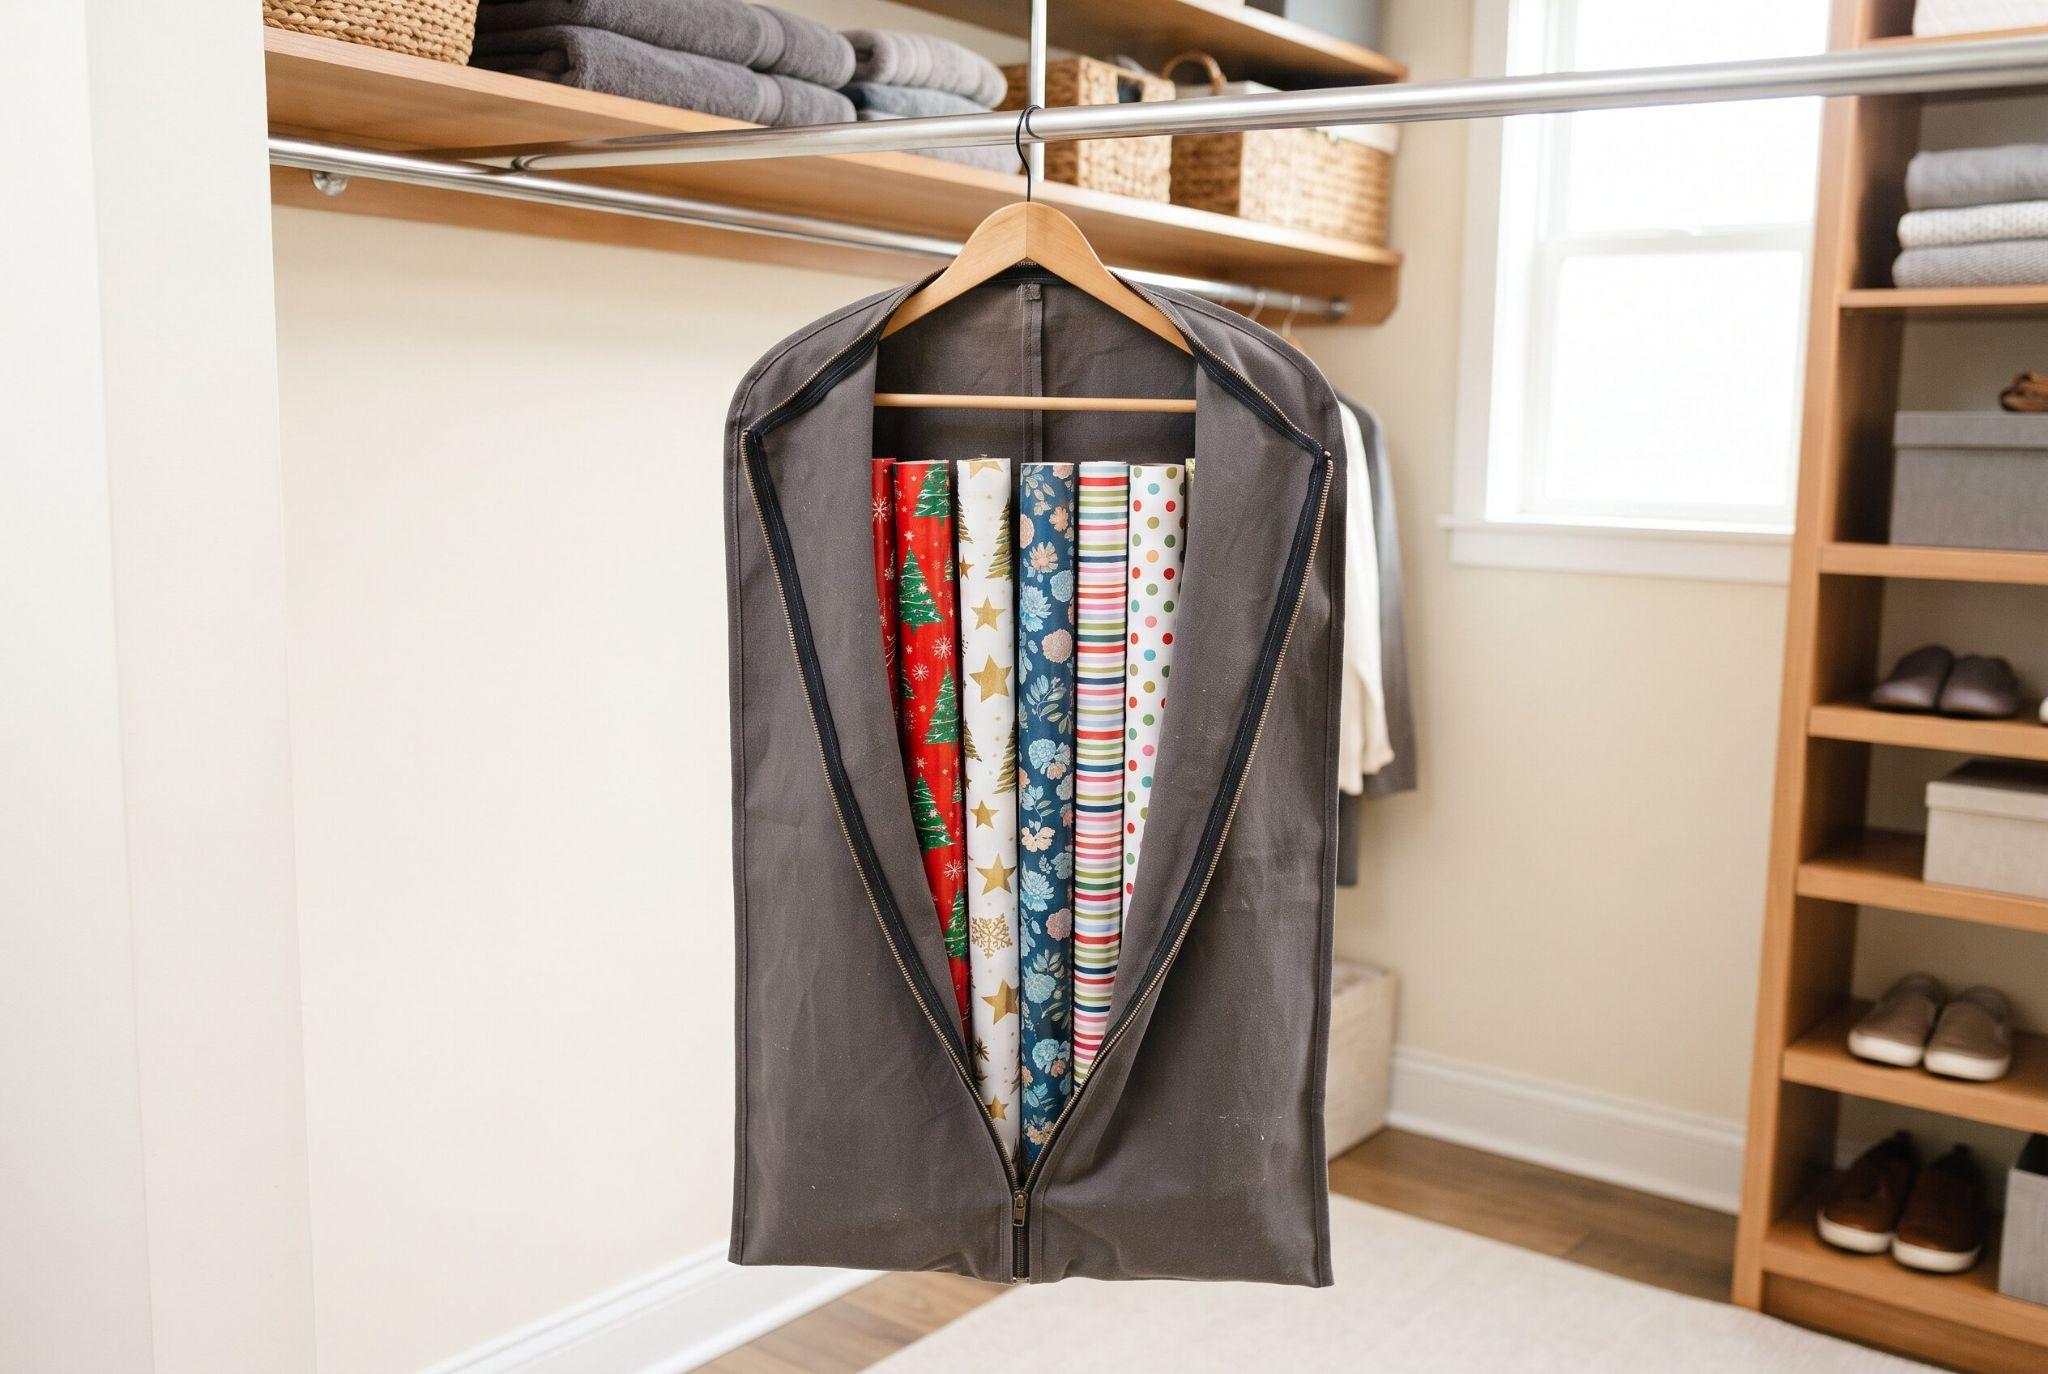
An old suit or dress garment bag, the zippered kind gathering dust in the back of a closet, holds four to six rolls standing upright when hung from a single sturdy hanger. It’s DIY storage in its simplest form: reusing something already sitting around instead of buying something new that does the exact same job.
7. Tension Rods in Dead Corners
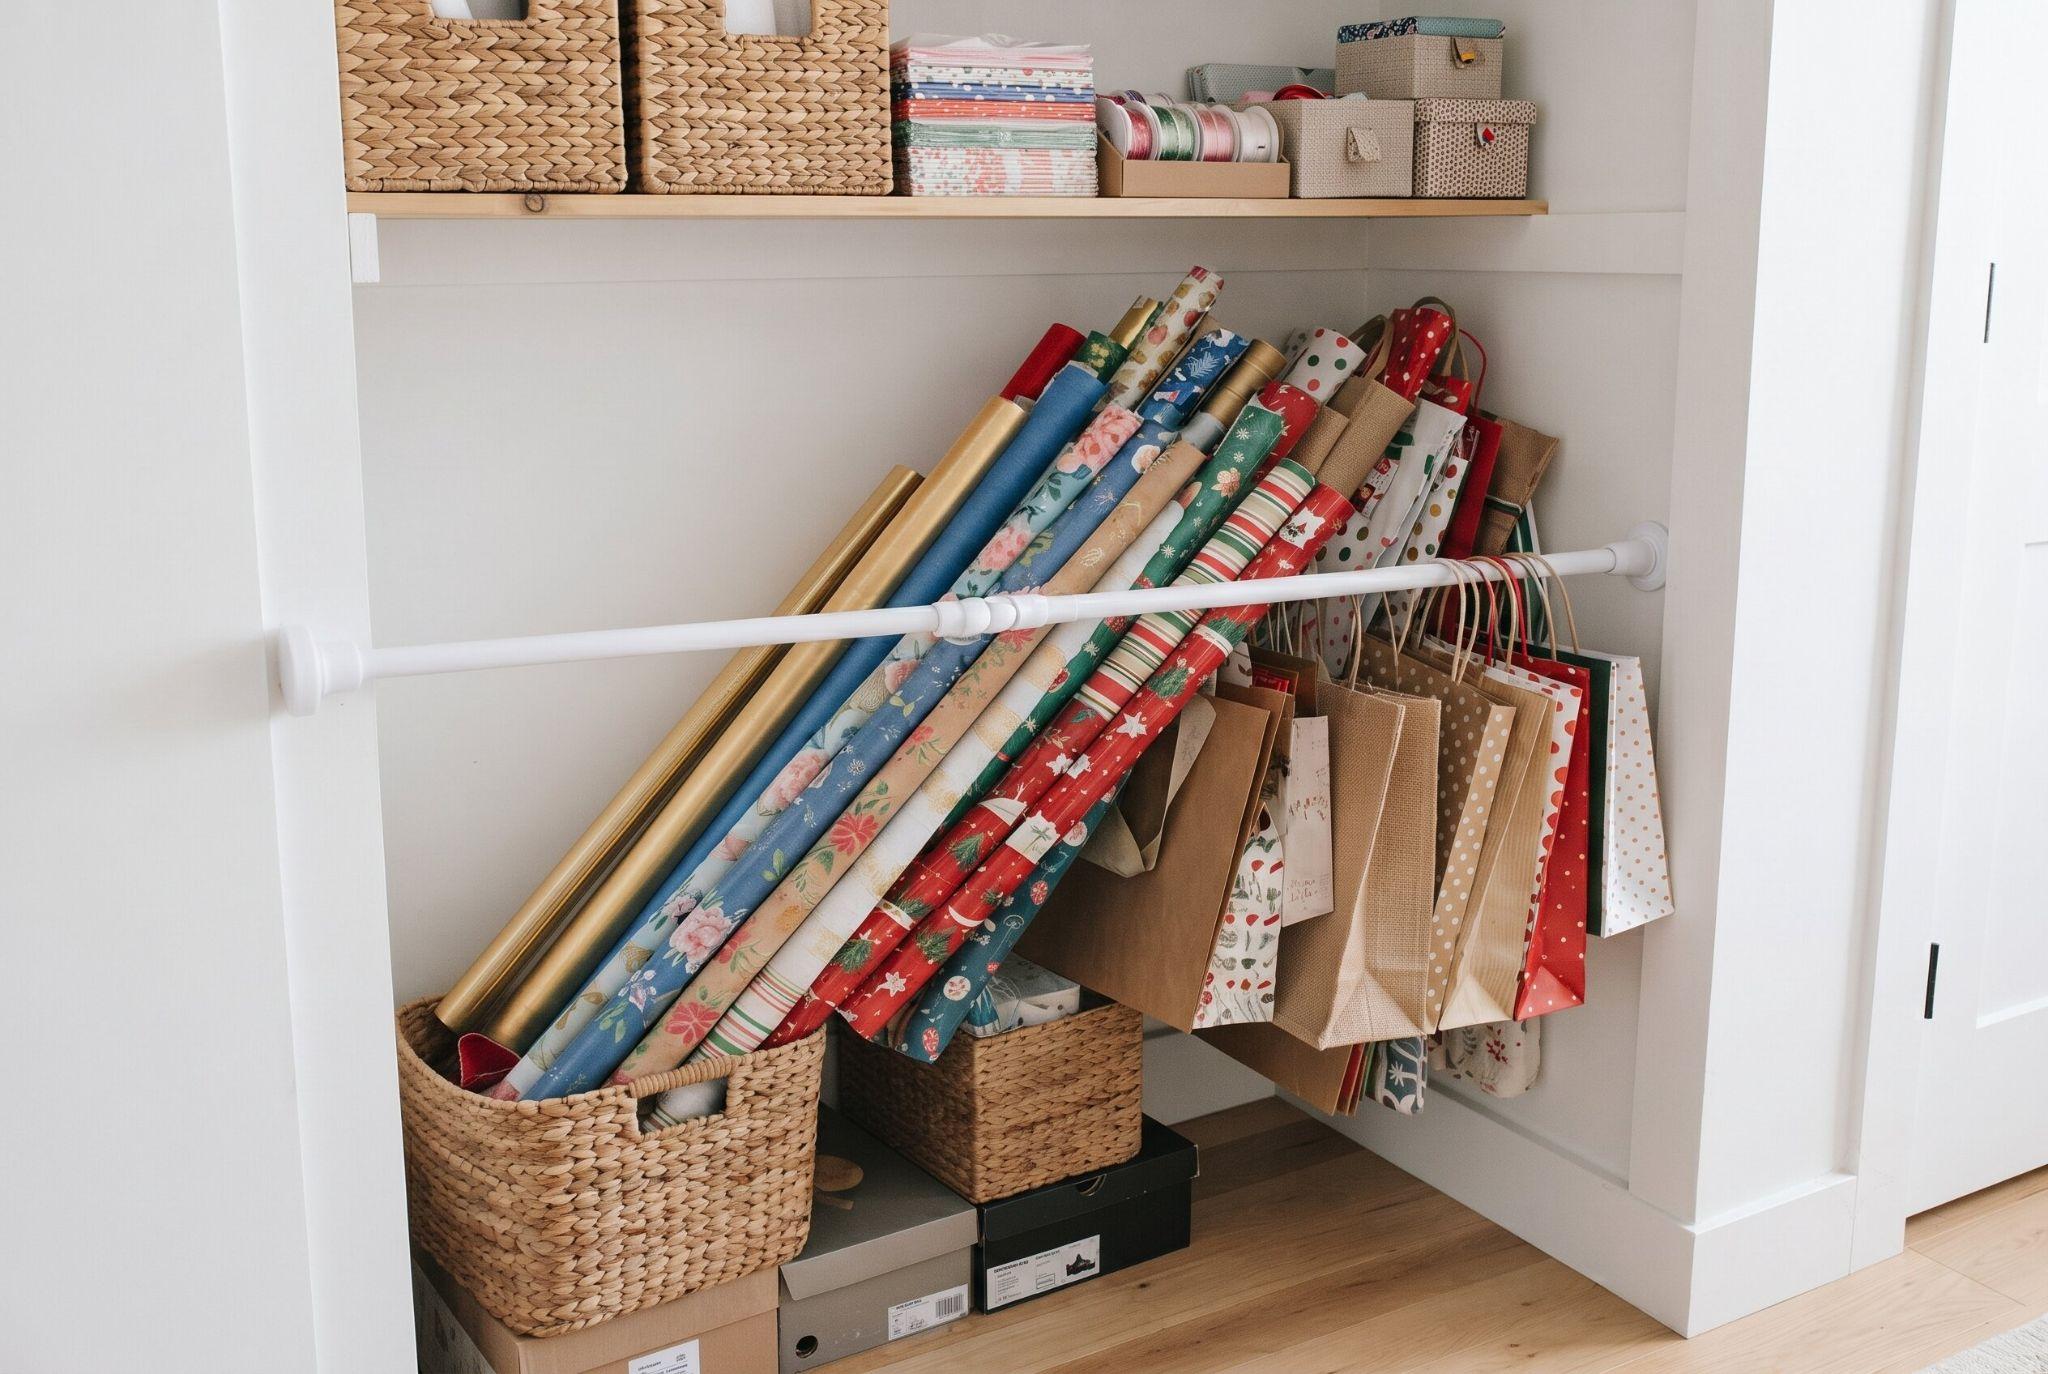
A spring-loaded curtain rod, roughly 28 to 48 inches depending on the gap, mounted diagonally across an awkward closet corner creates an instant mini rack for rolls to lean against at an angle. Installation takes about two minutes with no drilling required, and the whole setup costs less than a single specialty organizer sold online.
Organizing the Extras: Ribbon, Bags, and Tags
8. File Organizers for Gift Bags
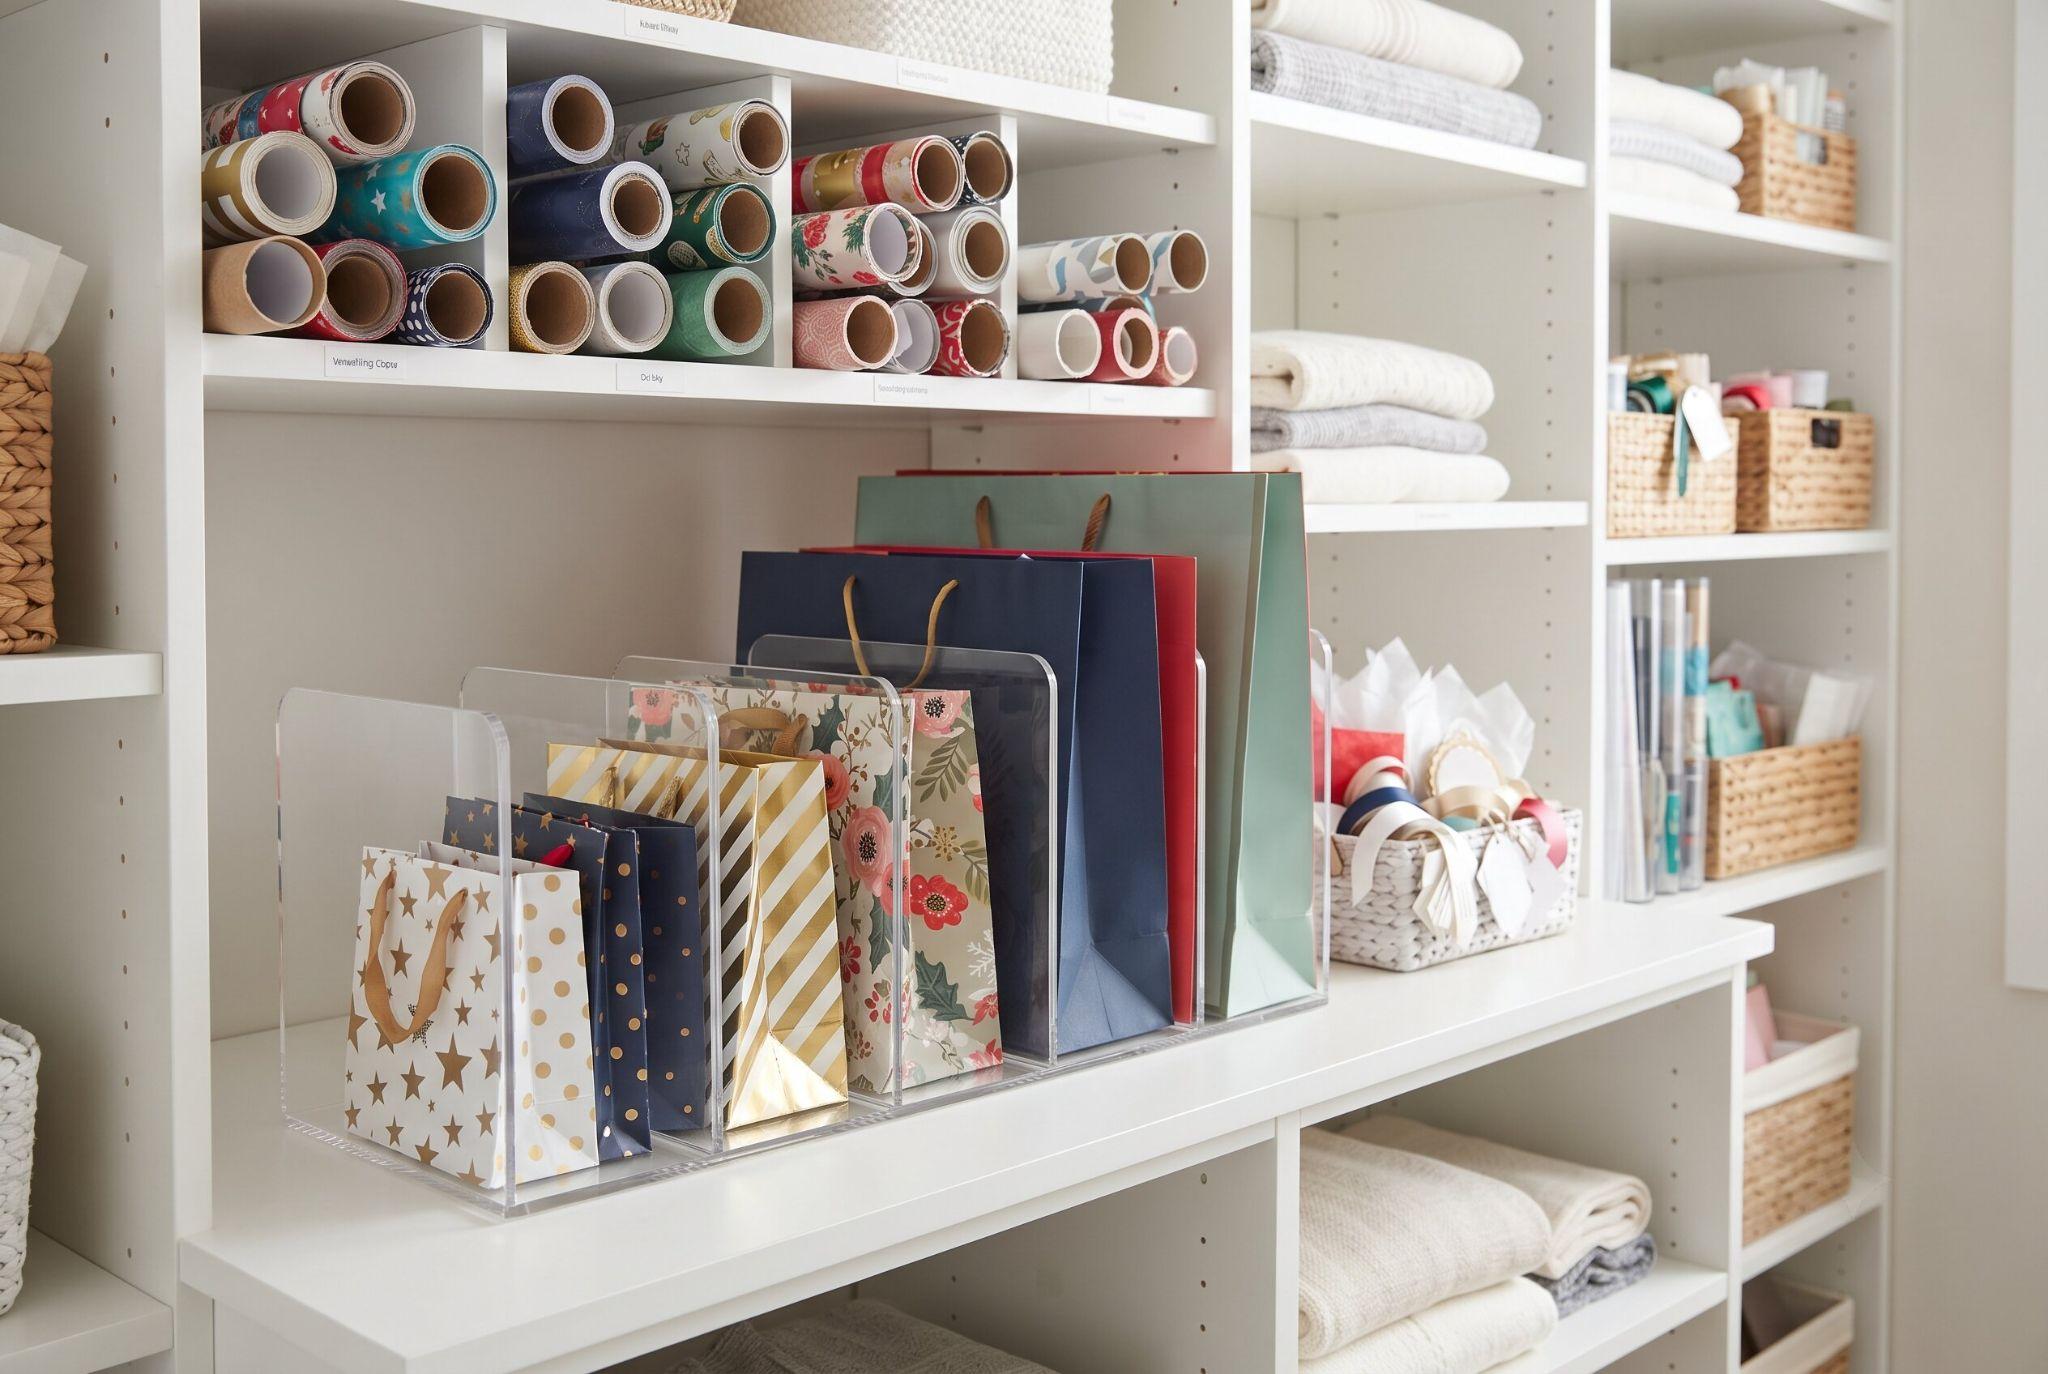
Treating gift bags like paperwork tends to work best. Standing them upright in an acrylic file organizer with three or four wide slots, sorted small to large, keeps every bag crease-free and grabbable in seconds rather than buried under a pile where the handles get bent.
9. The Shoebox Ribbon Dispenser
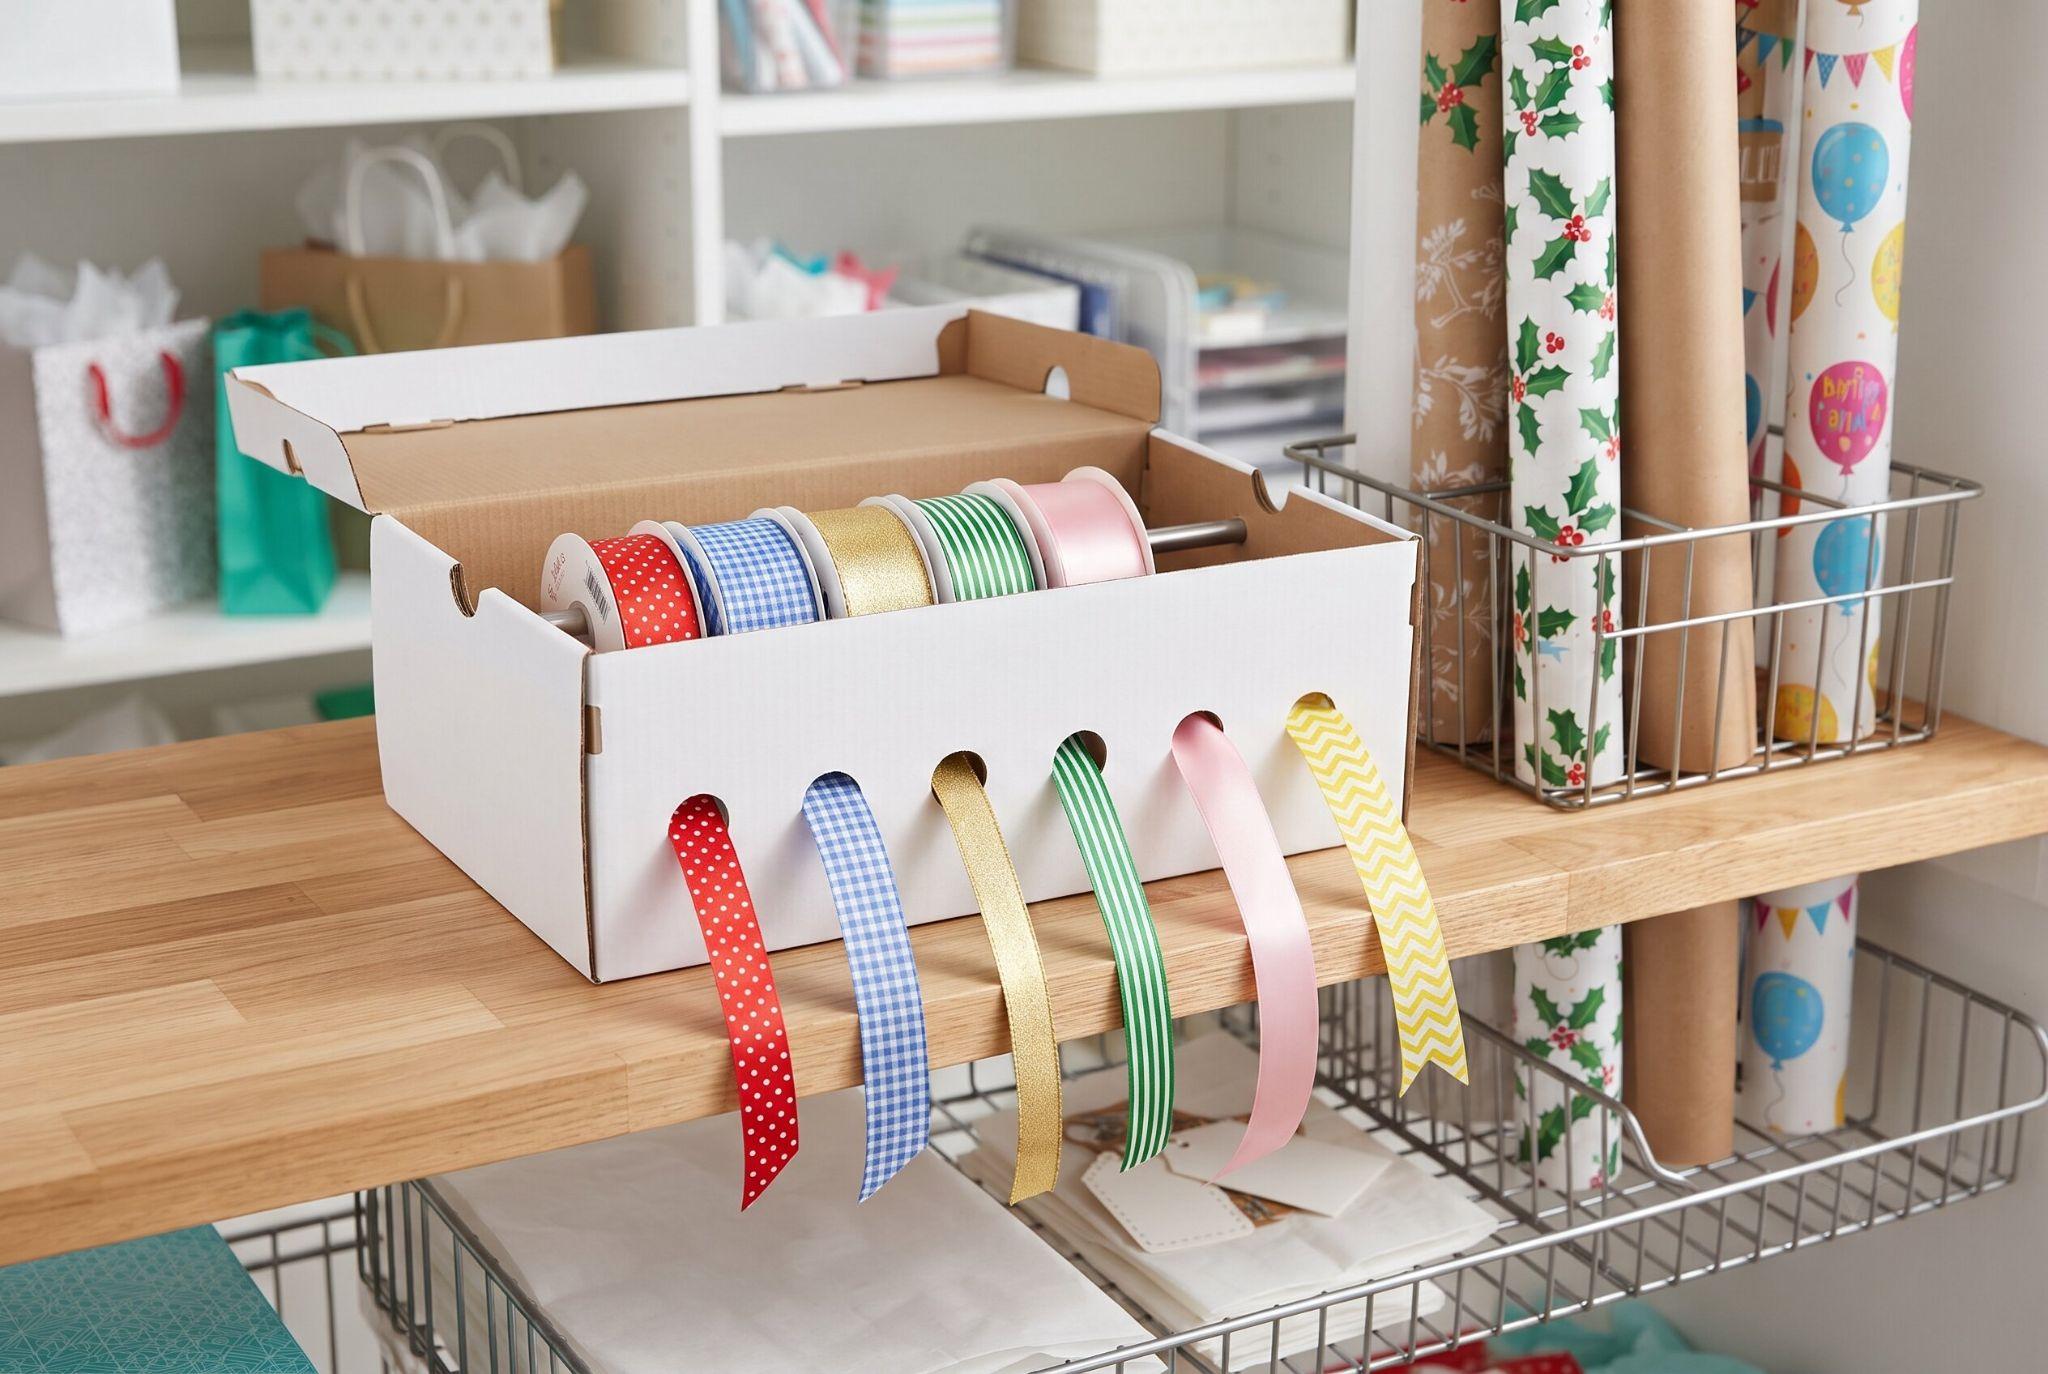
Punch a row of five or six small holes along one long side of an empty shoebox, spacing them about two inches apart, then thread each ribbon spool through its own hole with the loose end pulled through. Pulling ribbon straight out through the hole keeps every spool from unraveling into a tangled mess, and the whole setup takes under ten minutes. If your ribbon shares space with other craft supplies, these craft corner organization ideas can help keep everything together.
10. Zippered Pouches for Tissue Paper
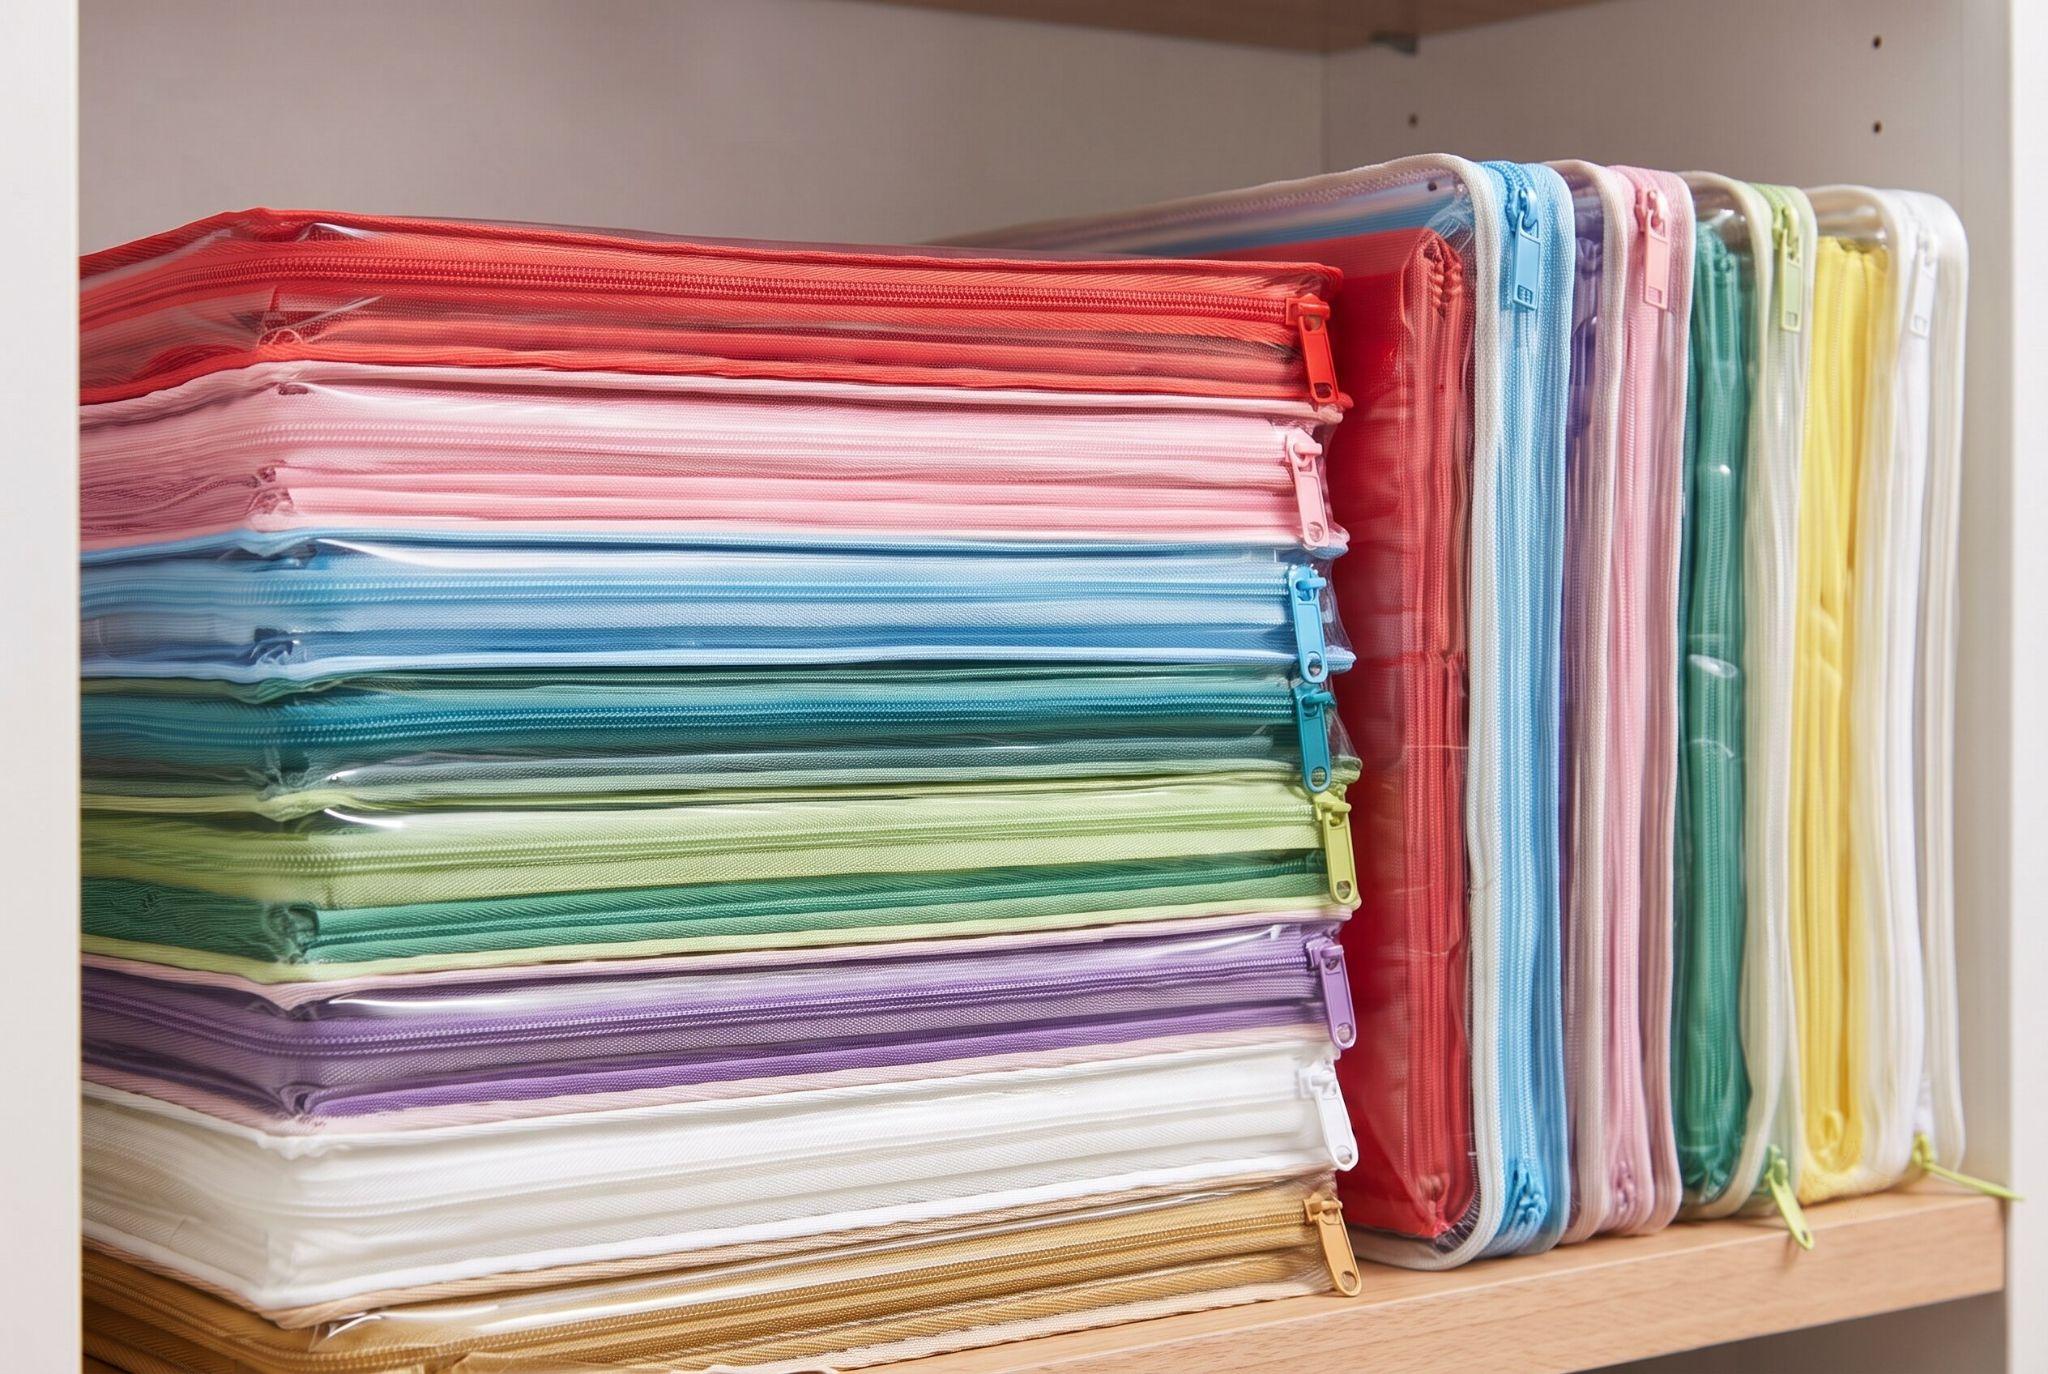
Flat zippered document pouches, the kind sized for A4 or letter paper, work just as well for sorting tissue paper by color, holding a stack roughly an inch thick per pouch. Zipping them shut also blocks the humidity that leaves stored tissue paper feeling musty and limp by the time it gets pulled out again. The flat pouches also stack neatly in a drawer, and these drawer organization hacks help keep them from sliding around.
11. Aesthetic Labeling for Everything
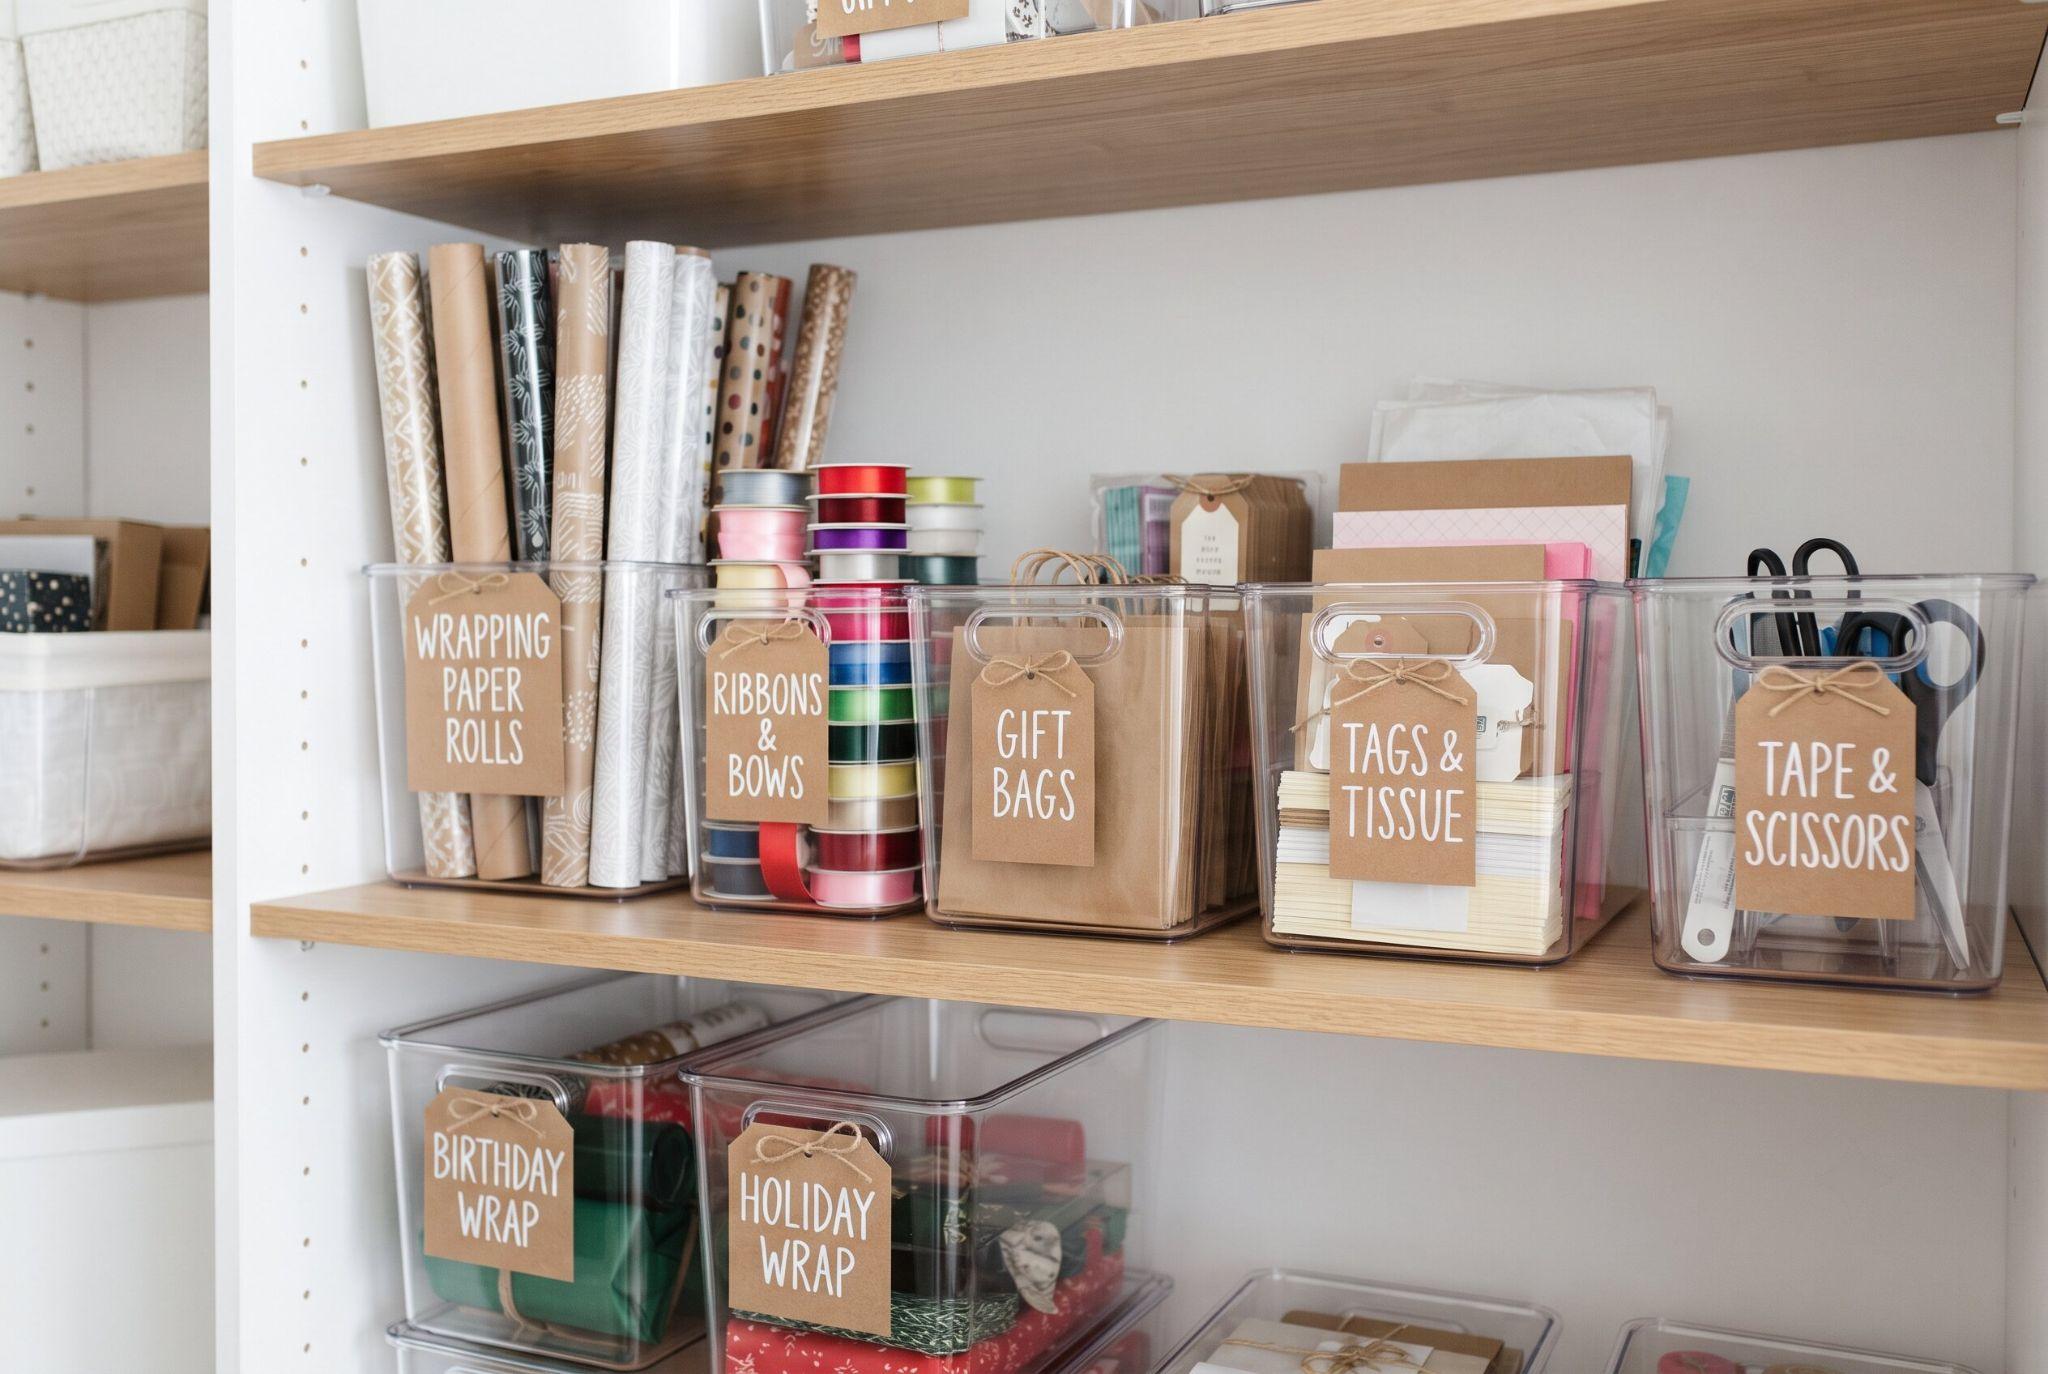
A label maker, or a simple hand-lettered tag on cardstock, turns gift wrap organization from a guessing game into a system that survives contact with next year’s rush. Labeling by category, paper, ribbon, bags, tags, means nobody has to reopen five containers just to track down a roll of tape.
More Quick Ideas
Pegboard gift wrap station. A pegboard mounted on a wall or inside a closet door turns into a full wrapping station. Use pegboard hooks or a pair of dowels to hold rolls, hang ribbon spools on a peg rod, and clip small baskets on for tape, scissors, and tags.
A dowel rod under a shelf. Mount a wooden dowel between two small brackets on the underside of a closet or craft shelf, then slide ribbon spools onto it. Each spool unrolls freely, and the ribbon stays off the shelf below.
A tall basket or umbrella stand. A tall woven basket or an umbrella stand holds rolls upright in a corner of the room where you usually wrap, and it looks tidy enough to leave out during the holiday season.
An over-the-door shoe organizer. Clear shoe pockets make handy slots for gift tags, bows, tape, scissors, and small ribbon spools, all visible at a glance on the back of a door.
Where (and How) to Store Wrapping Paper
Keep it indoors. Attics and garages swing between heat, cold, and humidity, which can curl paper, fade colors, and make tape and bows gummy. An interior closet, the space under a bed, or a spare cabinet keeps supplies in better shape.
Stand rolls upright. Storing rolls on end puts the weight on the strong cardboard core instead of the paper, so they don’t flatten. If rolls have to lie down, keep them in a single layer and support them along their full length.
Secure half-used rolls. Slide a cardboard cuff or a plastic roll sleeve over each partly used roll so the loose end can’t unravel or tear, and avoid taping paper to itself, which leaves sticky, ripped edges.
Keep the tools together. Store tape, scissors, and a pen for tags with the paper so the whole kit is ready when you need it.
FAQ
How do you store wrapping paper without crushing it?
Cardboard cuffs at the roll ends, combined with a rigid-sided tote rather than a soft bag, solve this almost completely, since crushing nearly always comes from loose rolls shifting and knocking against each other inside flimsy packaging.
What’s the best way to store wrapping paper in a small apartment?
Vertical solutions win nearly every time, whether that’s an over-the-door rack using six inches of depth nobody else wants, or the flat, low-profile space under a bed frame that would otherwise sit completely empty year-round. For more space-saving ideas, see our guide to living in a one-bedroom apartment without feeling cramped.
How do you store half-used wrapping paper rolls?
Slip a cuff made from a cut toilet paper tube, or a store-bought roll sleeve, over the roll so the loose end stays tight. This keeps the edge from unrolling and tearing and avoids the sticky mess of taping paper to itself.
Should wrapping paper be stored vertically or horizontally?
Vertically is usually better. Standing rolls on end keeps pressure on the cardboard core and prevents flattening. If you store them horizontally, as in an under-bed tote, use one layer with dividers or straps so they can’t roll or stack.
Where should you not store wrapping paper?
Avoid attics, garages, and damp basements. Heat, cold, and humidity can curl and fade paper and make tape and bows sticky, so an indoor closet or under-bed space is a safer choice.
Conclusion
The best wrapping paper storage ideas are the ones that fit the space you actually have. A tote or a rack only solves half the problem. The other half comes from treating this as a short yearly reset rather than a one-time purchase. Setting aside thirty minutes to sort, purge, and put everything back exactly where it belongs turns next year’s wrapping session into something closer to enjoyable, rather than another scavenger hunt through closets, drawers, and that one box nobody remembers packing.