

Baseboards often bear the brunt of daily household activity, enduring scuffs from toddlers playing with toys or pets brushing against the wood. These essential architectural details can quickly become a source of frustration when they appear dingy or damaged. A fresh coat of paint provides a high-impact, low-cost refresh that can make an entire room feel brand new.
While the task might seem daunting for those unfamiliar with home improvement, utilizing a few professional methods makes the process much more manageable. Understanding how to paint baseboards effectively involves a transition from frantic scrubbing to methodical application. This guide explores the best strategies for achieving a professional baseboard finish without the need for expert hiring in many cases.
The Golden Rule of Prep: Cleaning and Repairs
Industry experts frequently emphasize that approximately 70% of a high-quality paint job is determined during the preparation phase. Skipping these initial steps often leads to peeling or an uneven surface that highlights every imperfection in the wood.
Mastering the Initial Clean

Removing years of accumulated dust and grease is the first priority. The best way to clean baseboards involves more than a quick wipe with a dry cloth. Using a dedicated baseboard cleaner or a solution of warm water and mild detergent ensures that the paint can adhere properly to the surface.
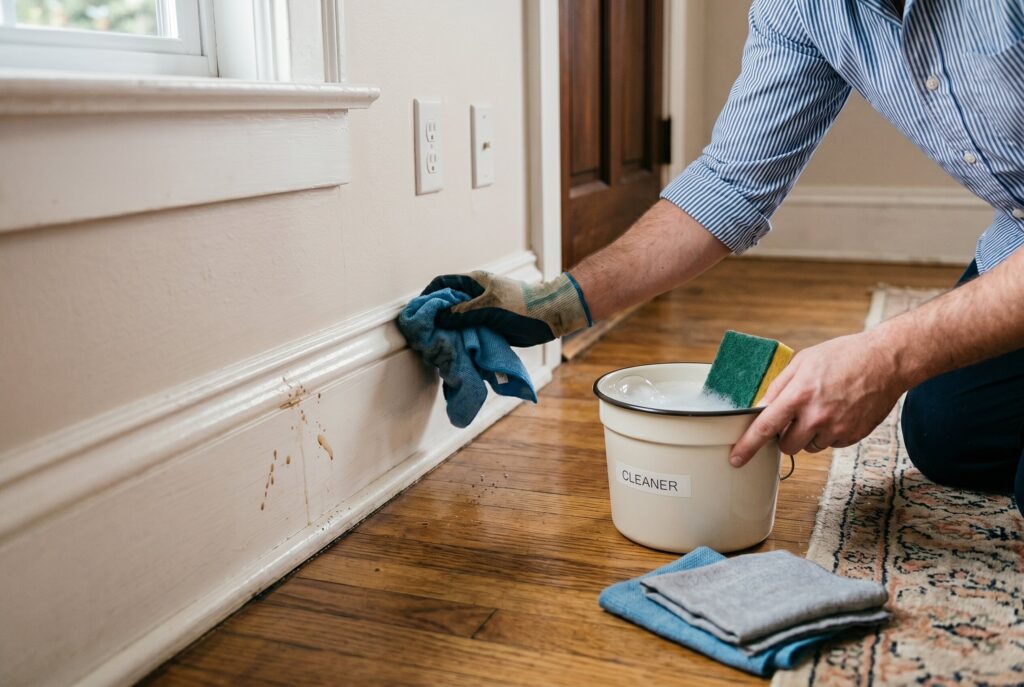
For those looking to streamline the process, a specialized baseboard cleaning tool helps reach tight corners and reduces physical strain. Learning how to clean baseboards thoroughly sets the foundation for every subsequent step in the project.
Patching and Structural Repairs
Once the surfaces are clean and dry, the focus shifts to repairing physical damage. Small holes left by finishing nails or cracks caused by seasonal shifts require attention.
Utilizing a high-quality wood filler or spackle is necessary to create a smooth canvas. After the filler has cured, sanding with a fine-grit sandpaper (typically 220-grit) creates a level surface and provides “tooth” for the new baseboard paint to grip. This step is especially critical when painting pine boards, as natural wood often has more texture than pre-primed alternatives.
The Professional Secret: Caulking
A common oversight in DIY baseboard painting is the omission of caulk. Applying a thin bead of paintable latex caulk along the gap where the baseboard meets the wall creates a seamless transition.
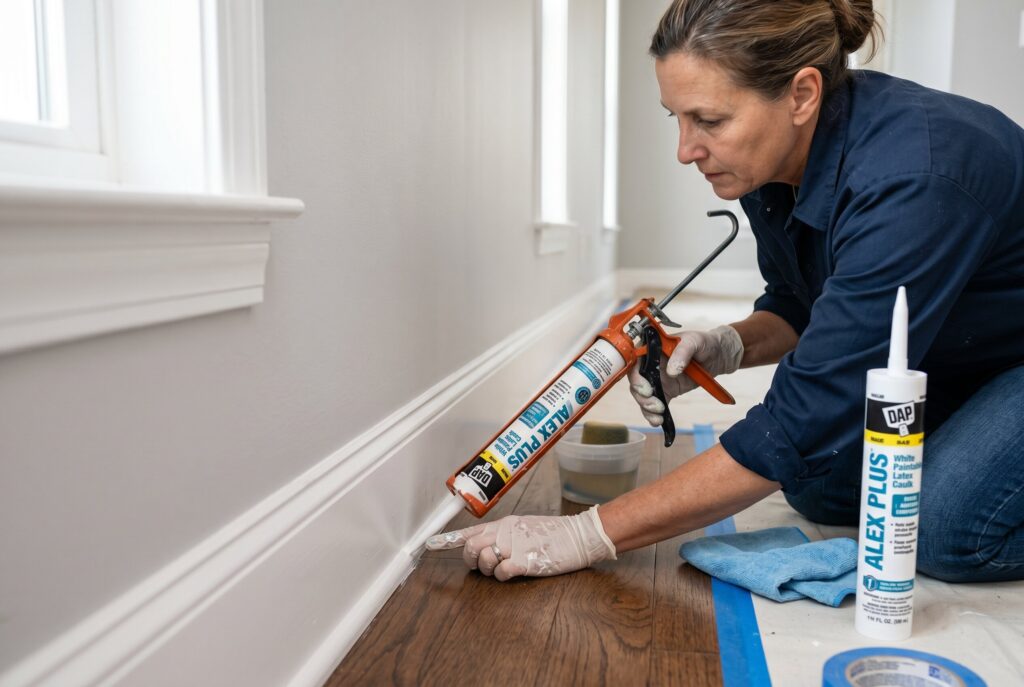
This technique hides the dark shadow line often found in older homes and results in a crisp, integrated look. However, it is vital to ensure the caulk is specifically labeled as “paintable,” as silicone-based products will repel water-based paints.
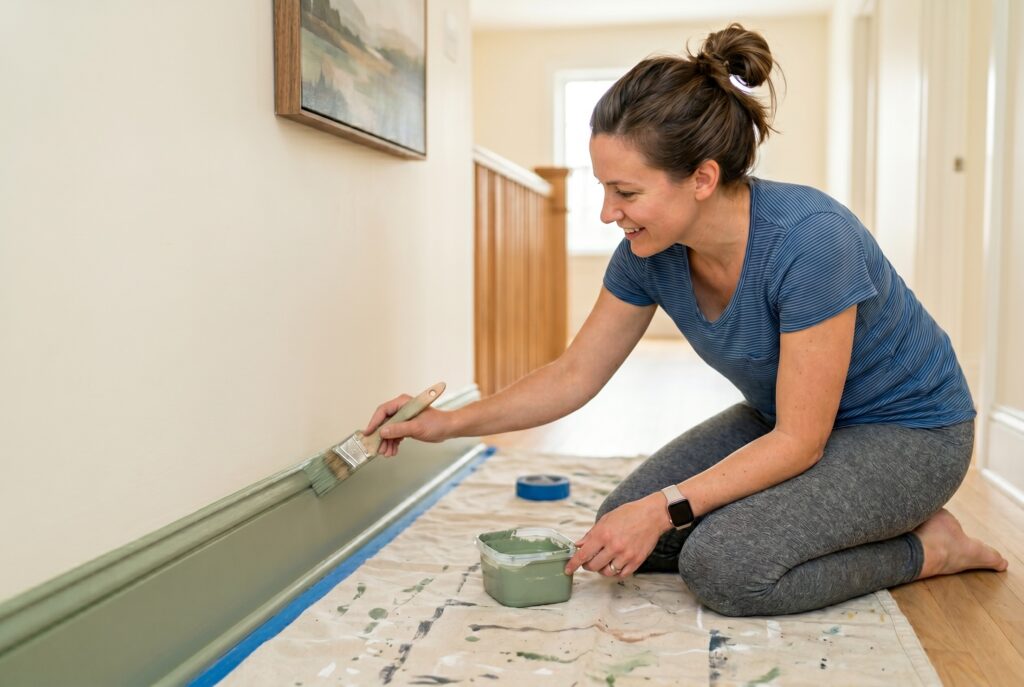
3 Painting “Hacks” for Every Floor Type
Achieving clean lines depends heavily on the type of flooring adjacent to the trim. Different surfaces require unique protection strategies to prevent messy edges.
1. The “Caulk-and-Peel” for Hard Floors
On hardwood, tile, or laminate surfaces, a specific methodology known as the “caulk-and-peel” trick offers superior results. After applying high-quality painter’s tape approximately 1/8 inch away from the trim, a putty knife is used to seal the tape firmly against the floor.
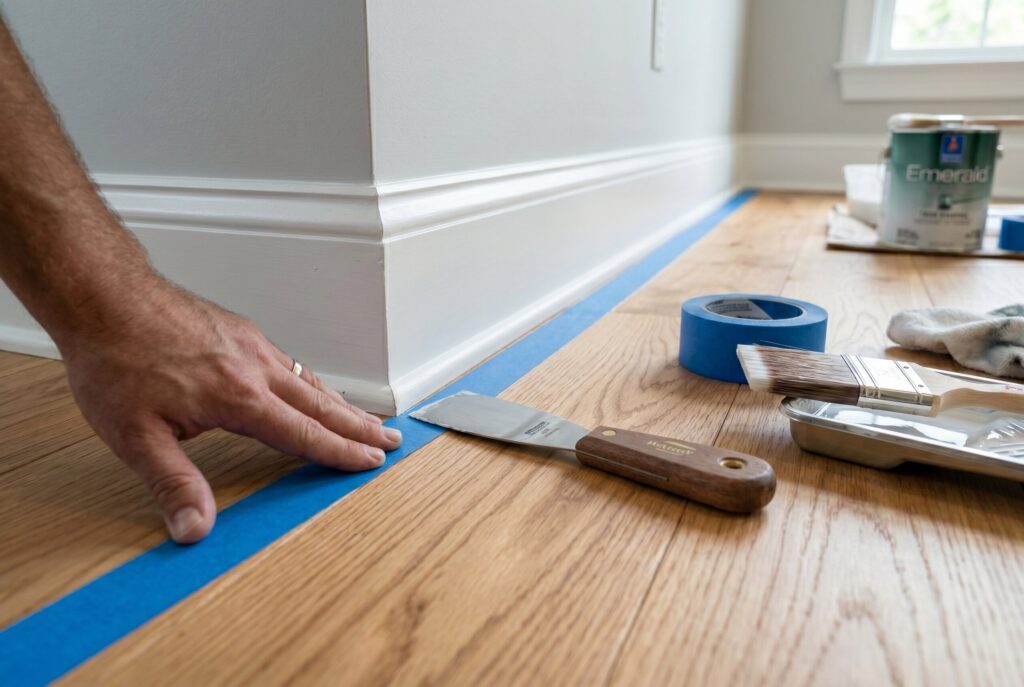
A very thin layer of caulk is then applied over the edge of the tape to prevent paint bleed. The key is to remove the tape while the paint is still slightly wet, which results in a razor-sharp line.
2. Painting Baseboards with Carpet
The prospect of painting baseboards with carpet is often the most intimidating part of a room refresh. Traditional taping often fails here because carpet fibers can pop up and touch the wet paint.

A more effective “hack” involves using a wide drywall knife or a dedicated paint shield. By pressing the blade down into the carpet to depress the fibers, a temporary barrier is created. The paint is applied above the blade, which is then wiped clean and moved along the floor as the work progresses.
3. Navigating Corners and Moulding
When the project includes painting quarter round or painting shoe moulding, a standard brush can sometimes be too cumbersome.
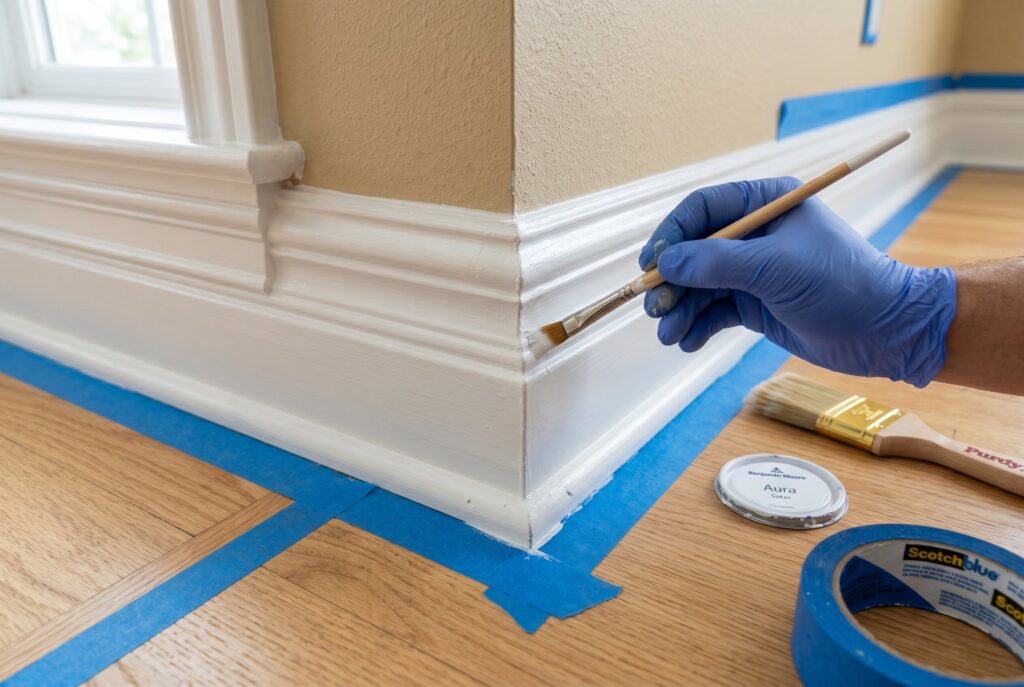
For these small, curved surfaces, using a smaller artist-style brush or even a gloved finger to smooth paint into tight crevices can ensure full coverage. This level of detail is what separates an average job from a professional baseboard finish.
Choosing Materials: Sheens, Tools, and Modern Trends
The selection of materials significantly impacts both the application process and the long-term durability of the work.
Selecting the Right Sheen
The choice between different levels of gloss is a primary decision in any painting trim project.
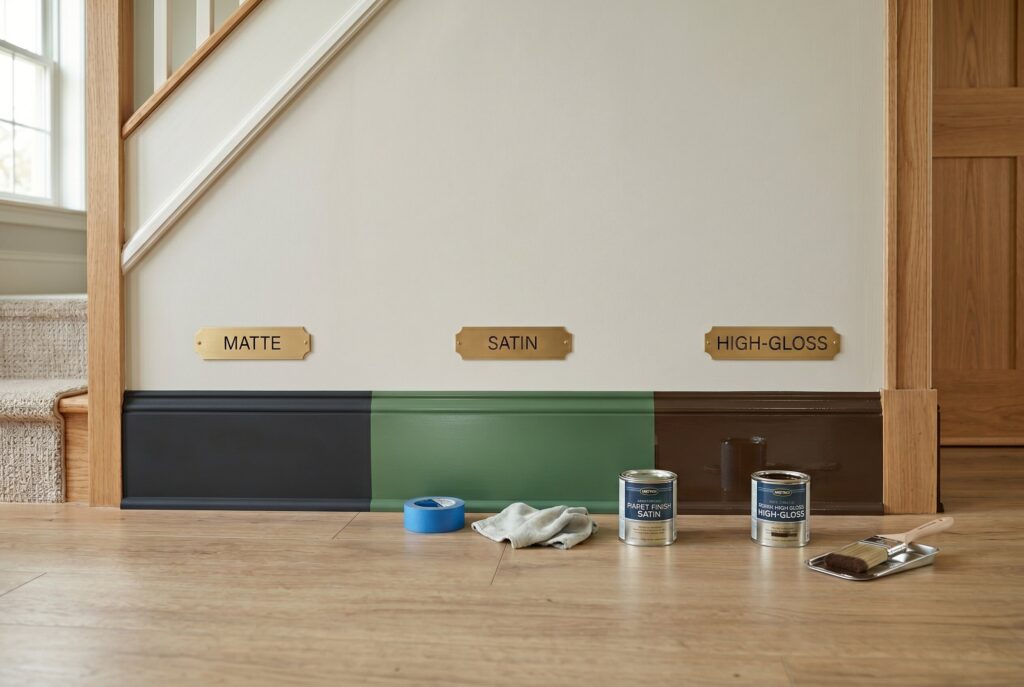
- Semi-Gloss: Historically the standard for baseboards due to its high durability and ease of cleaning. It resists moisture and stands up well to frequent vacuuming or mopping.
- Matte or Satin: A significant trend emerging in 2024 through 2026 involves moving toward flatter finishes. These sheens offer a more modern, sophisticated aesthetic and are better at concealing minor imperfections in the wood surface.
- High Gloss: While less common in modern residential design, it provides maximum light reflection and a traditional, high-contrast look.
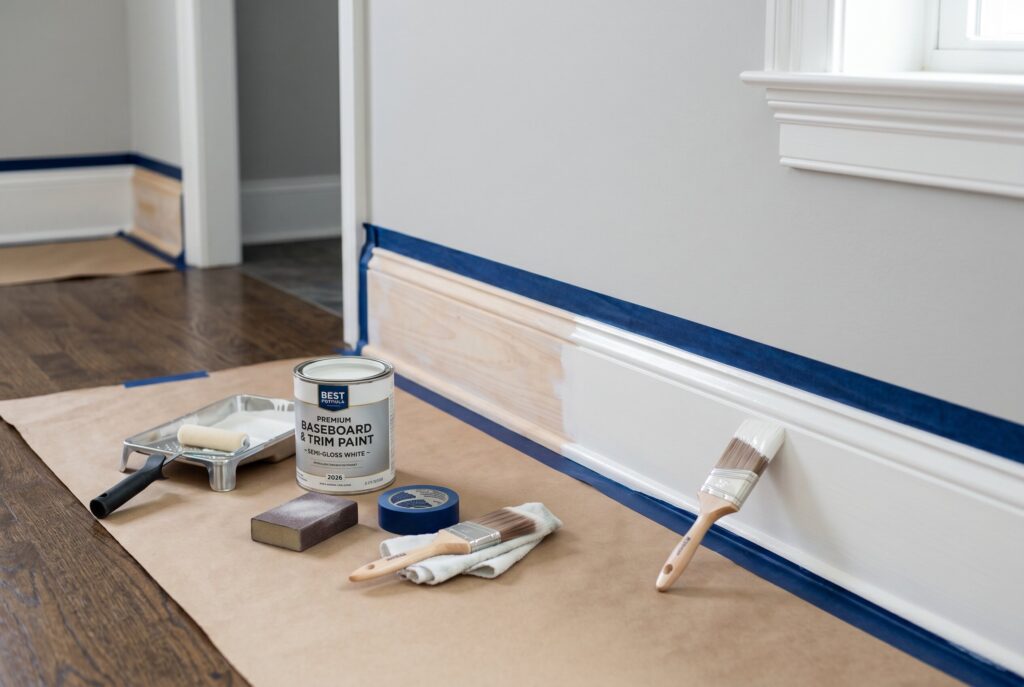
Essential Tool Recommendations
Utilizing the correct tools can significantly reduce the time spent on painting baseboards.
- Tapes: Brand-name products like FrogTape or ScotchBlue generally offer better adhesion and cleaner removal than generic alternatives.
- Containers: A HANDY Paint Pail with a built-in magnet to hold the brush is a helpful accessory for maintaining mobility during the project.
- Brushes: High-quality synthetic brushes are preferred for water-based paints to ensure smooth “feathering” and minimal brush marks.
2026 Design Trends
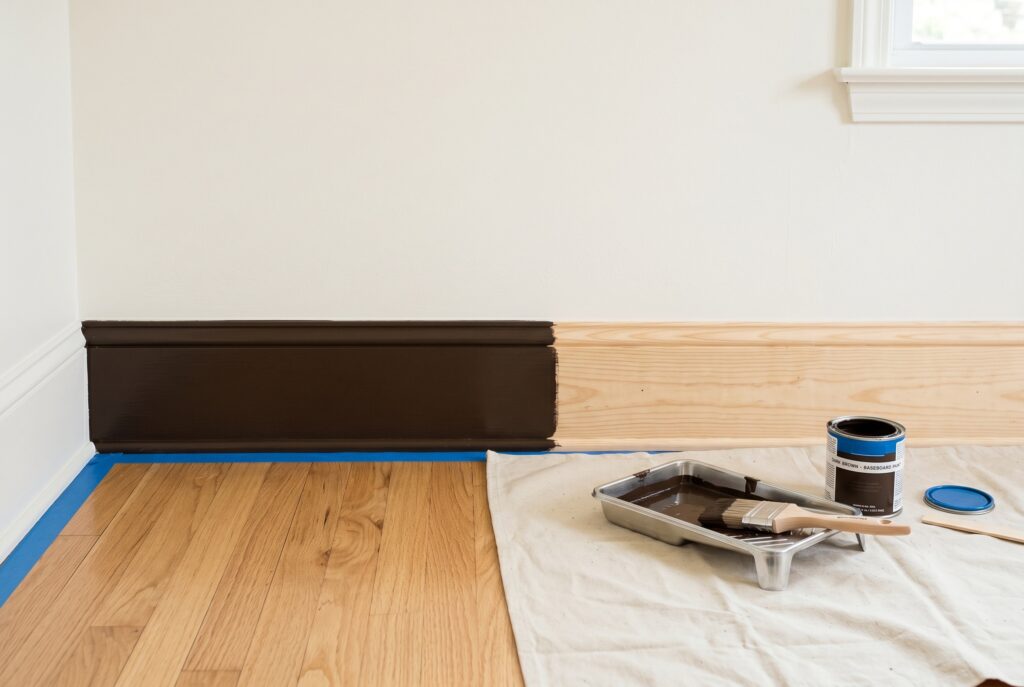
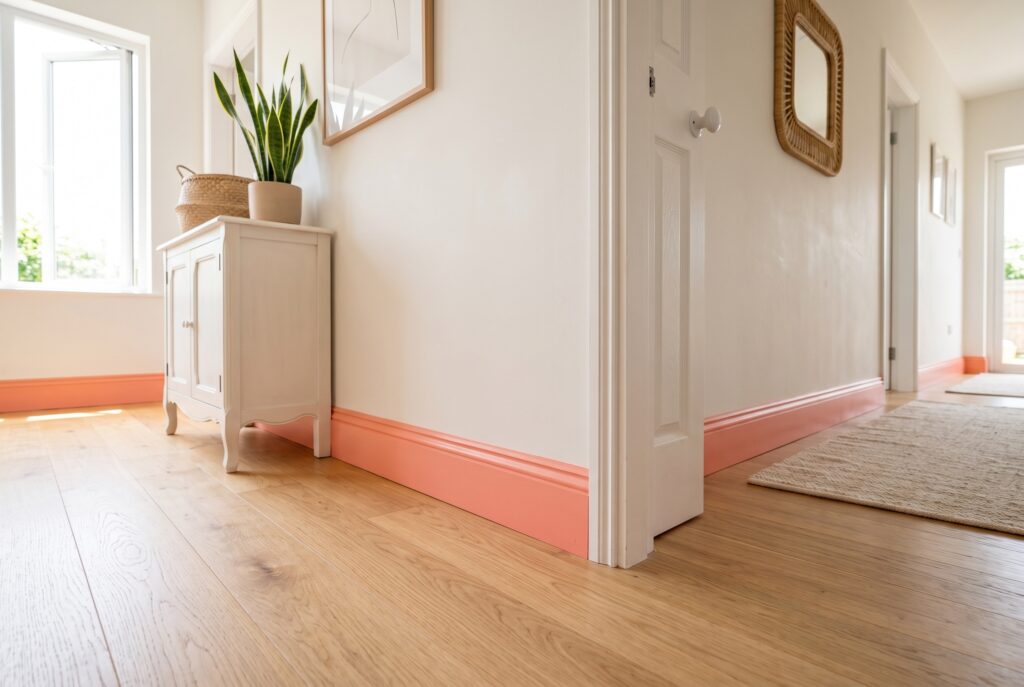
The current design landscape is heavily influenced by a concept known as “color drenching.” This involves painting the baseboards, walls, and sometimes even the ceiling the exact same color to create a cohesive, immersive environment.
Additionally, there is a growing demand for eco-friendly, zero-VOC (Volatile Organic Compound) paints that prioritize indoor air quality without sacrificing the durability of the baseboard paint.
Avoiding Common Rookie Mistakes
Success in DIY baseboard painting often comes down to patience and attention to technical details.
One frequent error is failing to manage “wet edges,” which results in visible lap marks where one section of paint dried before the next was applied. Maintaining a steady pace and overlapping strokes helps mitigate this issue. Furthermore, observing proper drying times is essential. Rushing to apply a second coat before the first has fully cured can cause the paint to bunch up or peel later.
Another critical safety consideration involves older homes. If the structure was built before 1978, the existing layers may contain lead paint. Sanding such surfaces without proper containment and protection can release hazardous dust into the air. In these scenarios, consulting a professional or using lead-safe testing kits is mandatory.
The Financial Perspective: DIY vs. Pro
Deciding between a self-managed project and hiring a contractor depends on the scope of the work and the budget.
The DIY Advantage
Taking the manual route is significantly more cost-effective for small to medium-sized projects. Purchasing individual painting trim supplies is a fraction of the cost of professional labor. For homeowners focused on “micro-renovations” like refreshing a closet or a single bedroom, the time investment is often manageable over a single weekend.
When to Hire Professionals
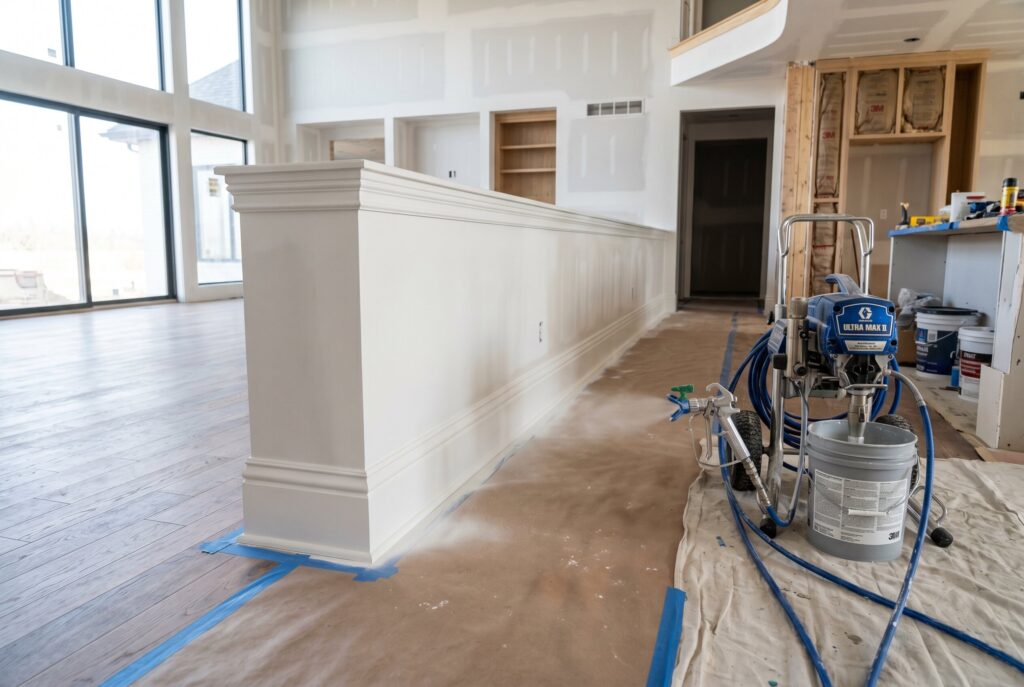
For large-scale baseboard installation in a new home or when dealing with extensive water damage and rot, professional intervention is often the better choice. Pros often use high-end sprayers that provide a level of uniformity that is difficult to replicate by hand over thousands of linear feet. They can also provide detailed cost-per-linear-foot estimates that help in long-term budgeting for major renovations.
Final Thoughts on the Project
A successful home refresh often starts with the smallest details. By mastering how to paint baseboards and selecting the right baseboard paint, homeowners can drastically improve the aesthetic of their living space.
Whether choosing the classic look of semi-gloss or the trendy appeal of color drenching, the secret always remains the same: meticulous preparation and the right tools for the job. With these professional techniques, achieving a high-end look is within reach for anyone willing to put in the time and effort.
Related Articles
How to Install Baseboards: A Flawless Baseboard Installation & Trim Guide (2026)

