

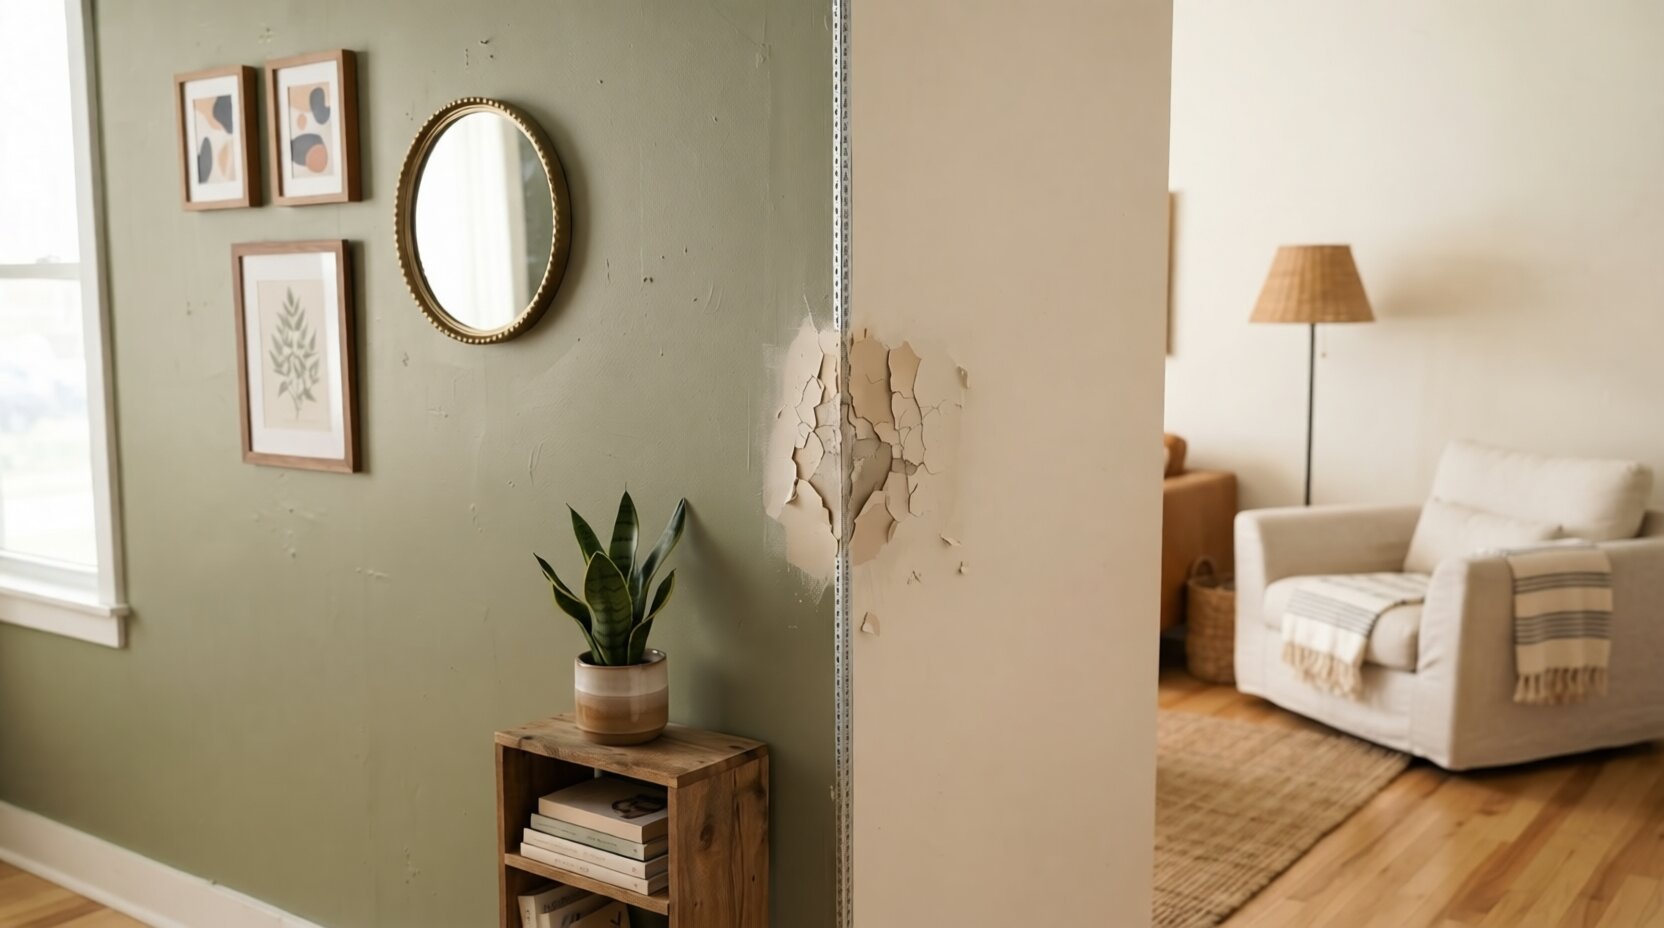
Corners take a different kind of beating than the flat stretch of a wall. A moving box catches the edge on the way through a doorway, a vacuum bumps the same spot every week, and the thin metal strip hiding underneath the paint, called corner bead, eventually dents, peels, or cracks along its length.
The usual approach to patching drywall works well enough on a flat, open section of wall, but corners are a different story. That general approach is covered in our guide on how to patch a hole in the wall, but try the same method on a corner and it’ll often crack again within a few months. Expect an hour or two of hands-on work, two to three days of drying and sanding before paint goes on, and materials running $15 to $40 depending on whether the bead needs full replacement.
Tools and Materials You’ll Need
- Utility knife and an oscillating saw or tin snips
- Replacement corner bead, metal or vinyl, for outside corners
- Paper drywall tape for inside corners
- Joint compound, premixed all-purpose or setting-type
- A 4 inch putty knife plus an 8 or 10 inch taping knife
- Inside corner tool (optional, but it makes taping easier)
- 1 1/4 inch drywall screws or a stapler
- Level or straightedge
- Fine grit sanding sponge, 150 to 220 grit
- Primer and matching wall paint
- Dust mask and safety glasses
A quick safety note before you cut or sand: wear a dust mask, since joint compound dust is fine enough to irritate your lungs. If your home was built before 1978, the paint on that corner may contain lead. Test it with an EPA recognized lead test kit before scraping or sanding, and follow lead safe work practices if it tests positive.
Figuring Out What’s Actually Wrong
Before reaching for a knife, it helps to know which kind of corner is damaged and why, since outside and inside corners fail for different reasons and call for different fixes.
Outside corners, the ones that stick out into a room like a hallway edge or a door opening, almost always get damaged by impact. Furniture corners, kids running past, a dropped tool, all of it lands on that exposed edge over time. The metal bead underneath usually bends or dents from a hit like that, and once it’s bent, the compound sitting over it cracks and starts peeling away from the paint. Run a finger along the length of the corner; if there’s an actual bump, ripple, or a section that flexes slightly under light pressure, the bead itself is compromised and needs to come out rather than getting mudded over again.
Inside corners, where two walls meet or a wall meets the ceiling, crack for a different reason almost every time. Hold a straightedge or a level against the crack. If the gap stays roughly the same width from top to bottom, it’s almost always the house settling, wood framing shifting slightly with seasonal humidity, and a straightforward wall crack repair with tape and compound solves it for good.
If the crack widens noticeably toward one end, runs diagonally instead of straight up and down, or comes with a door that’s started sticking in its frame, that’s worth a quick look from a contractor before patching over it, since it can point to movement in the framing rather than simple settling.
How to Patch Drywall Corners: Repairing an Outside Corner
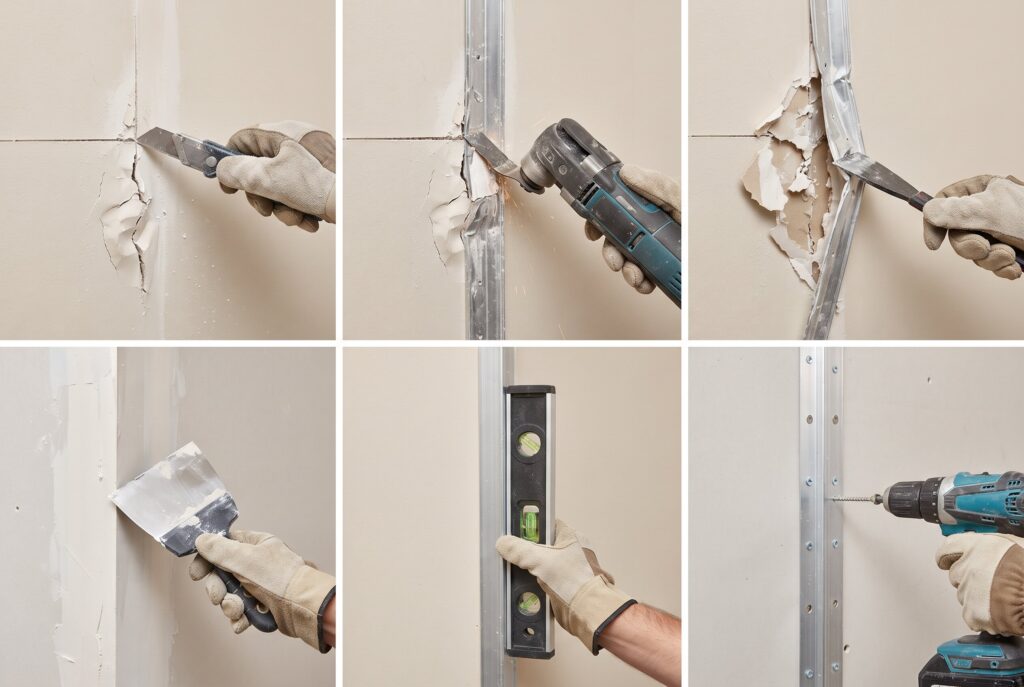
Once a bent or peeling metal bead is confirmed, that section needs to come out entirely, since compound applied over damaged metal just cracks again in the same spot within a season or two.
- Score through the paint and compound a few inches above and below the damaged section with a utility knife, then cut the bead itself with an oscillating saw or tin snips.
- Pry the loose section away by hand, then scrape off any leftover compound or debris so the new bead sits flush against bare drywall.
- Cut a replacement piece a couple inches longer than the damaged section, hold a level against it to confirm it’s plumb, and fasten it with 1 1/4 inch drywall screws or staples spaced about 8 inches apart along each flange.
The choice between metal and vinyl beads matters more here than it looks. Metal holds a sharper, crisper edge and takes repeated impact better, which makes it the right call for hallways, stairwells, and any corner something is bound to bump into again.
Vinyl, sometimes sold as composite bead, flexes slightly instead of denting, which suits bathrooms and other damp spots where metal eventually rusts under the paint, and it also conforms to slightly curved or out of square corners where rigid metal won’t sit flat. Vinyl carries one more practical advantage: small chips can often be filled with compound alone, without cutting the strip out and starting over, which a dented metal bead almost never allows.
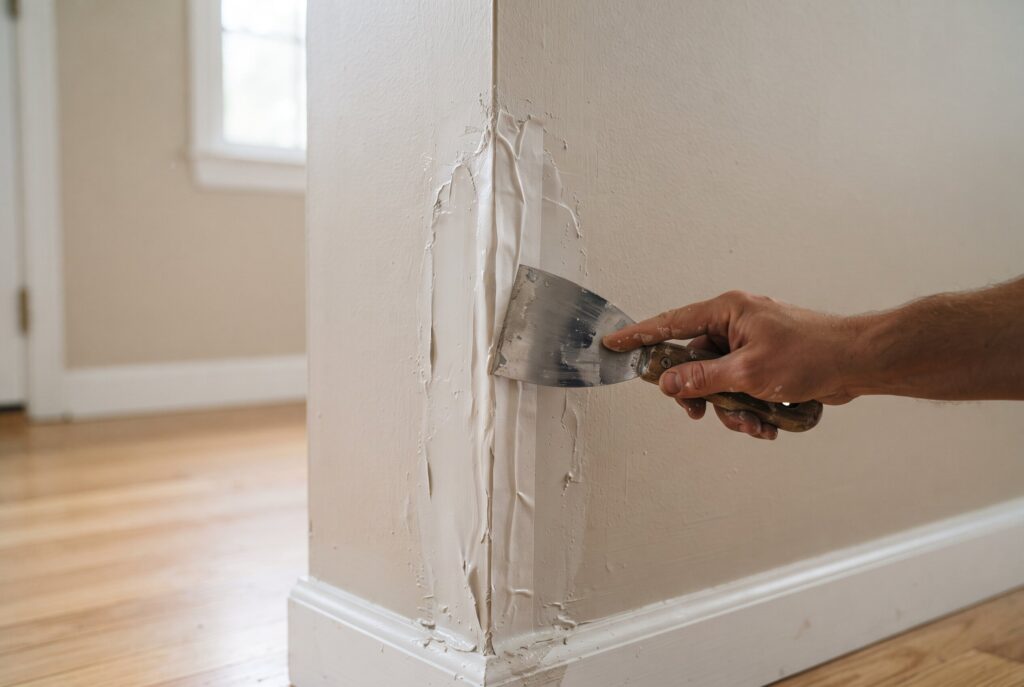
With the new bead fastened in place, spread joint compound over it about an eighth of an inch thick, covering every screw or staple head and running slightly past the bead’s edges on both sides so nothing telegraphs through later.
How to Patch Drywall Corners: Repairing an Inside Corner
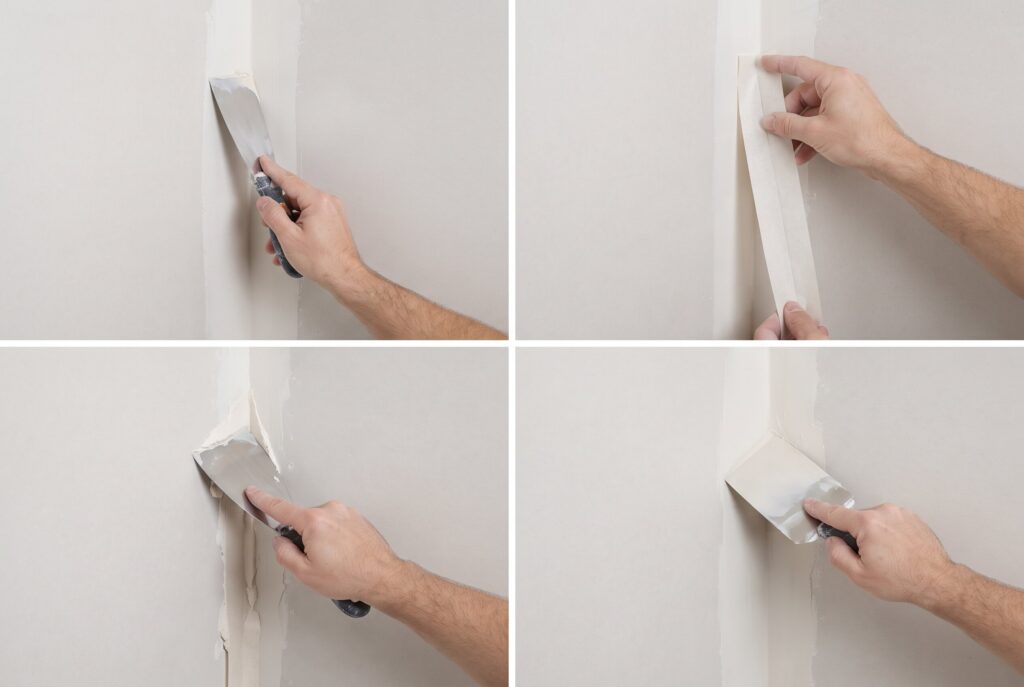
Inside corners get finished with tape instead of a rigid strip, and the tape choice matters as much as the bead choice does on an outside corner. Paper tape, which has a crease running down the center, folds cleanly into a sharp ninety degree angle and holds up to the slight twisting a corner goes through over time far better than mesh tape does. Mesh has no crease and tends to bunch or gap right at the fold, which is exactly where a corner needs the most support.
If other seams on the same wall are getting redone at the same time, tape the flat seams first and let the inside corner tape overlap them afterward. This keeps the whole system locked together instead of leaving an unsupported seam sitting underneath the corner tape.
To bed the tape, spread a thin layer of compound into the corner first, fold the paper tape along its crease, and press it into place with a corner tool or the edge of a putty knife, working top to bottom in smooth, even passes so no air gets trapped underneath. A light coat of compound over the top locks the tape down and gets the corner ready for the finishing layers.
The 6 Inch Feathering Rule
The single biggest reason a corner patch looks lumpy once painted comes down to using too small a knife. A putty knife under 4 inches wide can’t spread compound thin enough at the edges, which leaves a visible ridge once it dries.
Switching to an 8 or 10 inch knife for the later coats fixes this. Feather each coat out at least 6 inches from the corner, thinning the compound down to almost nothing at the outer edge so it blends into the surrounding wall instead of ending in a hard line. Two to three coats, each one wider than the last, gets a corner looking seamless. Between coats, press a finger against the surface; it should feel completely cool and firm, not just dry on top, before the next coat goes on or before sanding starts, since sanding over compound that’s still soft underneath tears it right back out.
The type of compound changes the timing. Premixed all-purpose compound is the easiest to work with and dries by evaporation, so each coat typically needs about a day. Setting-type compound, often called hot mud, comes as a powder you mix with water and hardens by chemical reaction on a set schedule printed on the bag, such as 20, 45, or 90 minutes, which lets you apply more than one coat in a day. A common approach is setting-type compound for the first coat over tape or bead, then a lighter premixed compound for the final coats because it sands more easily.
Once the final coat cures, usually 24 hours in a well ventilated room, sand with a fine grit sponge, somewhere around 150 to 220, using light circular passes instead of digging in at any one spot. Wiping the corner with a barely damp sponge afterward knocks down leftover ridges with far less dust than dry sanding alone. If dust is already a problem in your home, our guide on how to reduce dust in an apartment covers the cleanup side.
Where Corner Repairs Usually Go Wrong
A short list of habits separates a corner repair that disappears from one that shows up the moment sunlight hits the wall at an angle.
- Skipping a wipe down before applying compound traps dust and loose debris underneath, which shows up as small bumps once everything dries and gets sanded.
- Rushing the drying time between coats, especially in a humid bathroom or during a rainy week, leads to hairline cracking once the compound gets painted over.
- Painting straight over bare compound without primer leaves a dull, slightly darker patch, since the compound is more porous than the surrounding painted wall and soaks up color differently even with a perfect color match.
Keeping Corners From Getting Damaged Again
A freshly patched corner is worth protecting rather than repeating the same repair again next year. Clear plastic corner guards, the low profile kind that adhere flush and barely show against the paint, hold up well in narrow hallways and stairwells where furniture regularly passes close by.
Felt pads on chair and table legs, roughly a quarter inch thick, cut down on the everyday scuffs that eventually chip paint and crack compounds near floor level. In bathrooms, a bead of paintable caulk run along the base of the corner keeps moisture from creeping behind the paint and softening the compound underneath, which is often what starts a repeat crack in the same spot a year or two later.
Drywall Corner Repair FAQs
Can I use caulk on a cracked inside corner?
For a hairline crack that opens and closes with the seasons, a thin bead of paintable acrylic caulk can work because it flexes with the movement. If the crack is wider, the tape is loose, or the paper is bubbling, caulk will only hide the problem for a while, and retaping the corner is the lasting fix.
What is the difference between spackle and joint compound?
Spackle is made for small dings and nail holes. It dries quickly and shrinks very little, but it is not designed for bedding tape or covering wide areas. Joint compound is what drywall finishers use for taping, covering corner bead, and feathering wide coats, which is why it is the right choice for corner repairs.
How long before I can paint a patched drywall corner?
With premixed compound, plan on about a day of drying per coat, then sanding and a coat of primer before paint. For a typical two to three coat repair, that usually means painting two to three days after you start. Setting-type compound can shorten the timeline because coats harden faster.
Can I fix a chipped outside corner without replacing the bead?
Yes, if the bead underneath is still straight and firmly attached. Small chips in the compound, or in a vinyl bead, can usually be filled and feathered with compound alone. If the metal bead is bent, rippled, or flexes when you press on it, replace that section, because compound over damaged metal tends to crack again.
Conclusion
Corner damage rarely needs a full drywall repair across the whole wall. Diagnosing whether the damage is impact or settling, picking the bead material that matches how the corner actually gets used, and feathering compound out a full 6 inches before sanding covers nearly every situation that comes up. Once the last coat is sanded smooth and primed, the corner disappears back into the wall the same way a well done patch on any flat surface would, sharp lines and all.