

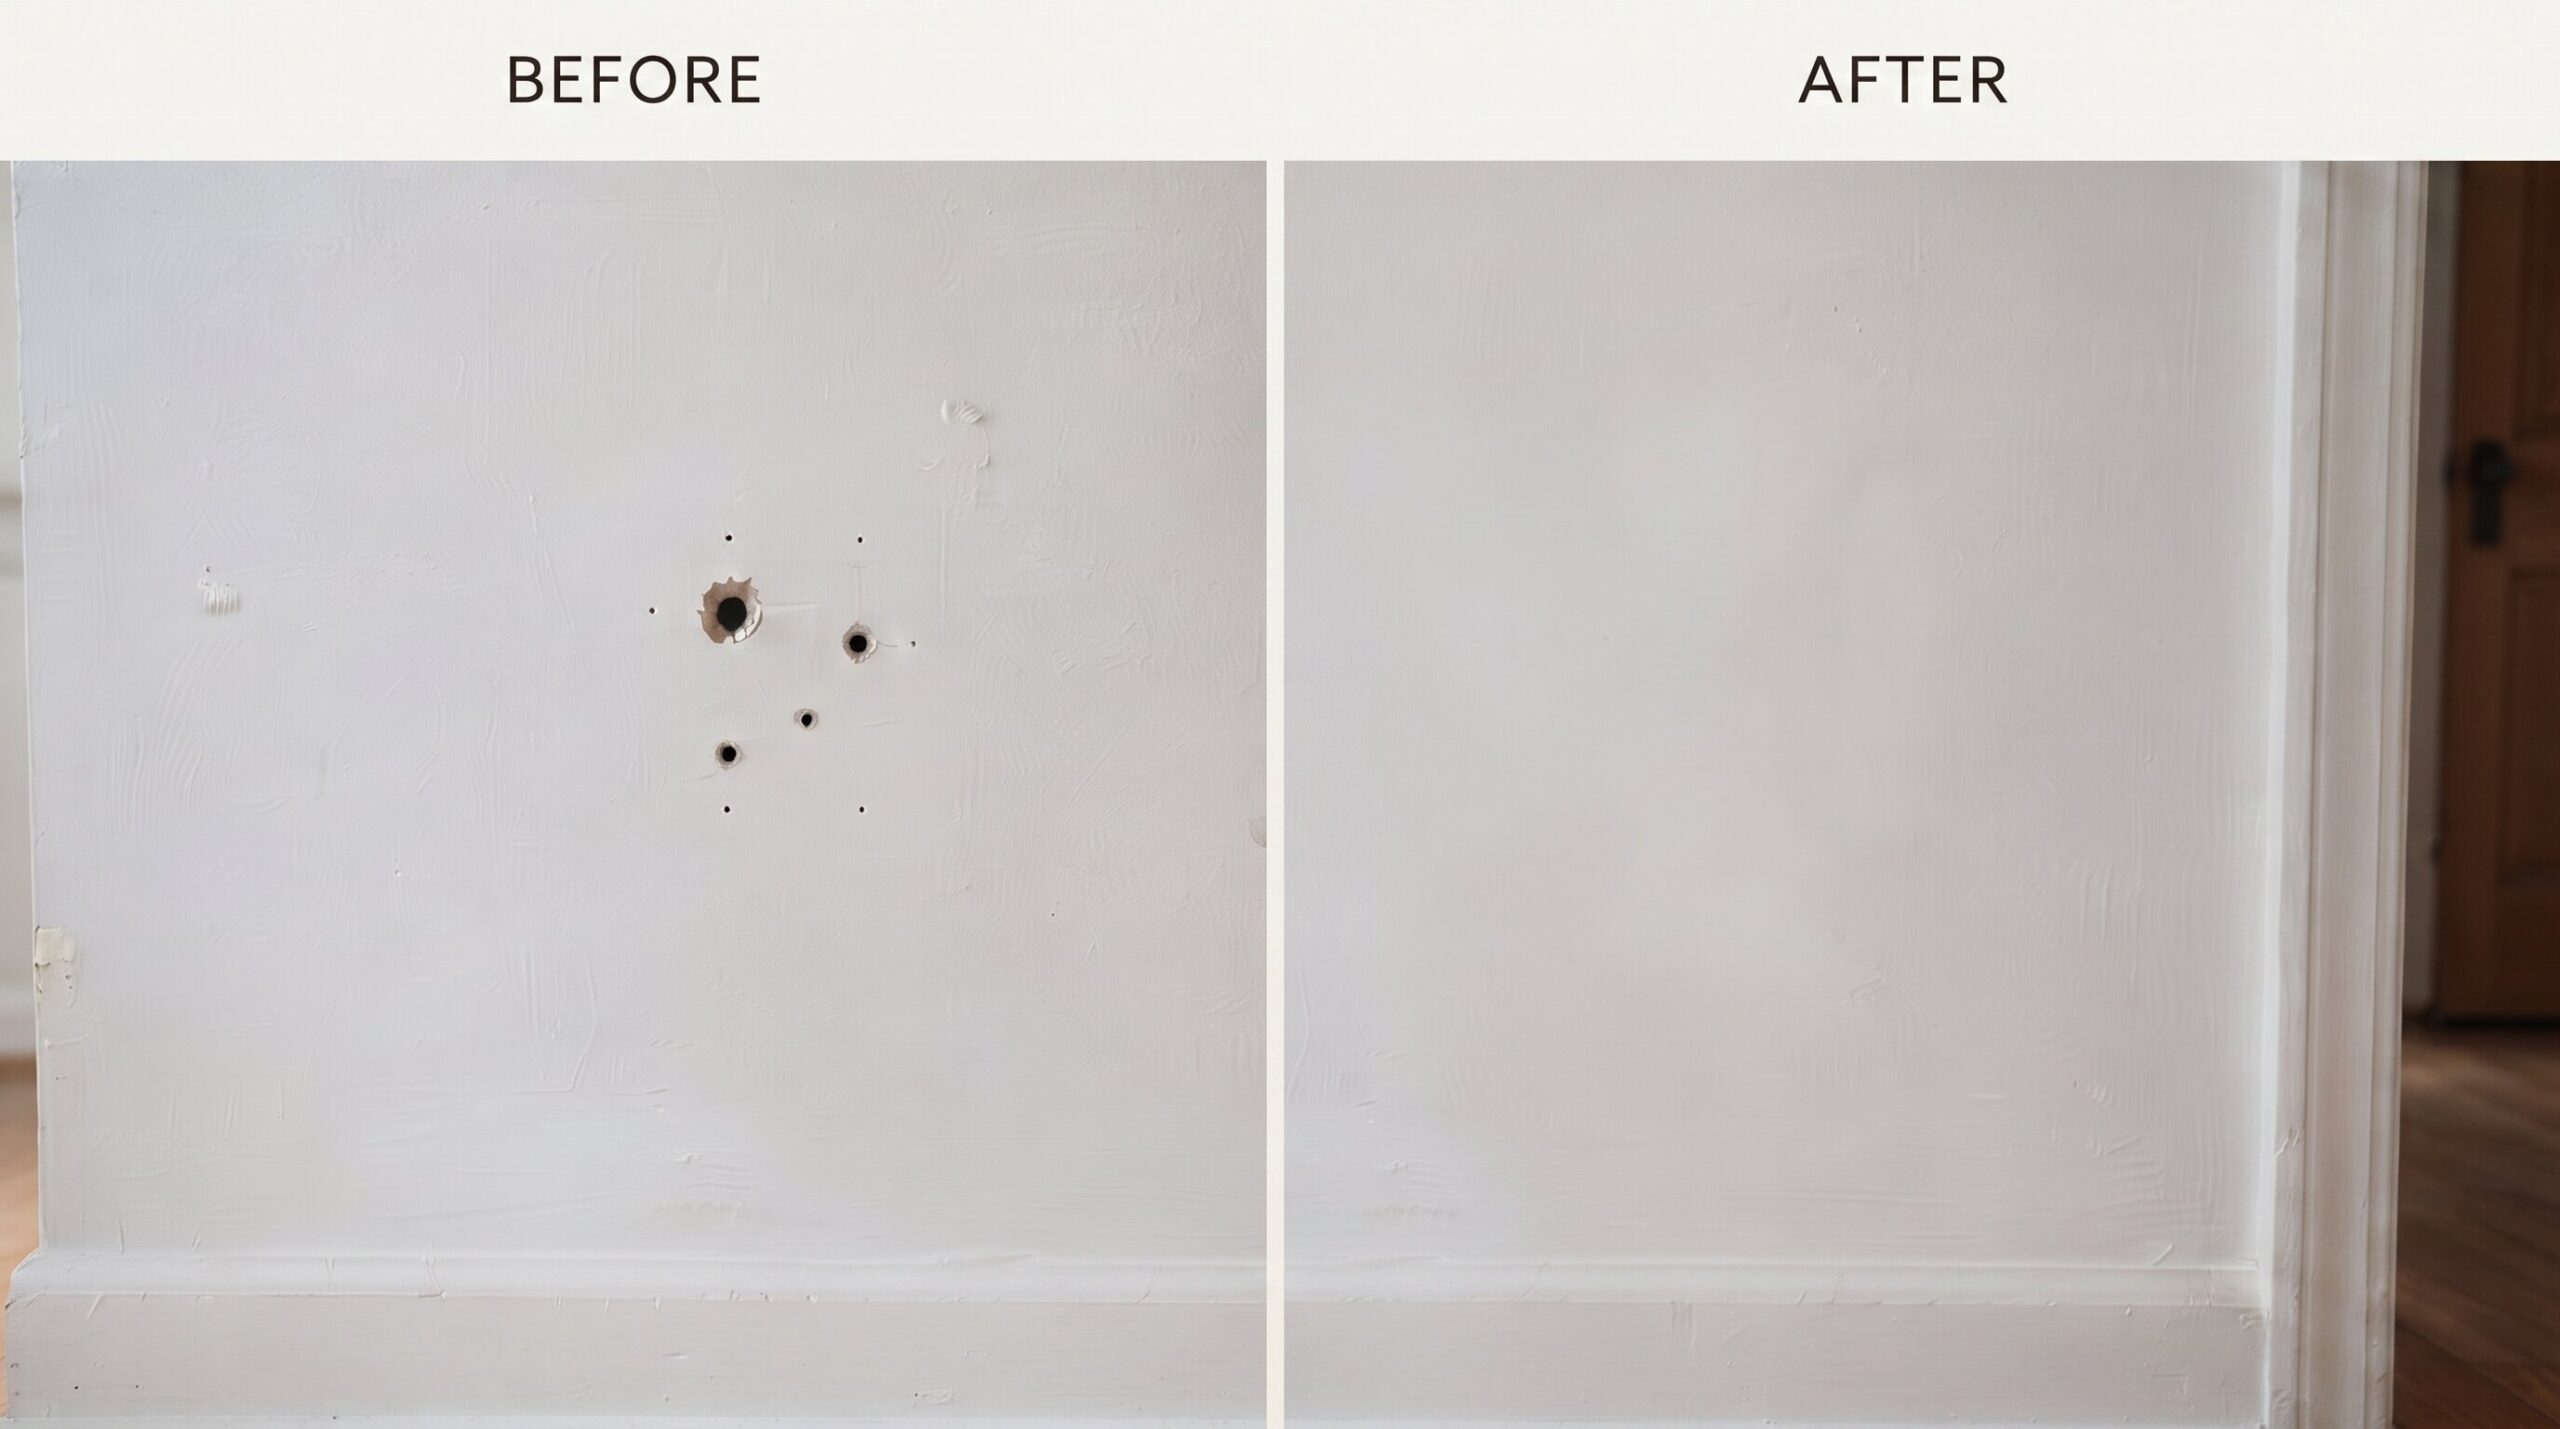
Most guides on how to patch a hole in the wall treat every size the same way, spackle first, sand later, and that’s exactly why so many patches end up visible once the paint goes on. A nail hole, a doorknob dent, and a genuine blowout each need a different tool and a different technique. Get the size wrong and even a careful repair job telegraphs through the paint as a slightly raised or discolored patch. What follows breaks the job down by exact diameter, using the same measurements and drying windows a working contractor would use.
The Toolkit Before Starting Anything
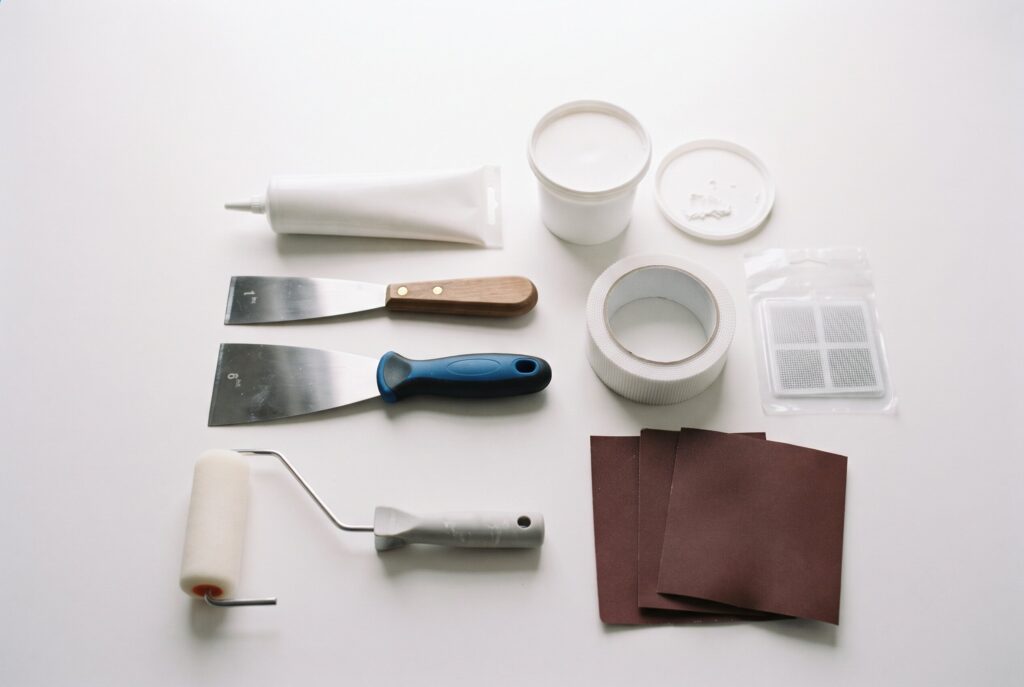
A short list of supplies covers essentially every hole size covered below, and buying it all at once beats making three separate trips to the hardware store mid project.
- Color changing spackle for anything under an inch across
- A one inch and a six inch putty knife
- Self adhesive fiberglass mesh patches in four and six inch squares
- Joint compound, sold pre mixed in small tubs for one off repairs
- 150 and 220 grit sandpaper, or a damp sponge as a dust free alternative
- A scrap piece of drywall for anything larger than four inches
- Primer and a small foam roller for the final finish
Phase 1: Micro Holes and Anchors, the Five Minute Fix
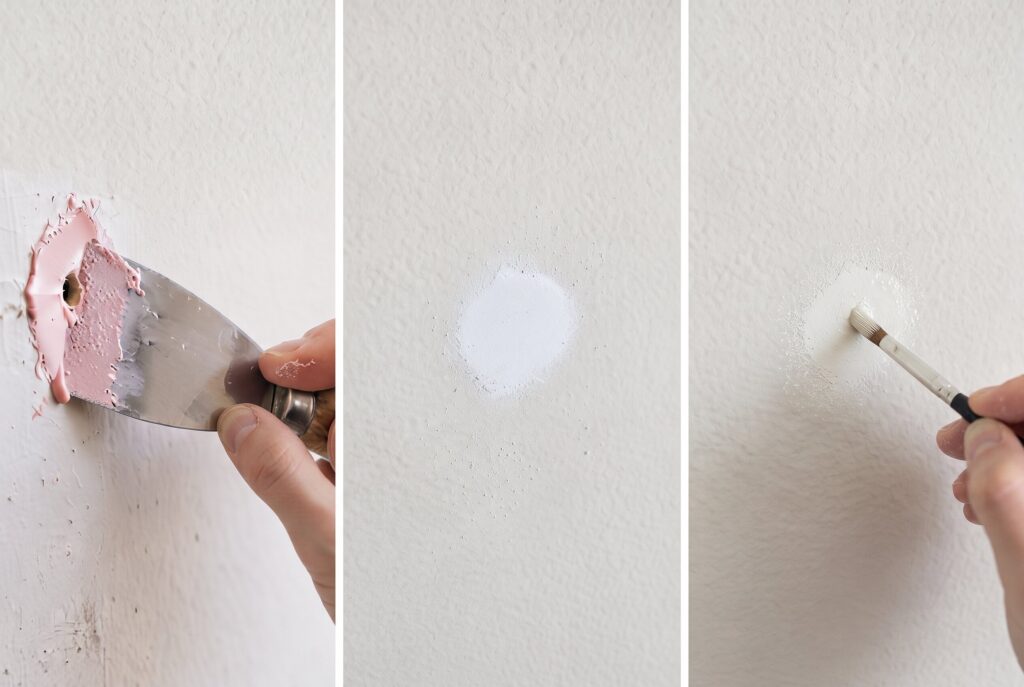
Nail holes, screw holes, and the small punctures a drywall anchor leaves behind rarely need more than a putty knife and a tube of spackle. Color changing spackles are worth keeping on hand specifically for this size range. It goes on pink straight from the tube and turns white the moment it’s fully cured, removing the guesswork of poking a still wet patch to check.
Press a dime sized amount into the hole with the one inch putty knife, overfilling slightly since the spackle shrinks a little as it dries. Once the patch turns fully white, usually within 30 minutes for a hole this small, a light pass with 220 grit sandpaper knocks down any ridge until the wall reads flat under a palm. A small artist’s brush, not a full sized roller, dabs the matching wall color directly over the spot. That sequence, patch, wait for the color change, sand, dab paint, is the entire answer to repair drywall anchor holes and how to repair small holes in drywall without any visible trace left behind.
Phase 2: Medium Holes up to Four Inches, the Doorknob Dent
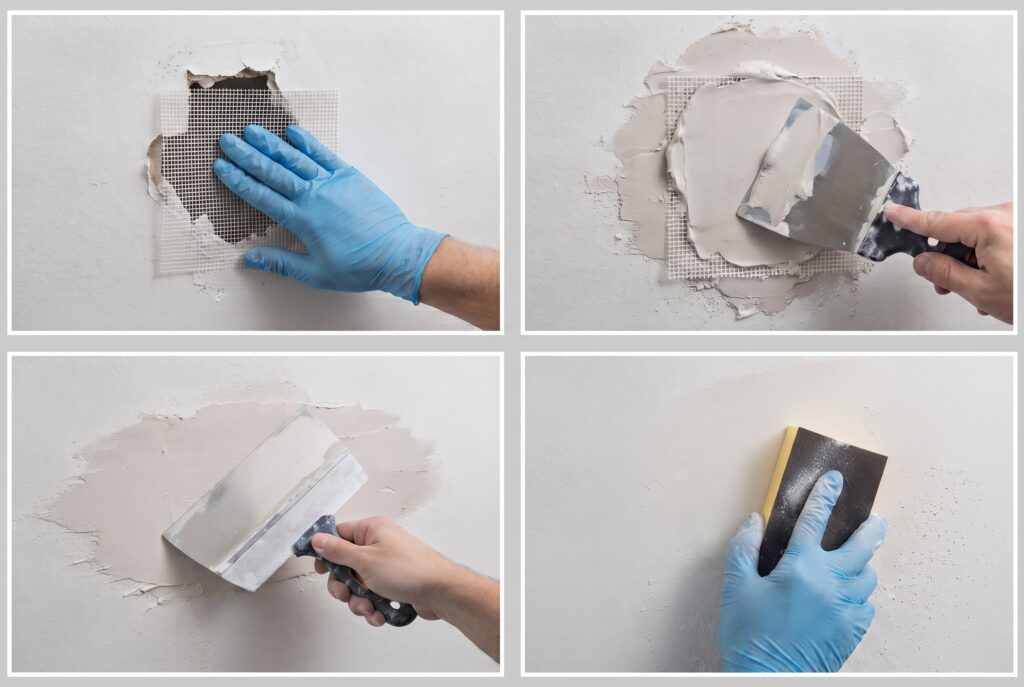
A doorknob swinging into a wall, or furniture bumped too hard, tends to leave a hole in the one to four inch range. Spackle alone fails here, since there’s no solid surface behind the hole for it to grip, and it simply falls into the wall cavity instead of curing in place. Damage sitting right on a corner needs an entirely different approach than a flat wall repair, covered separately in how to patch drywall corners. This size calls for a self adhesive fiberglass mesh patch centered directly over the damage, followed by these steps:
- Press the mesh patch firmly over the hole so the adhesive backing grips the wall on all sides.
- Spread joint compound across the entire patch with the six inch knife, feathering the edges out roughly two inches beyond the mesh in every direction.
- Let the first coat cure for about 24 hours before touching it again.
- Apply a thinner second coat, feathered even wider than the first, to smooth out any remaining edge.
- Sand with 150 grit paper once fully dry, checking for flatness with a flat hand rather than just eyesight.
Phase 3: The California Patch for Large Holes
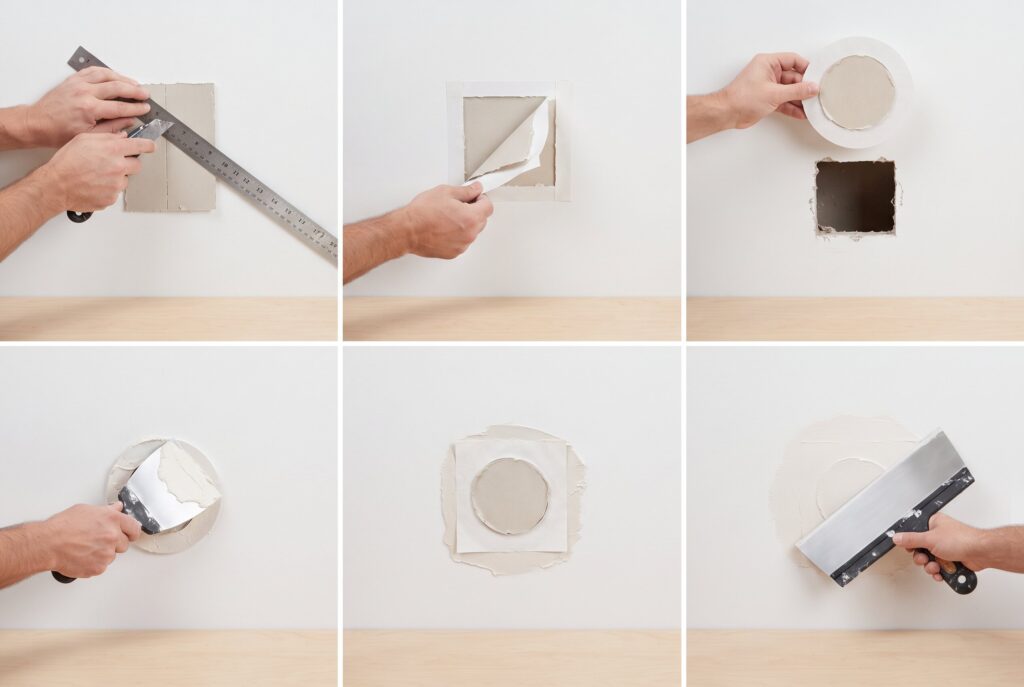
Anything larger than four inches usually means cutting in a fresh piece of drywall, and this is where most home repairs start looking amateur, with a visible square outline no matter how much compound gets layered on top. A technique borrowed from professional carpenters, often called a blowout patch, solves a large hole in drywall without requiring backing boards screwed into the wall cavity.
- Cut a piece of scrap drywall roughly two inches larger than the hole on every side, then flip it face down.
- Score a rectangle on the back matching the actual hole size with a utility knife, cutting only through the gypsum core and stopping short of the front paper layer.
- Snap that scored section away from the back, leaving the front paper intact as a two inch paper collar surrounding a drywall plug the exact size of the hole.
- Coat the paper collar with joint compound and press it directly into place over the hole, letting the paper act as its own built in tape.
- Let it set for roughly 24 hours, then apply a normal finishing coat of compound over the paper edge.
The result blends into the wall with none of the telltale rectangular shadow that backing board methods tend to leave behind, and it answers how to repair drywall for anyone dealing with damage too large for spackle or mesh alone.
Phase 4: Sanding, Priming, and the Invisible Finish
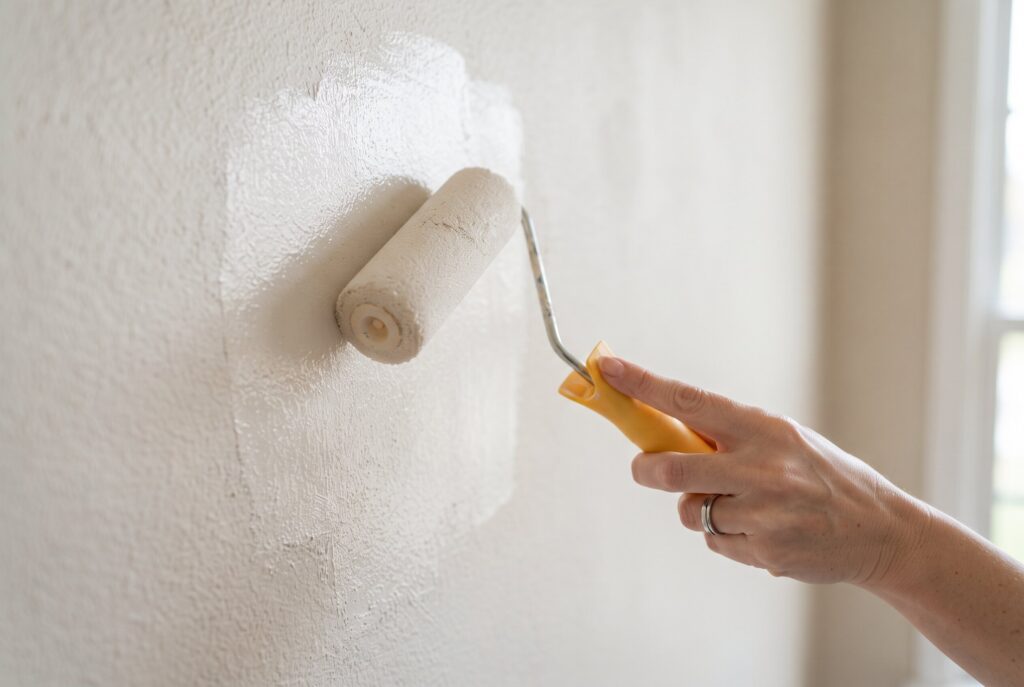
Every method above ends the same way, and skipping this final phase is the single most common reason a patch stays visible after painting. Dried joint compound is porous, considerably more porous than the painted drywall surrounding it, and any topcoat applied directly over bare compound dries a slightly different shade or sheen than the rest of the wall, even with an exact paint match.
A light coat of primer over the sanded patch seals that porosity before any color goes on. Once the primer dries, usually within an hour, the matching paint gets applied with a small foam roller rather than a brush, since a roller reproduces the same slight texture as the original wall instead of leaving brush marks that catch light differently. Two thin coats, allowed to dry fully between passes, blend far better than one heavy coat rushed on all at once.
FAQ
How long does a spackle actually take to dry?
Thin layers over small holes cure in 30 minutes to an hour, while a thick fill on a deeper hole can take closer to two hours before it’s ready to sand.
Is sanding always necessary?
A damp sponge, wiped in small circles over a spackle patch just before it fully hardens, smooths the surface without generating dust, which works well for anyone sensitive to sanding debris indoors.
What about cracks running along a basement wall?
Those usually point to a different issue than drywall damage entirely, often settling or moisture related, and calling in a foundation specific inspection makes more sense than treating it like a standard hole. For hairline cracks elsewhere in the house that aren’t foundation related, wall crack repair covers the mesh tape fix that holds up long term.
Conclusion
A pinhole and a fist-sized hole don’t belong to the same repair. Knowing how to fix a hole in the wall means picking the method that fits the damage in front of you, not reaching for the same fix every time. A tiny anchor hole, a doorknob dent, and a genuine blowout each have a specific fix that holds up once painted over. Gather the materials listed above, work through each phase without rushing the drying times, and the finished wall ends up flat enough that even the person who patched it forgets exactly where the damage used to be.